The Xbox PC
An Odd Fascination
Years before this project even began, I became interested in trying to build gaming computers inside of things that were never intended to be gaming computers. I started with a broken Pioneer reciever, an old LGA1151 ITX motherboard, a cheap TFX PSU of questionable quality, and a single-fan Nvidia 1660 Super GPU. This was well before I bought my 3D printer, so I mostly accomplished this by taking measurements for motherboard standoffs which I then mounted through the metal casing with bolts and JB Weld. Then, I used my Dremel to make cut outs in the thick rear plate of the reciever for the GPU, PSU, and Motherboard. One of the reciever PC’s cooler features was that the original EQ sliders were wired to an Arduino with Deej, allowing the sliders to control audio mixing between different programs. Unfortunately, I don’t have any pictures of this build, as I quickly stripped it to use the parts for my next idea.
The next concept was an even smaller PC that would be crammed into a Sony DVD Player, but that one wound up not working out when I realized that allowing for CPU airflow would be impossible without making it look awful (this will be important later).
The Original Xbox

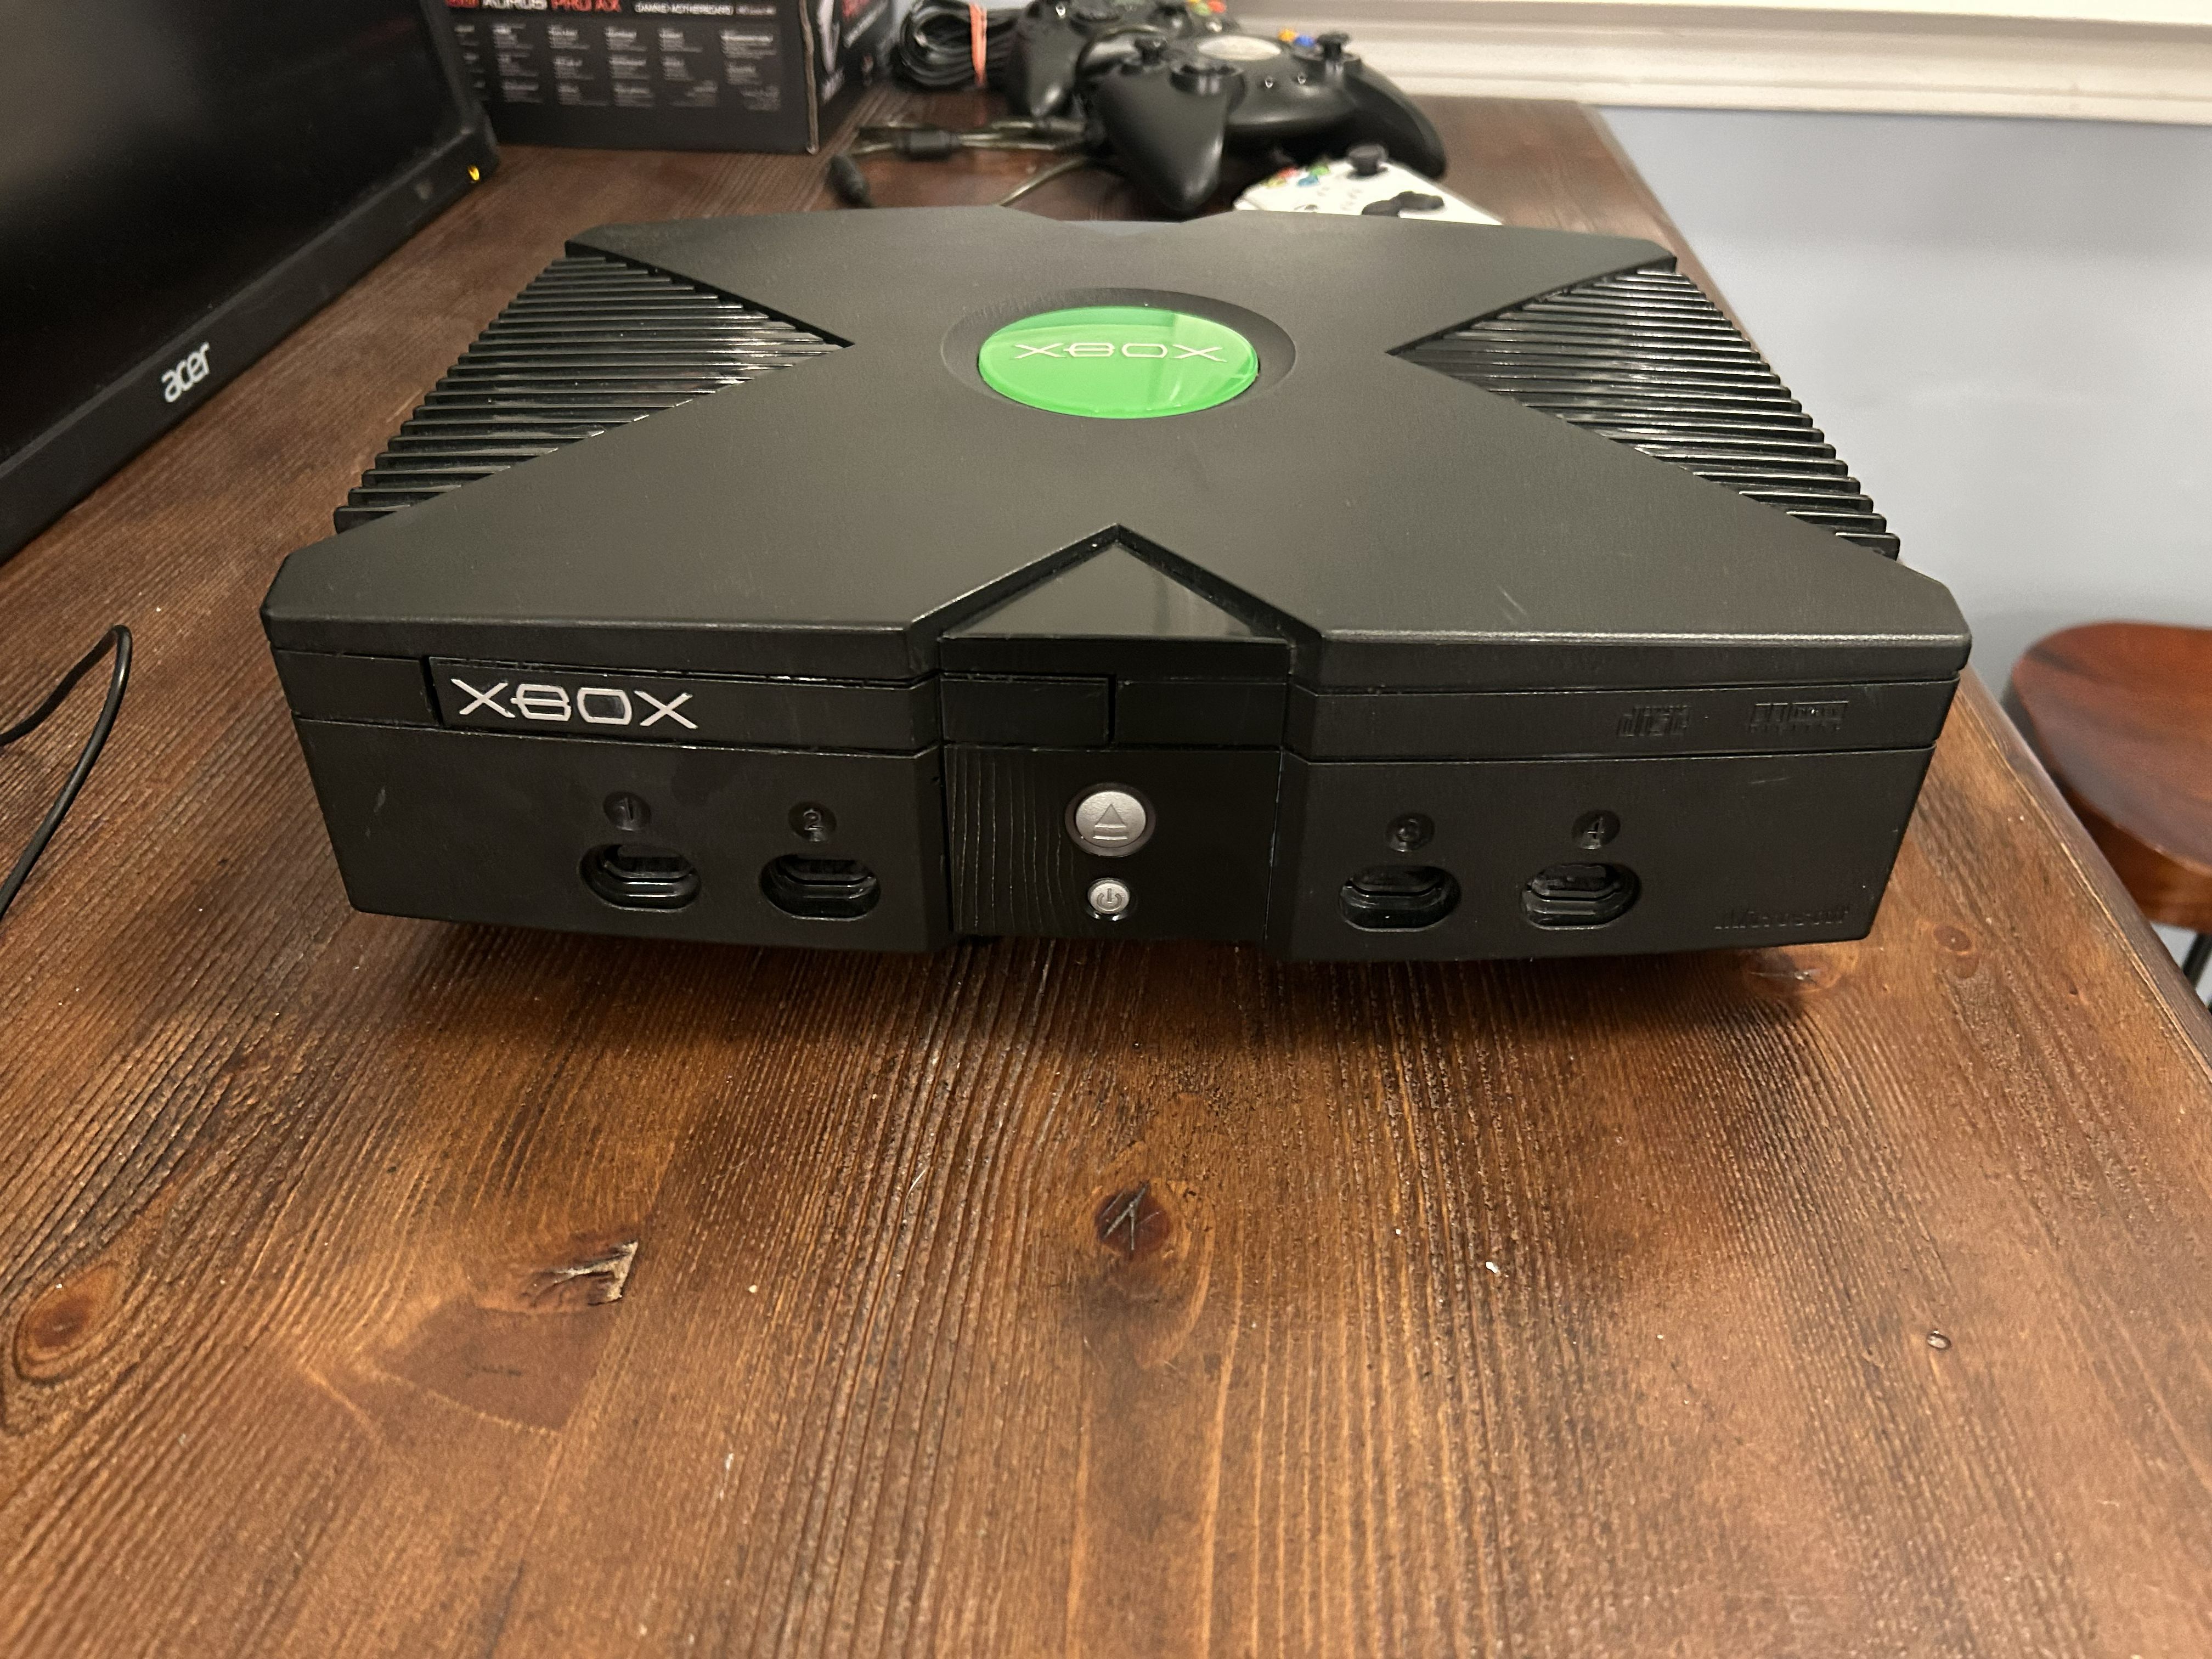
Soonafter, I started getting more into retro gaming on CRTs. I bought an untested original Microsoft Xbox on Ebay for $35; it worked, but its disc drive didn’t. I tried taking the drive apart to see if it was a problem with the belt. From what I remember, I somehow wound up breaking a PCB inside the disc drive in half.
Seeing as Original Xbox disc drives are practically the same cost as a working console, I moved on to a new idea: sell off the good components and keep the shell for a project.
Example Xbox PCs
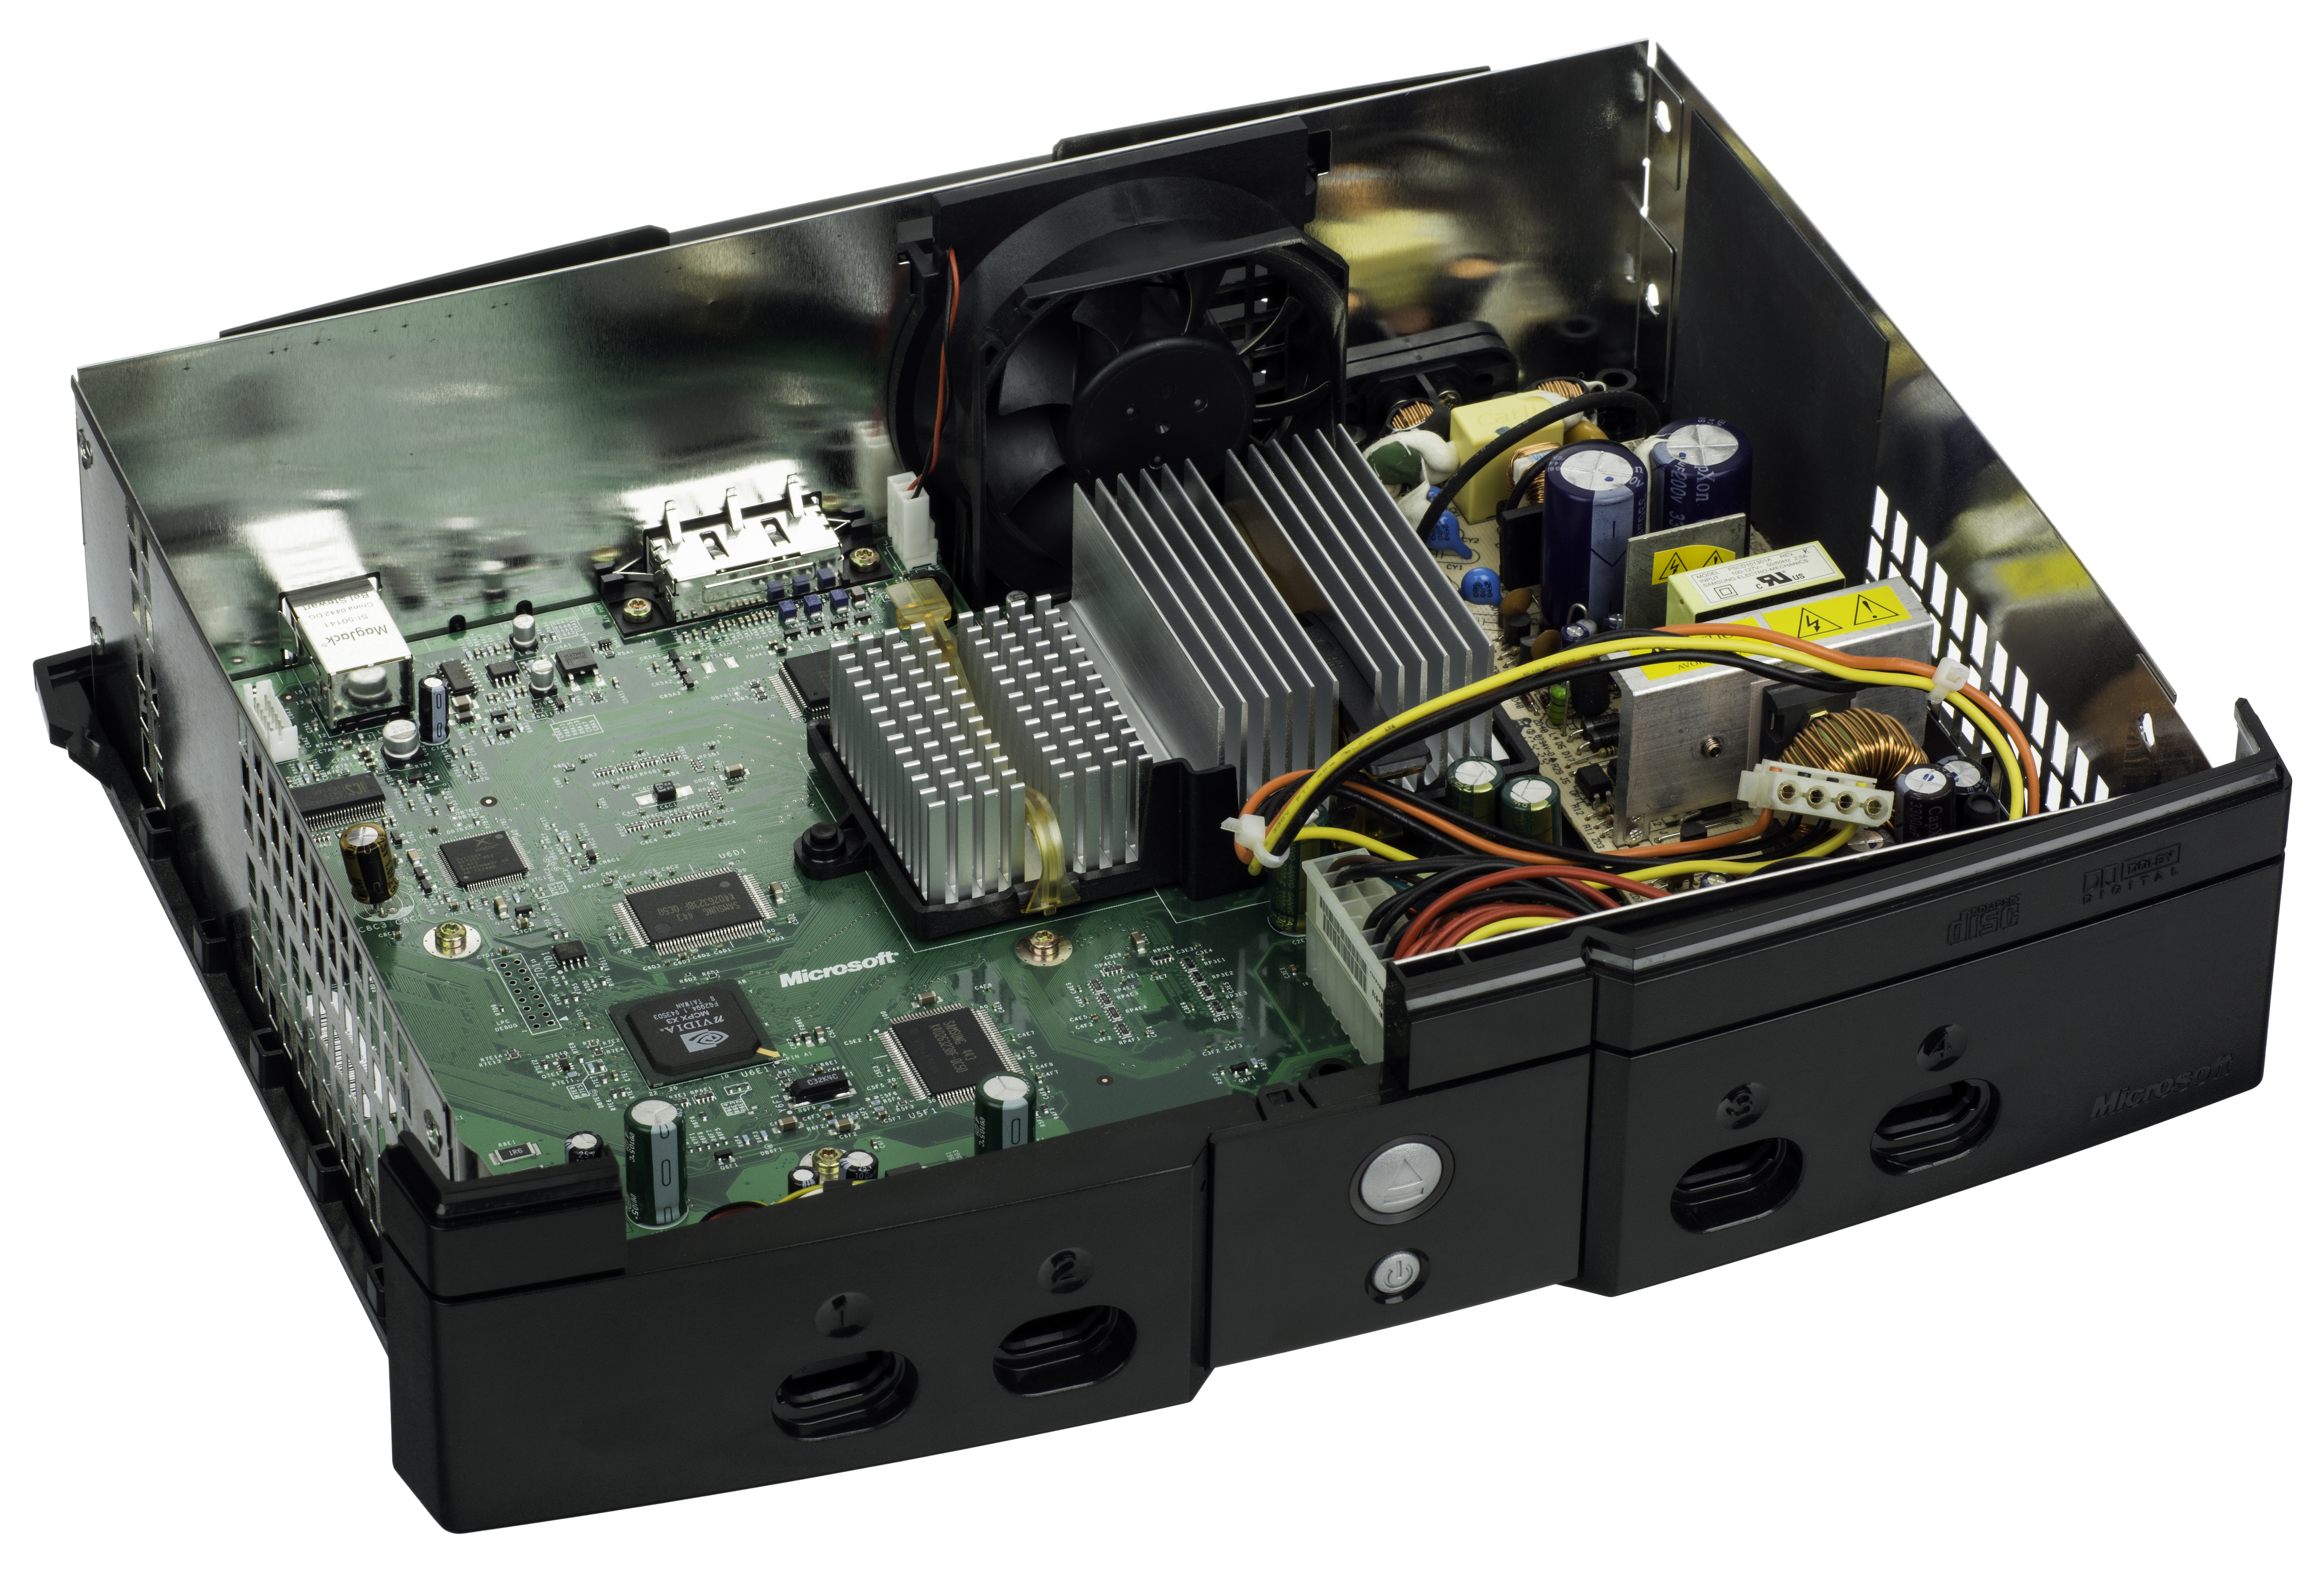
First, I did some research to see if anyone had ever successfully built a PC inside of an Original Xbox. The first one I found was a Lenovo mini PC that had been hotglued into the shell, a clear example of what I wanted to avoid. The other one I remember finding seemed to be quite well done: it was the only I remember that had a dedicated GPU, and a two-fan RTX 4070 at that. I remember reading the specs list, amazed at how an RTX 4070 was able to fit; it must’ve been modified, I thought.
As I scrolled through the pictures, I realized that the 4070 was not specially trimmed. Instead, the creator had basically left the entire rear of the console open as a massive hole, leaving the GPU and Motherboard I/O to just kinda hang out (the GPU also stuck out an inch).
I used this research to make a checklist of what I wanted the project to be.
Project Checklist
In my mind, the Xbox PC would…
1.) Have a dedicated GPU, rather than an APU like you would normally see in a console to PC conversion
2.) Have a built-in PSU, instead of an external brick (PicoPSU)
3.) Support original controllers and even USB 2.0 devices through the original controller ports
4.) Possess the best airflow possible without any major aestetic modifications
5.) Feature the original front buttons and LEDs as its front panel I/O
6.) Allow for any GPU that fit to be installed through customizable GPU I/O plates
7.) Not sound like a jet engine (though above-average loudness was expected)
Most importantly, however, every component of the Xbox PC would be easily upgradeable.
This was the real challenge of the project, not just cramming a PC into an original Xbox, but converting an original Xbox into a PC case.
The Components
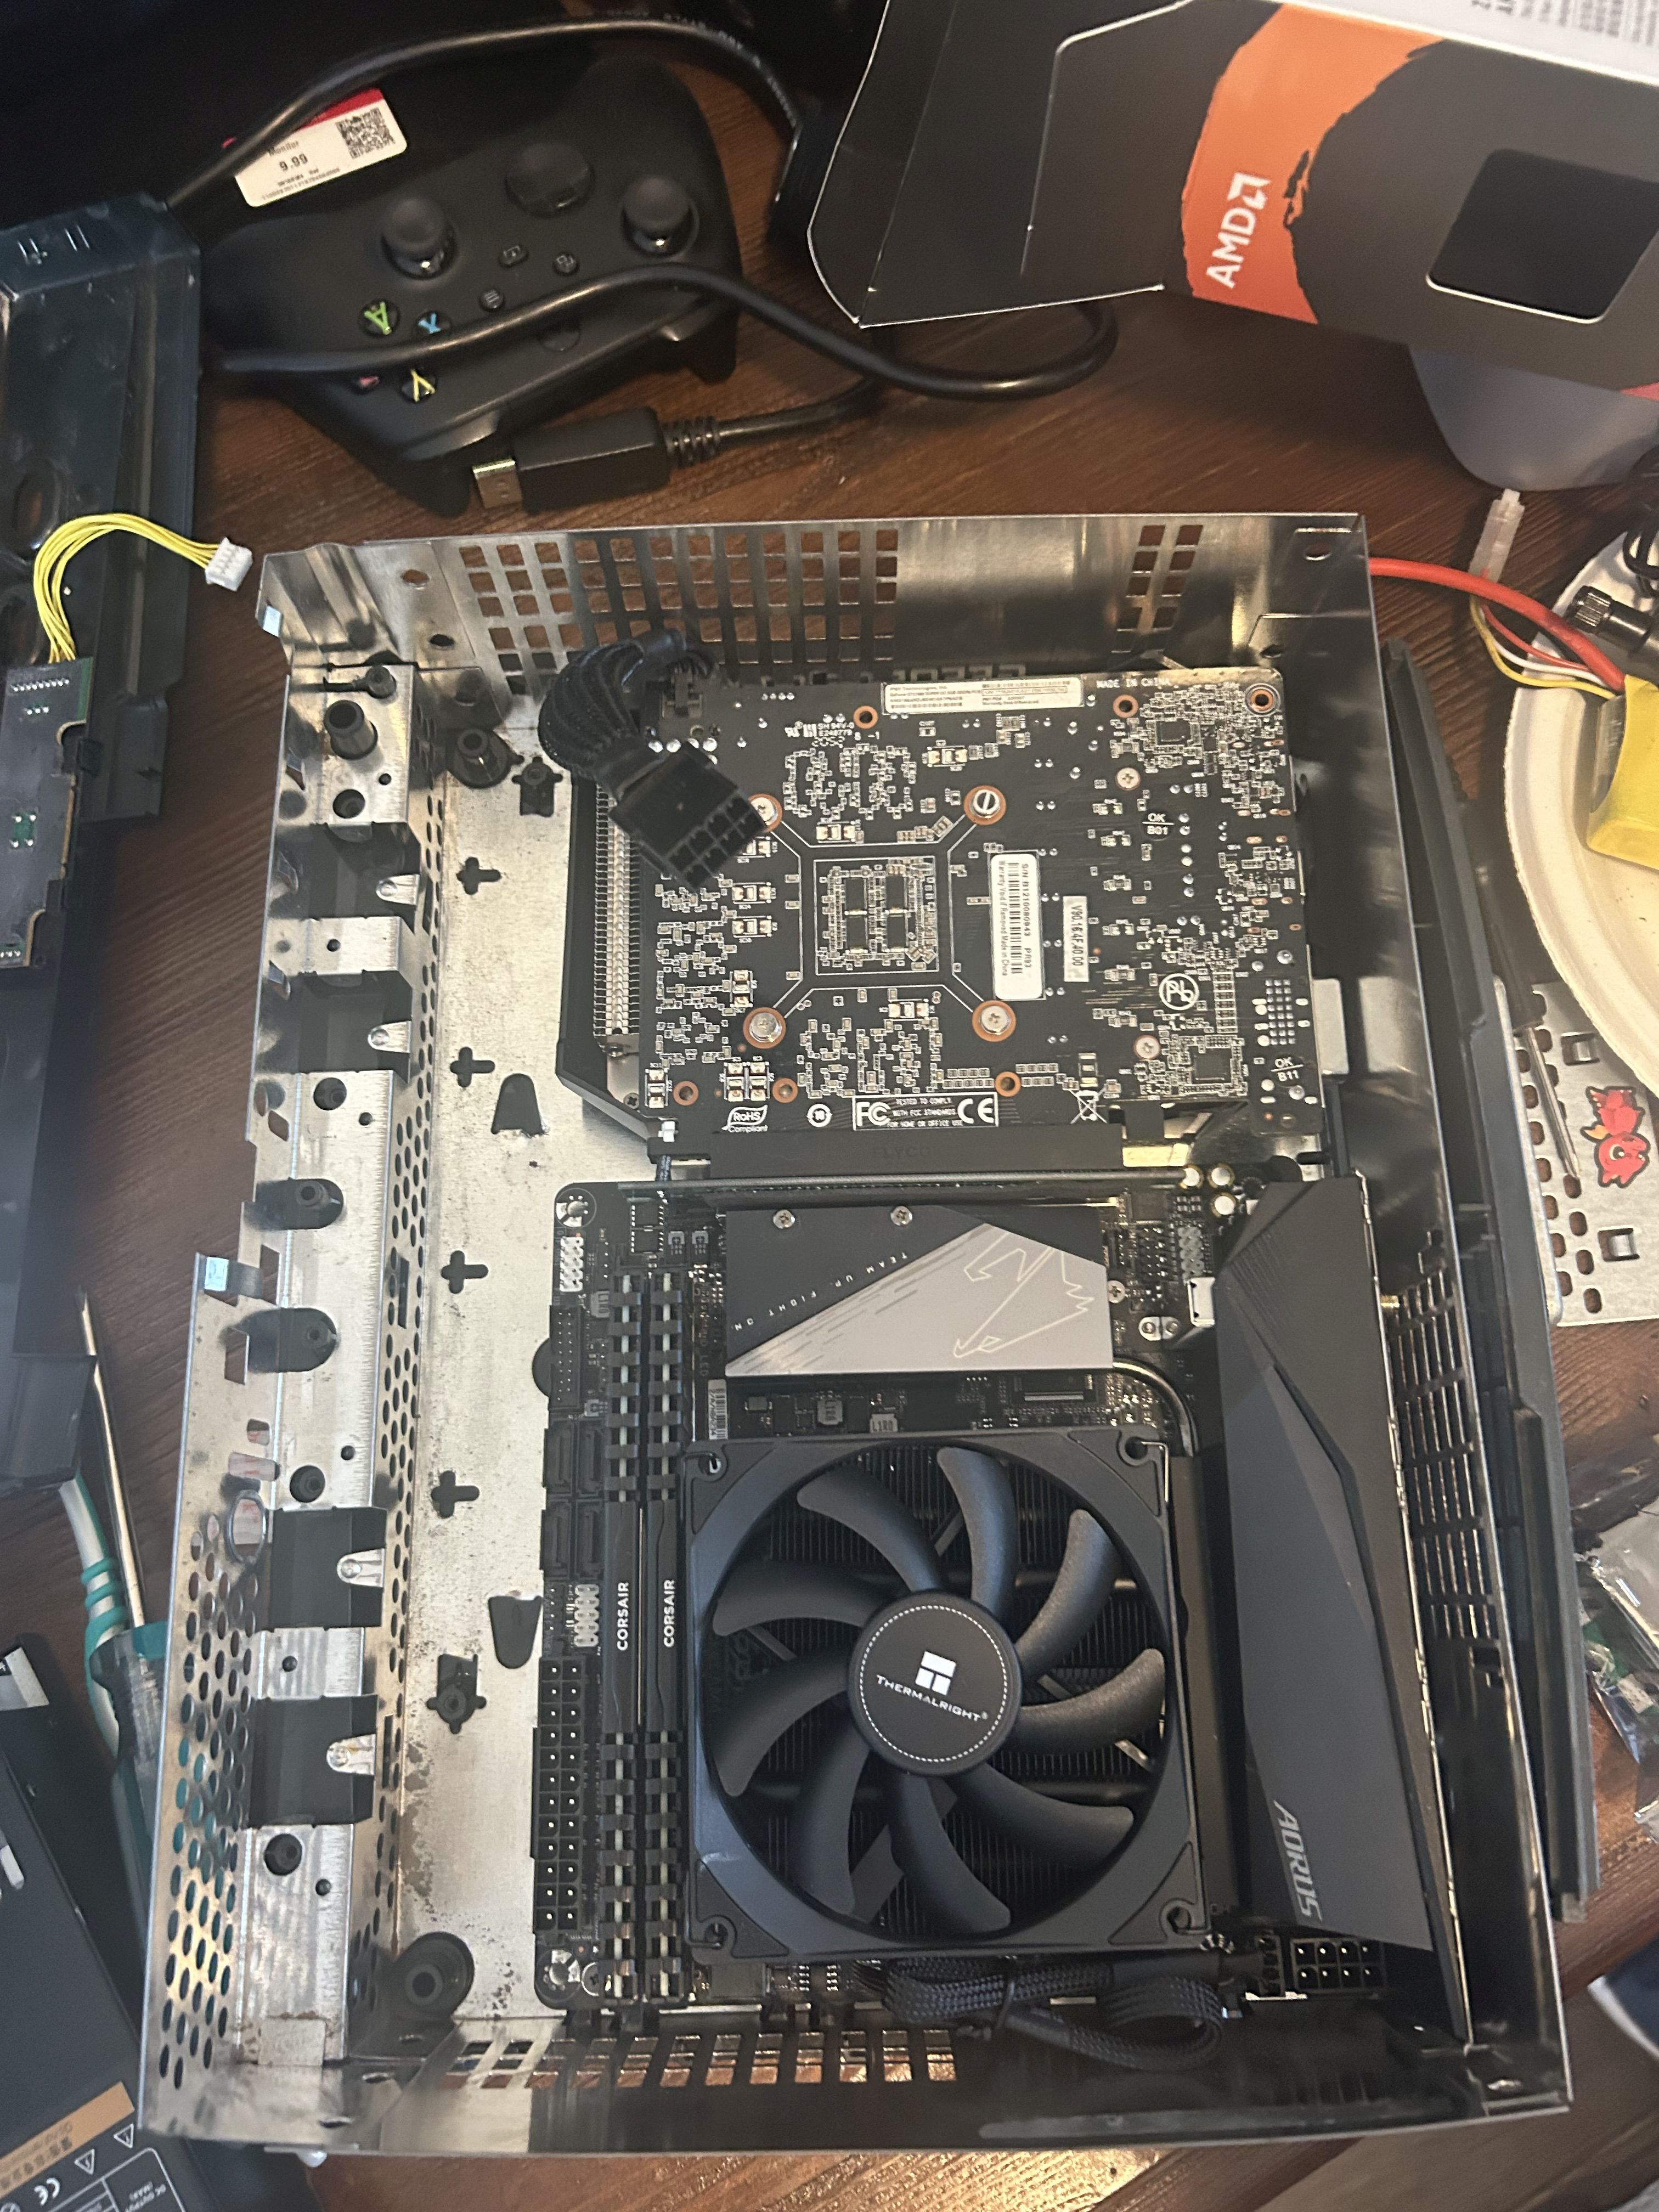
The parts that I initially planned to build the Xbox PC with were mostly the same parts that I had used to build the Pioneer Reciever PC; however, as I decided that this would become an HTPC for my living room, I realized that it needed to be powerful enough to handle my 4K 120hz OLED TV. In particular, I started out with the 1660 Super, an entry level GPU from 2019 that is nowhere near powerful enough for 4K gaming. So, in some older pictures you may see other parts that were changed soonafter. Here’s an early picture of the console when I was still using the 1660 Super:
The Motherboard
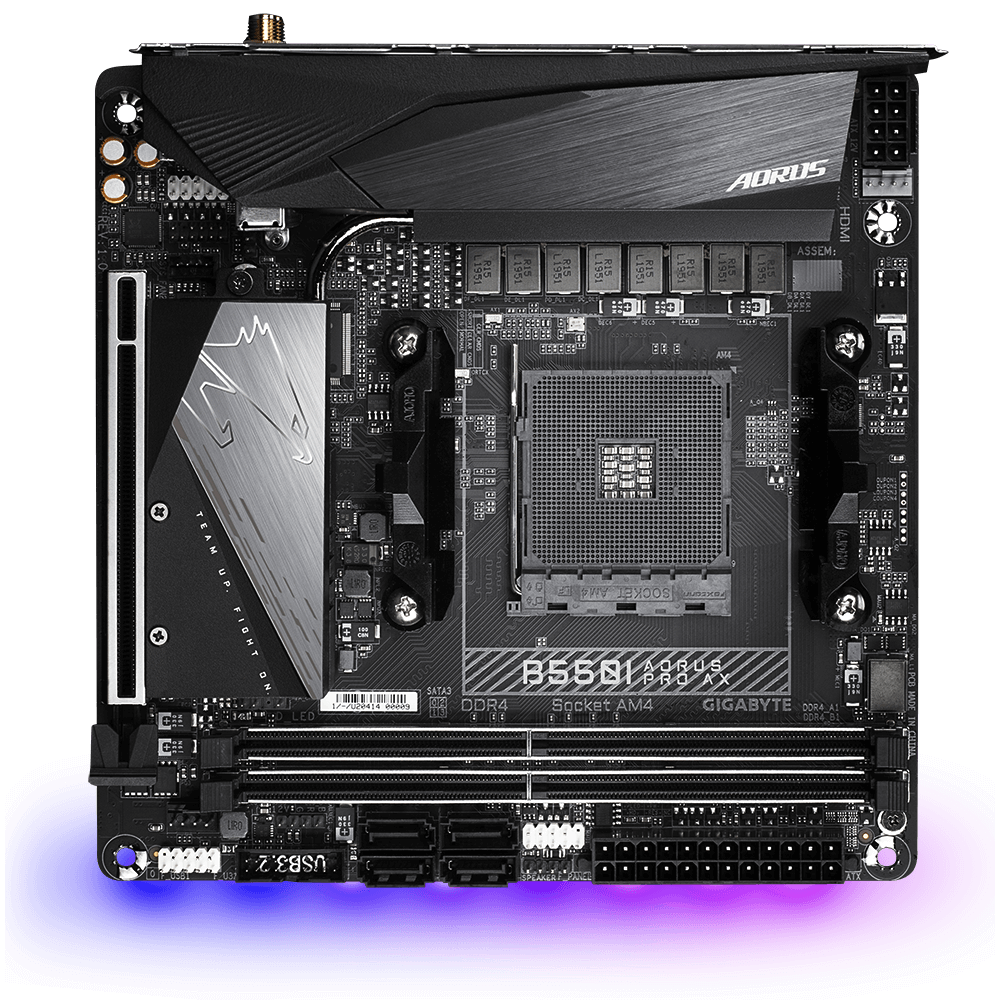
I went with the cheapest wifi-enabled, AM4 Mini-ITX motherboard that I could find on Ebay. This happened to be the Gigabyte B550I Aorus Pro AX. It’s nothing particularly special, other than that it supports 2 M.2 SSDs through its multiple NVMe slots (one on the top, one on the underside).
I installed two SSDs, a newer 2TB drive and an old 1TB drive from my first PC build.
The CPU
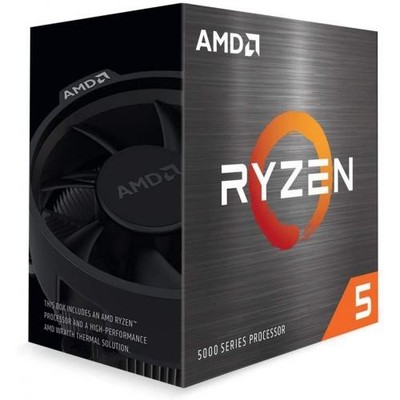
Initially, I bought a brand new Ryzen 5 5500 CPU off of Amazon. It’s low power consumption seemed like an ideal choice for keeping the console cool. There was a problem, however.
One of the longest time-sinks I faced on this project was troubleshooting a regular BSOD. Randomly, I would encounter a Clock_Watchdog_Timeout BSOD while scrolling Steam, Firefox, etc. At first I thought the RAM to be at fault, as, from my experience, RAM fails more often than any other part. When new RAM didn’t work, I tried updating BIOS, reinstalling windows, and a full repaste/resocket of the CPU. I knew that the power supply wasn’t at fault, since the crashing never seemed to happen during intensive tasks like gaming. Since it was either the motherboard or CPU, I ordered a used Ryzen 5 5600x CPU from eBay: everything worked perfectly.
While the 5600x does run hotter than the 5500, it’s much more powerful, being a generation ahead in both performance and PCIe.
The RAM
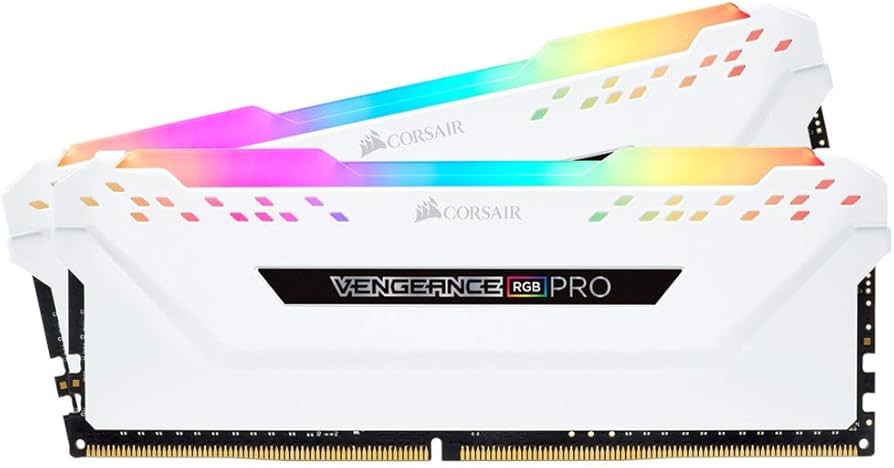
I started out with a set of 16gb Corsair Vengeance LPX RAM that I had on hand for testing purposes, but I planned from the start to upgrade to a 32GB set. During the BSOD troubleshooting process, I replaced the LPX sticks with a 3200mhz 2x16GB set of Vengeance RGB Pro that I “scored” on eBay for $100. I bought the same exact set NEW 6 years ago for $70. How times have changed…
The Power Supply
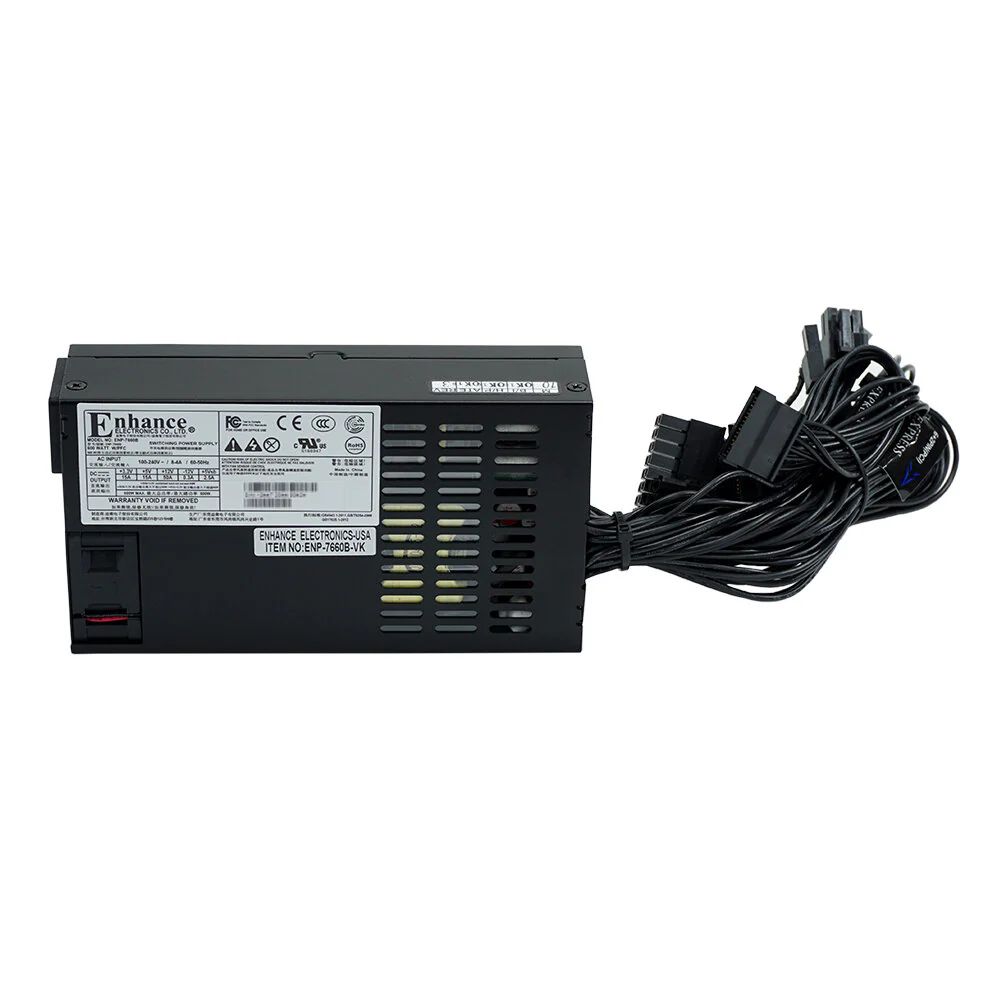
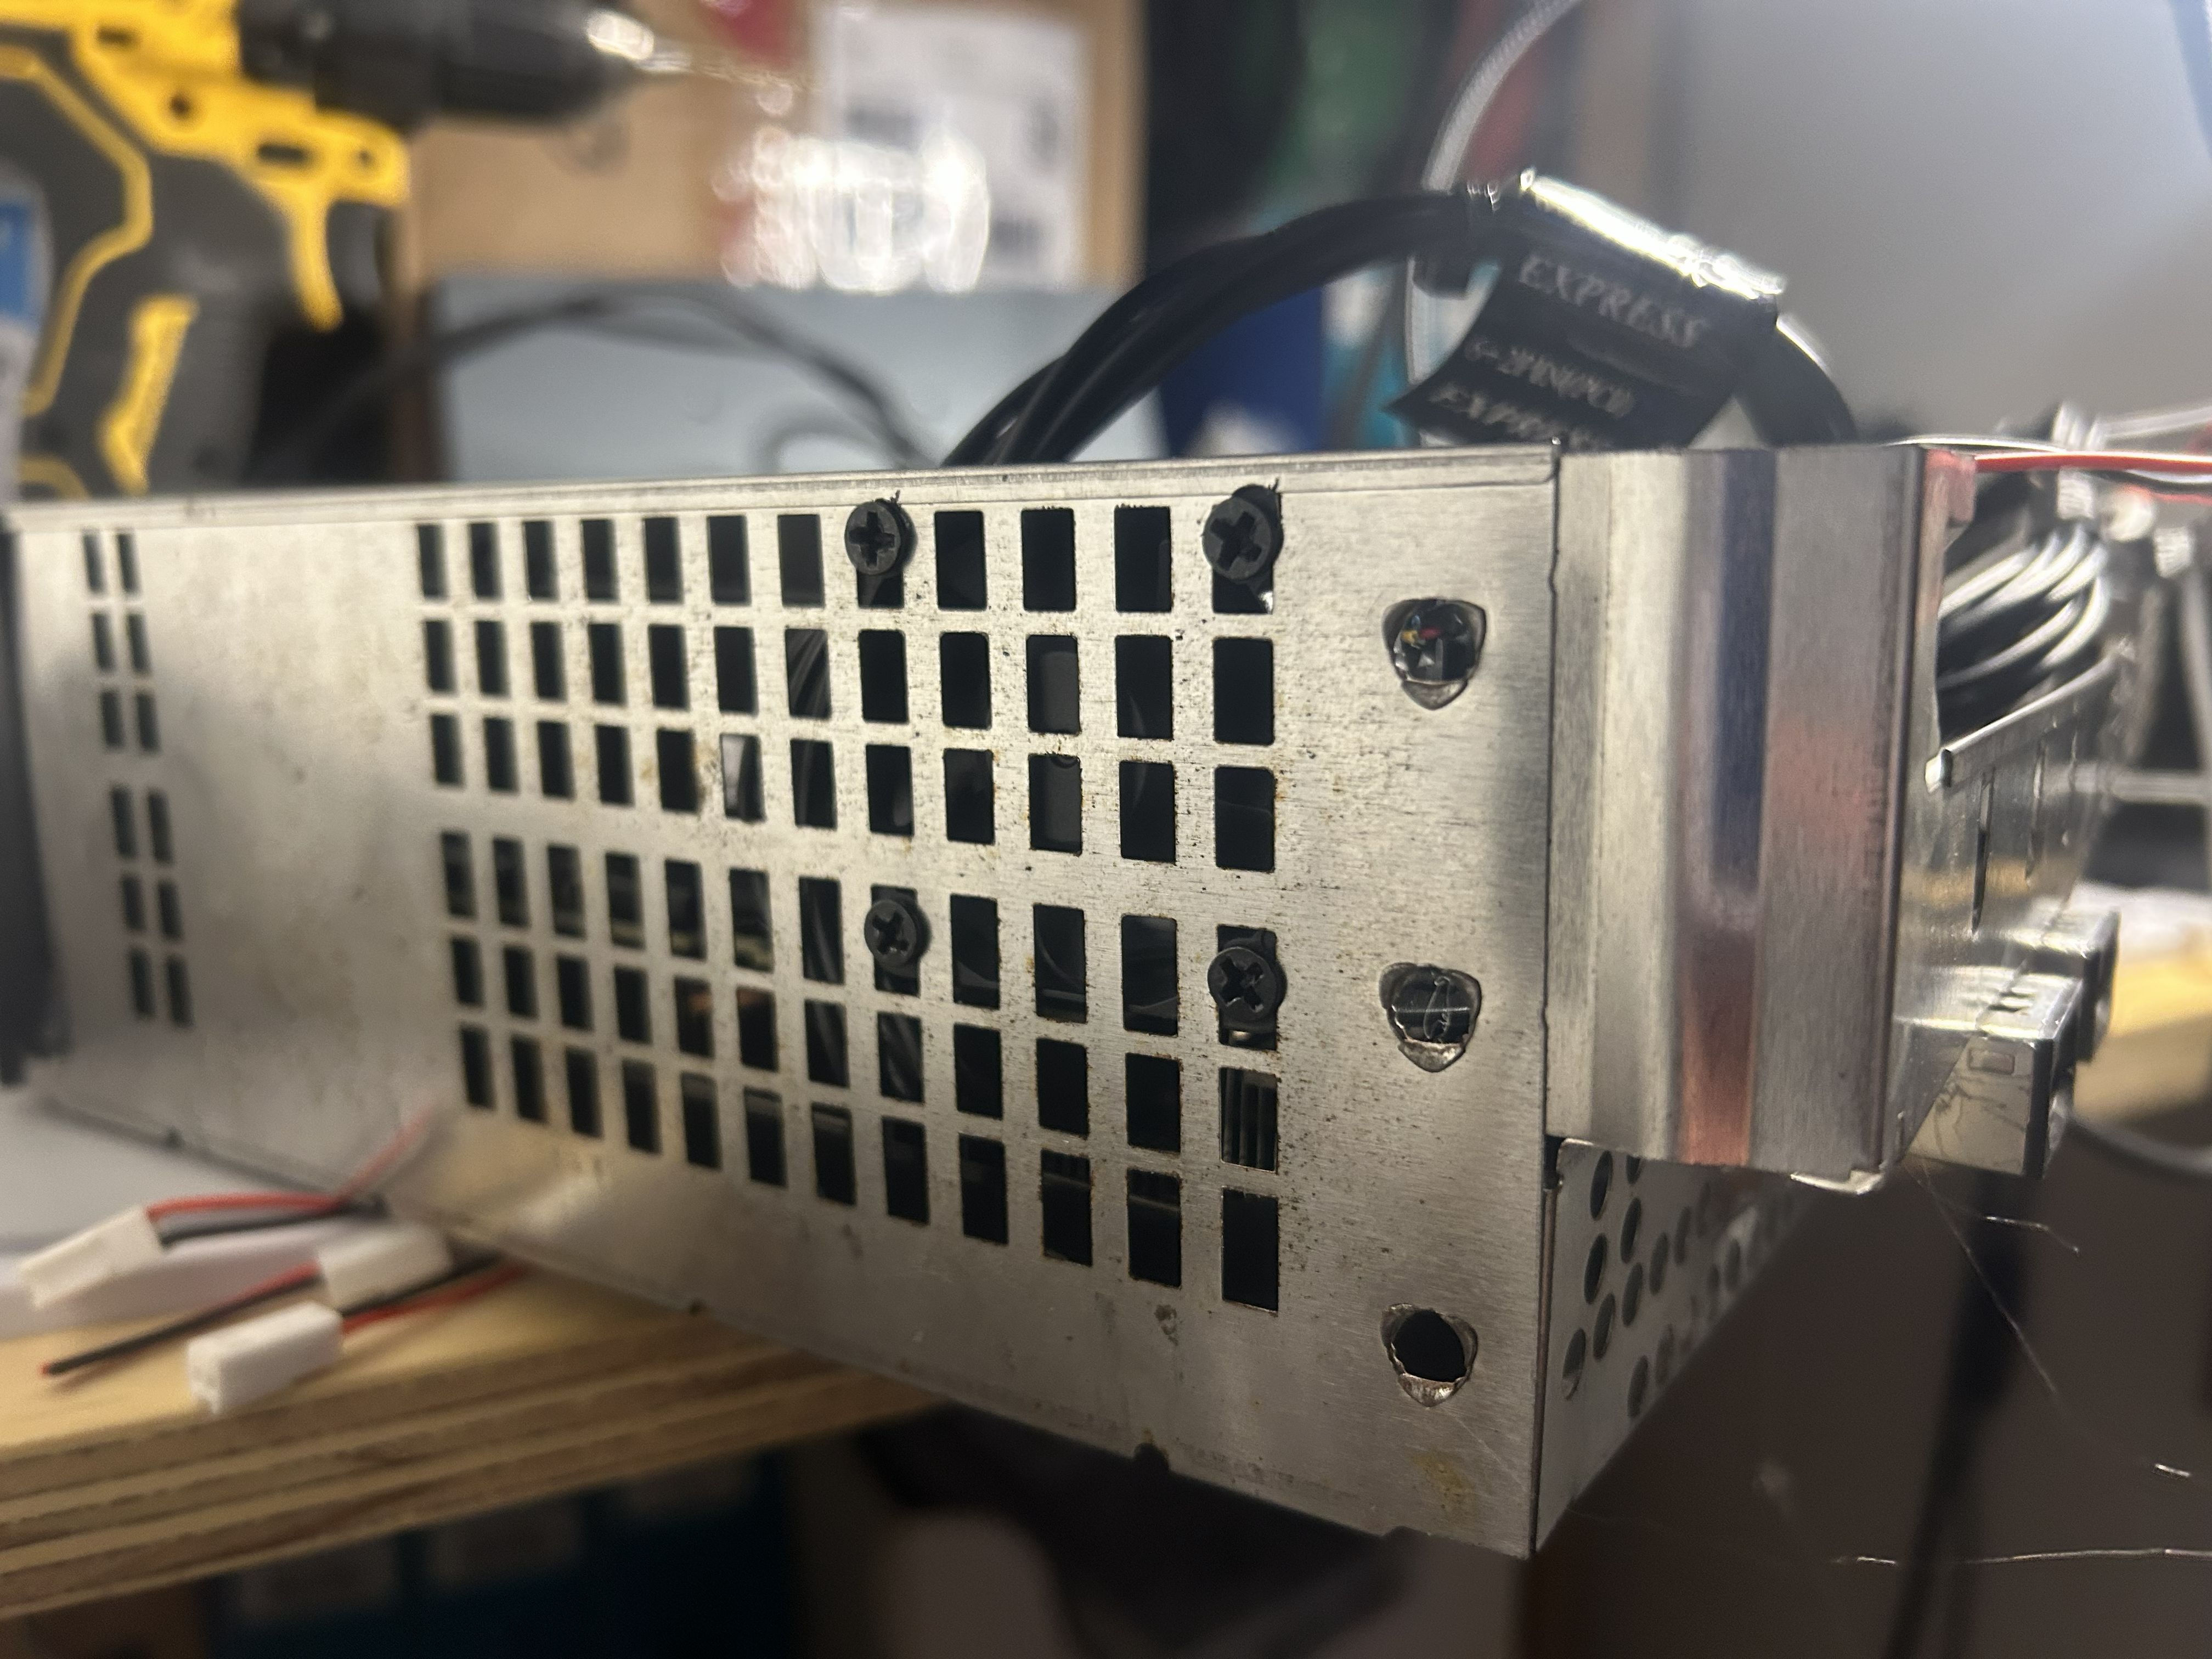
Choosing a PSU was an easy decision to make. After some brief research, the Enhance 7660B 600W power supply, specifically the model from Velkase, stood out as the most reliable option due to its common use in SFF systems. Its 600 Watt Output allows for it to handle basically any hardware that would ever be swapped into the Xbox PC, and it even has an 80 PLUS Platinum efficiency rating.
PCie Right-Angle Adapter
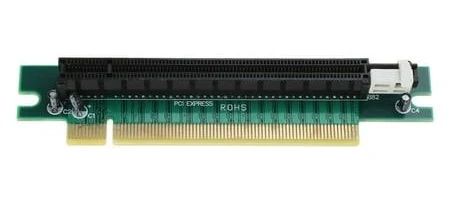
This small and cheap, yet extremely necessary adapter was what allowed for an ITX Mobo + two fan GPU to fit into an original Xbox in the first place. Luckily, these are affordable and all over Ebay and AliExpress (I think they’re used a lot in 1U servers).
The one I have even supports PCIe Gen 4.
The GPU
The GPU that I chose was the saving grace of this project. When I first began my search for a 4K-capable upgrade to my PNY 1660 Super, I limited myself to single-fan GPUs because I was convinced that a two-fan GPU would never fit.
The search for single-fan GPUs was rough; my only realistic option was the single-fan RTX 4060, which was pretty pricy. Single fan GPUs are uncommon because their only real use is for SFF (small form-factor) builds. The vast majority of PC enthusiasts would rather opt for a two or three fan GPU in their desktop PC - why wouldn’t you want better thermals and better performance for cheaper?
Out of curiosity, I ran a search on PCPartPicker for recent two-fan GPUs that were able to fit into the Xbox PC (< 205mm). The search returned one result.
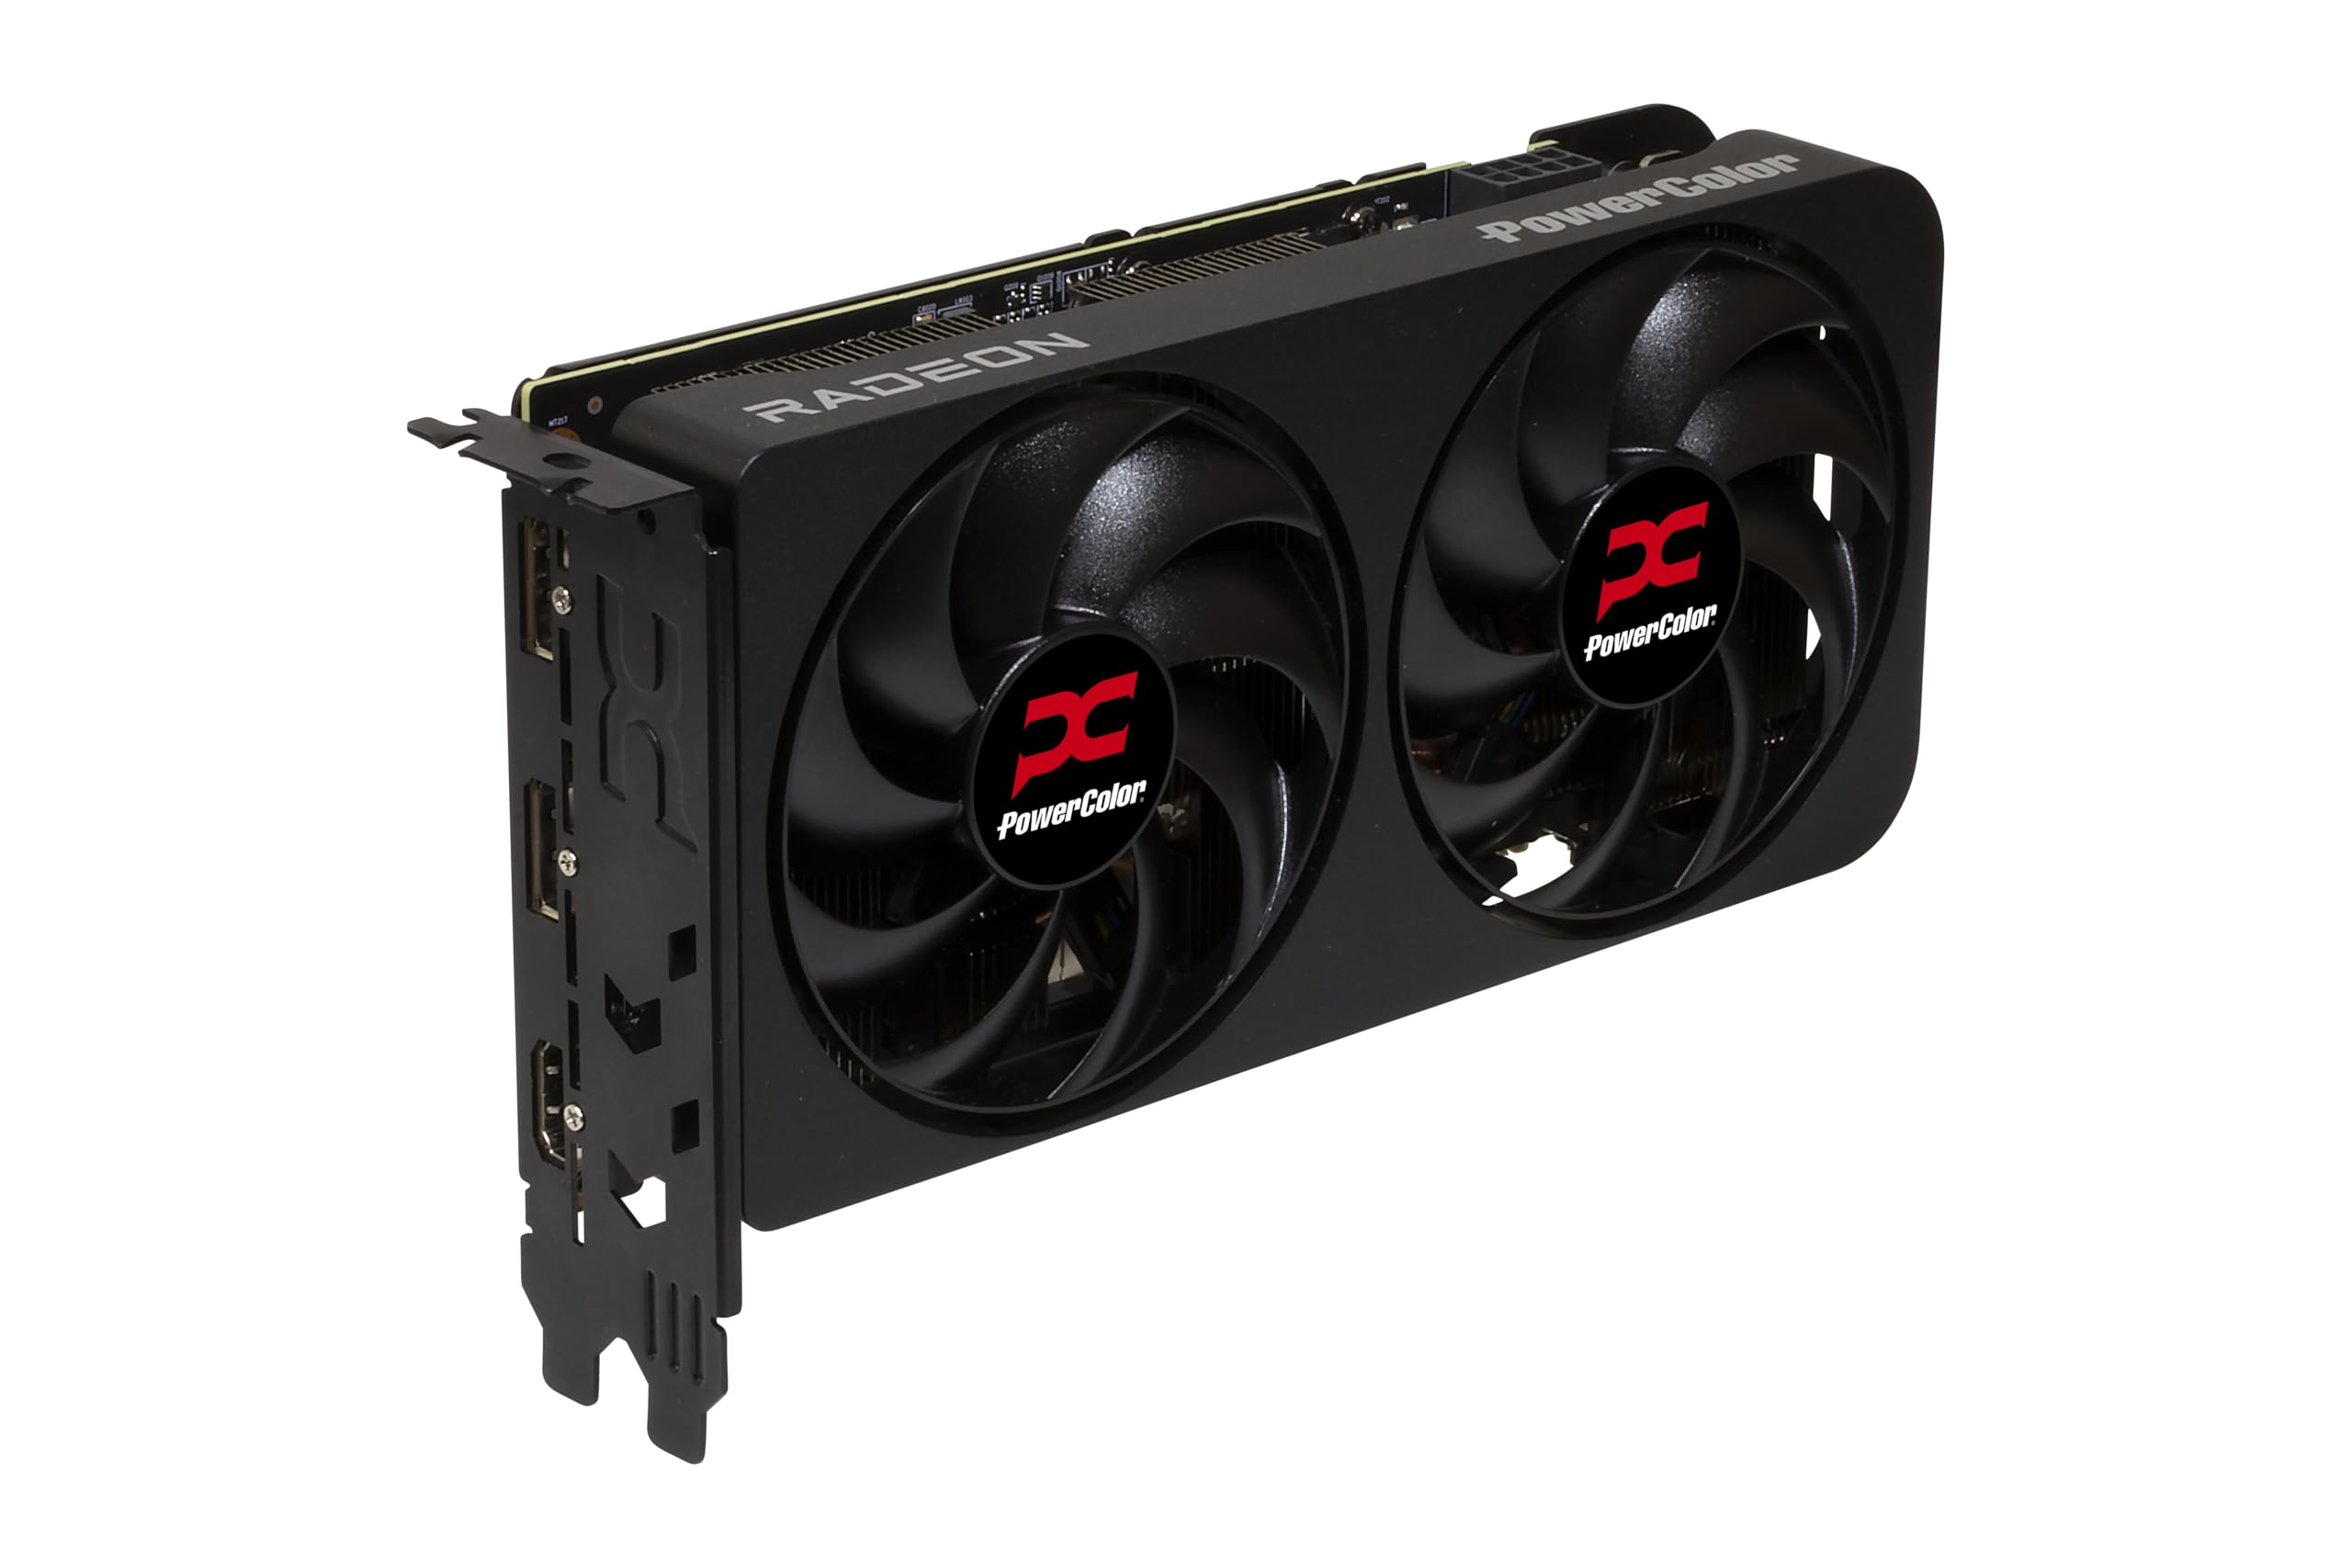
Enter the PowerColor Radeon RX 9060 XT Reaper. It’s not the prettiest GPU, but with 16GB of VRAM for $370 in a 200mm long form factor, it saved this project. If you buy this GPU today it will run you around $440 (on sale)because of AI datacenters.
Design Philosophy
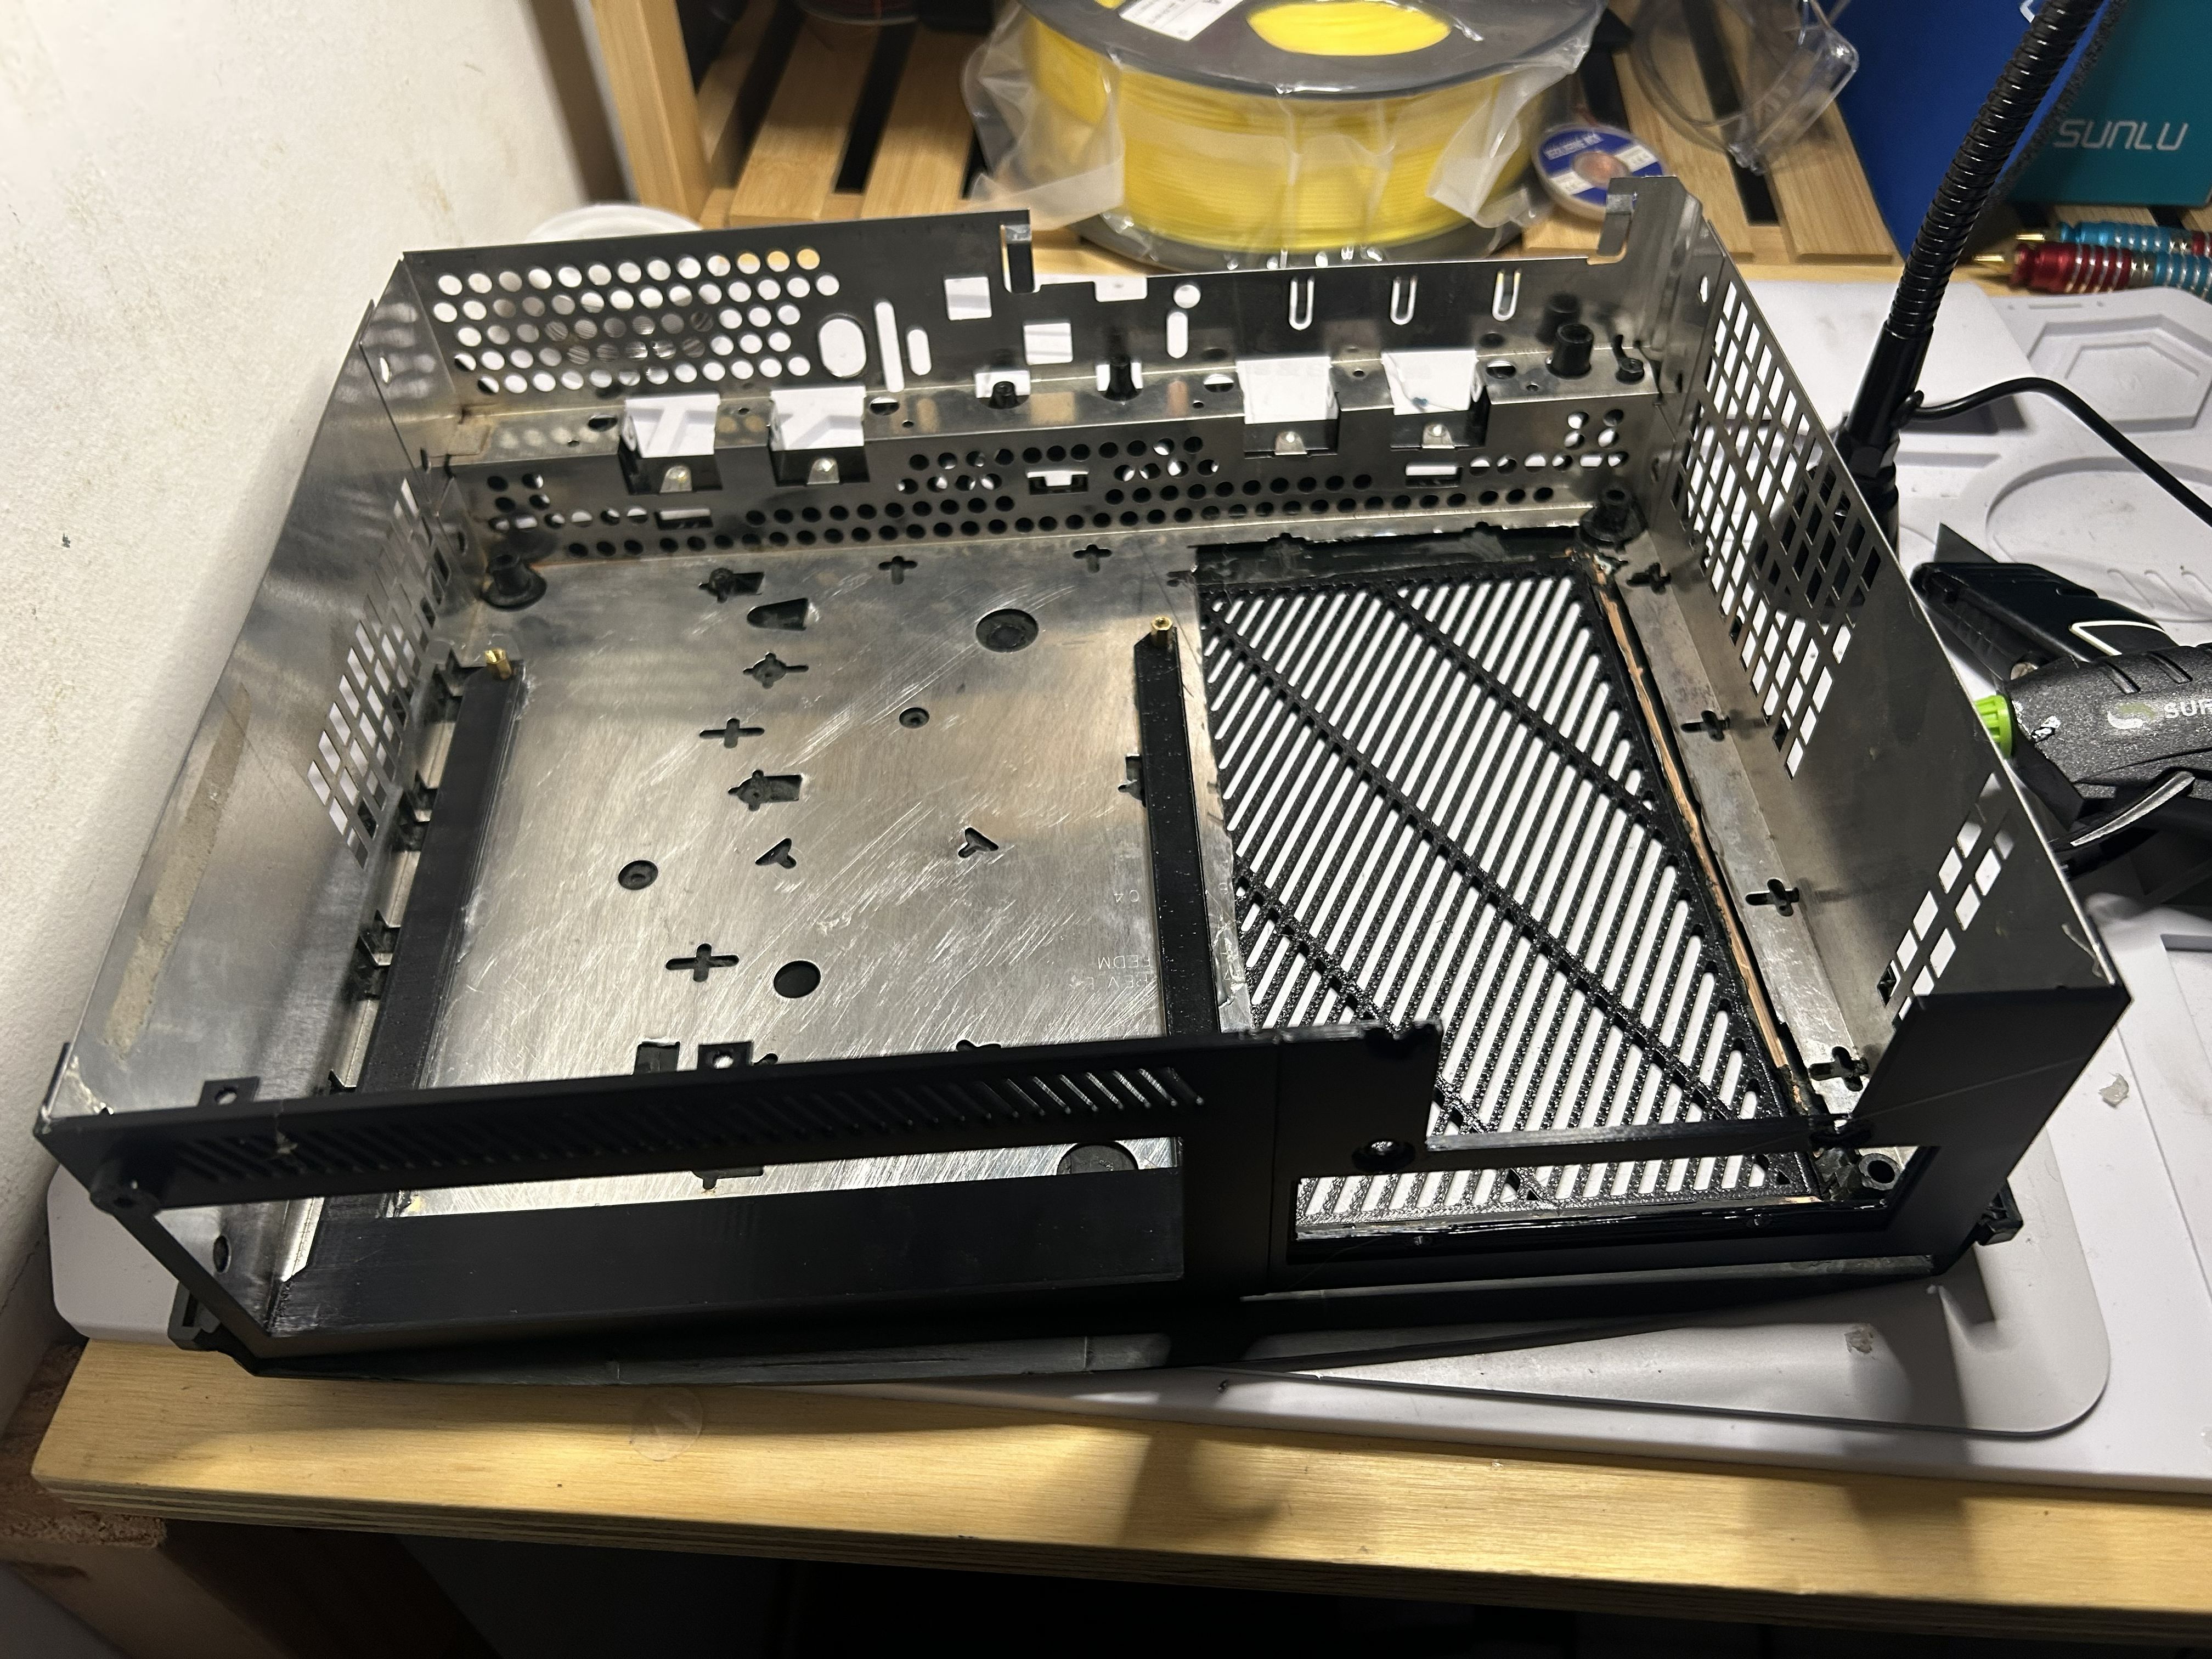
The original Xbox features all of its components inside of a metal cage that I’ll refer to as the chassis. My idea for converting the Xbox into a PC case was to modify this chassis with 3D-printed parts to create an inner skeleton to which all necessary PC parts could be mounted.
Initial Modifications
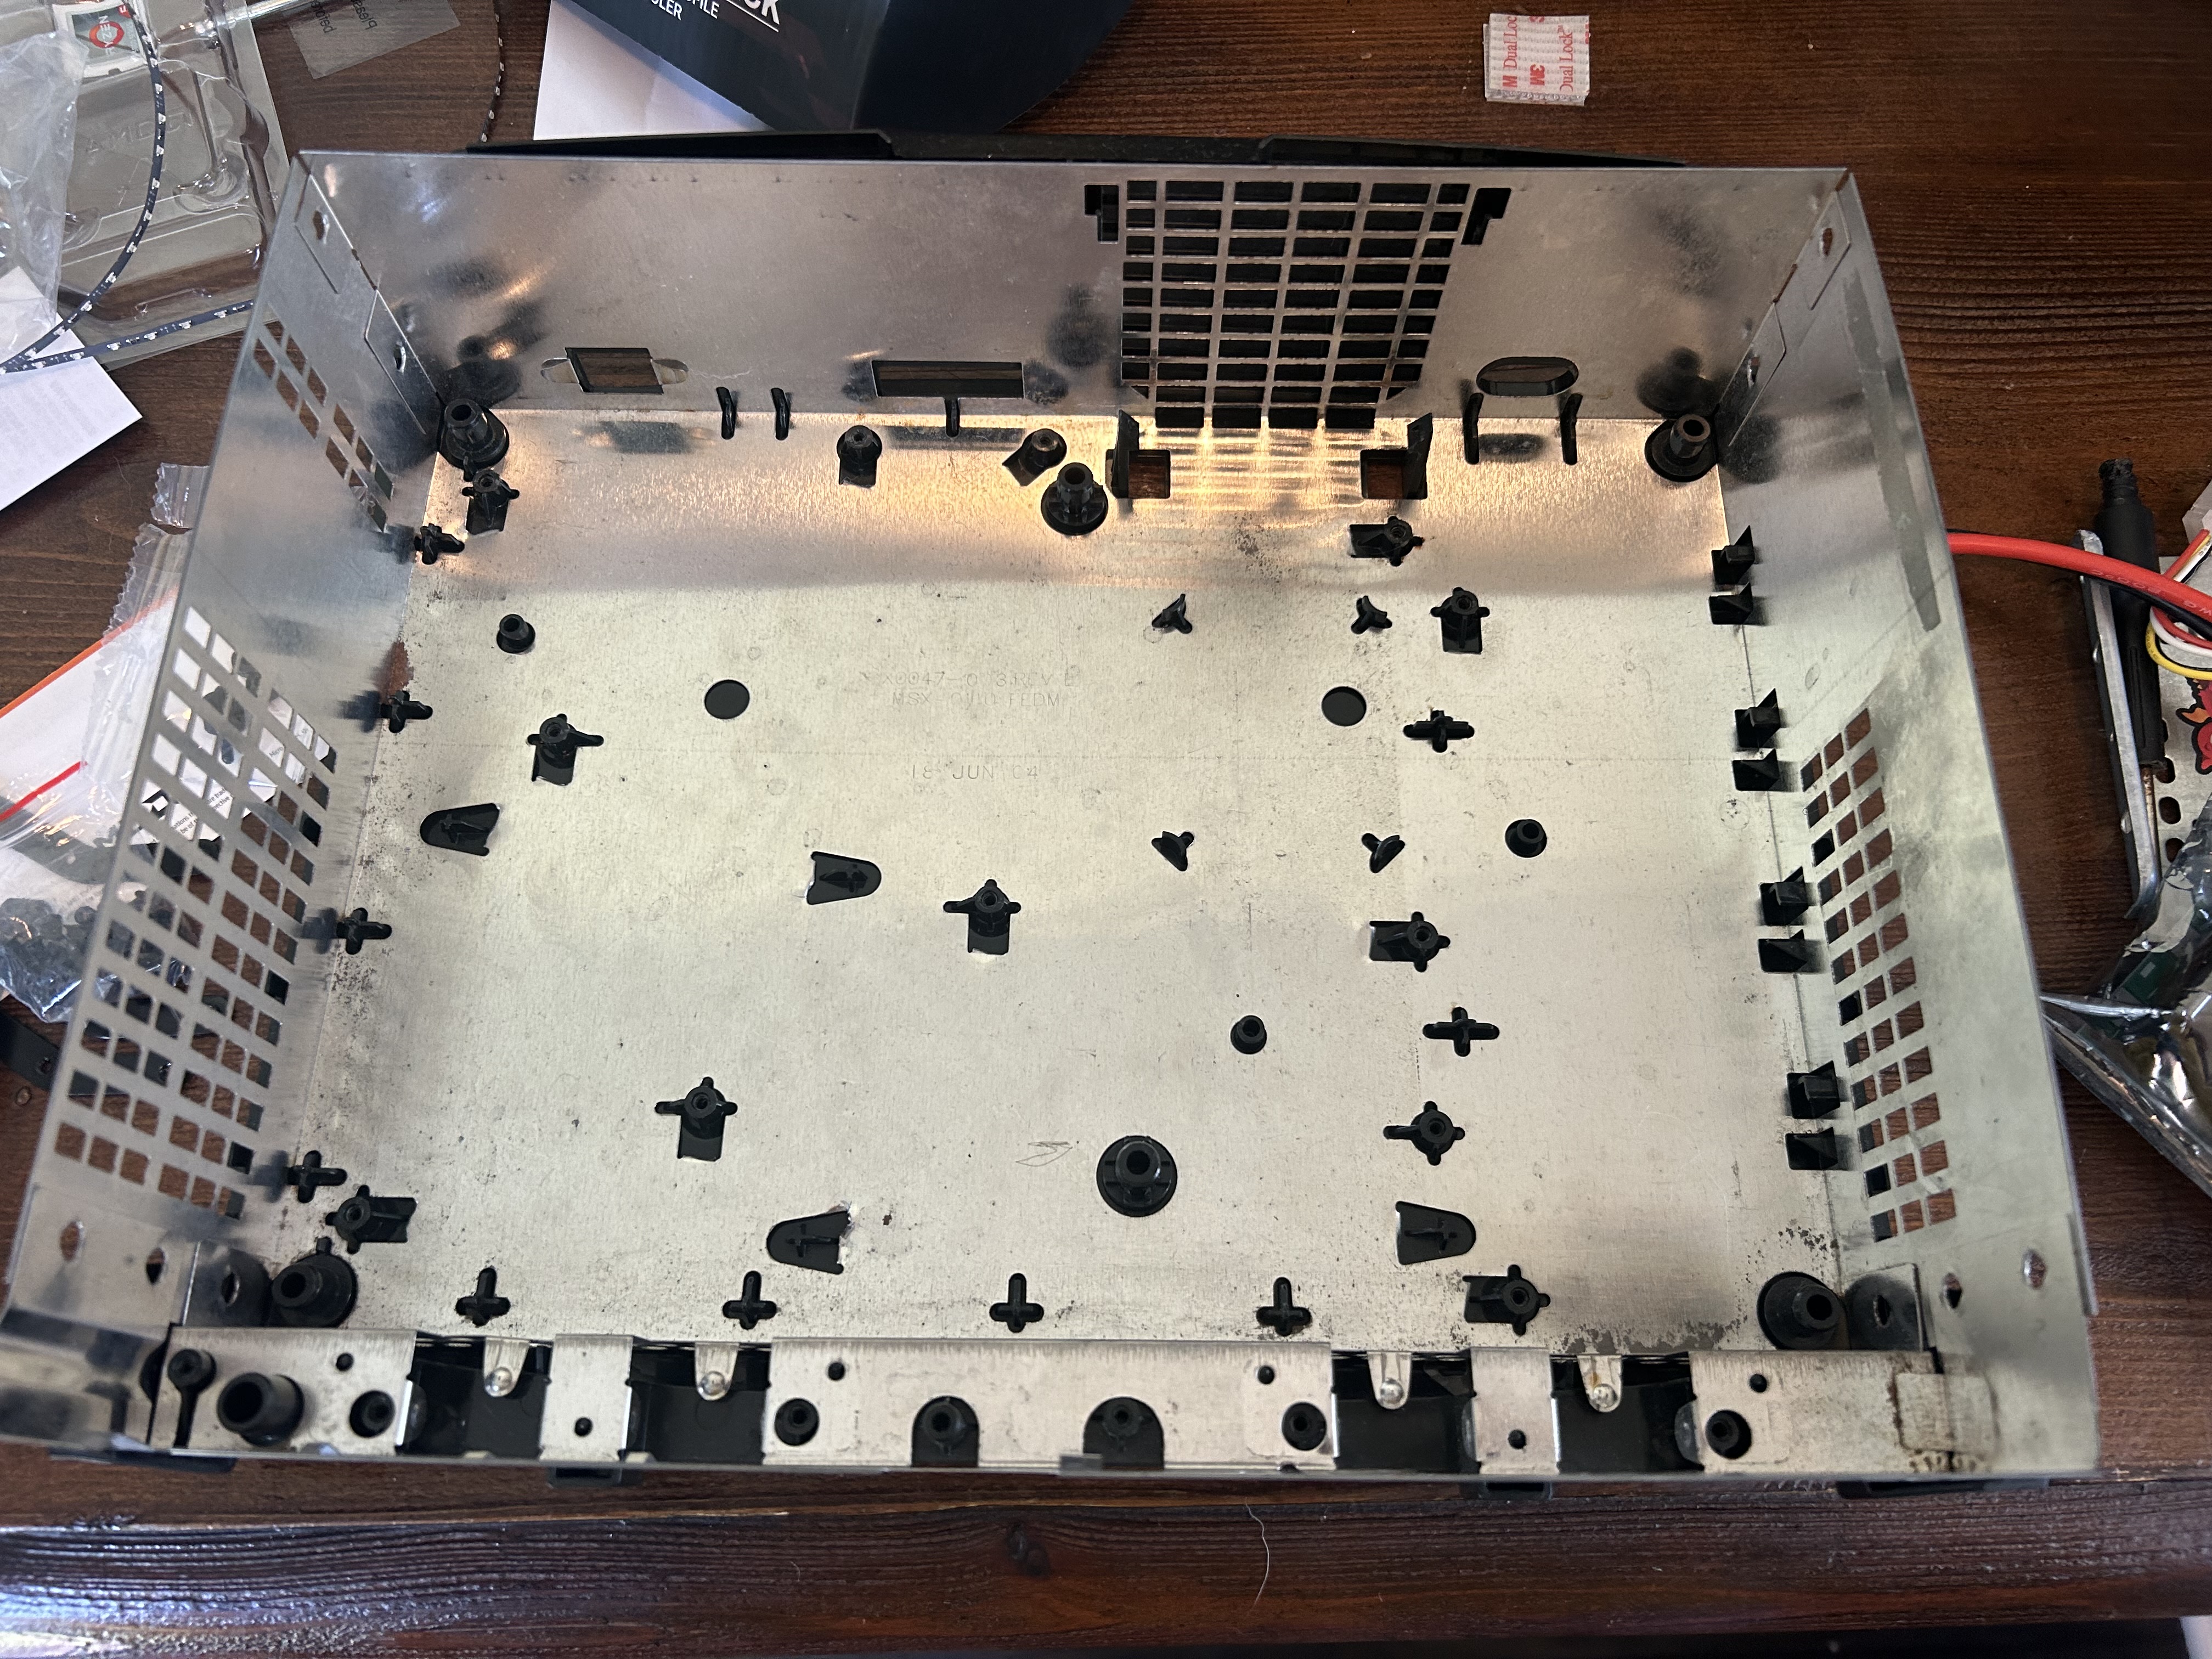
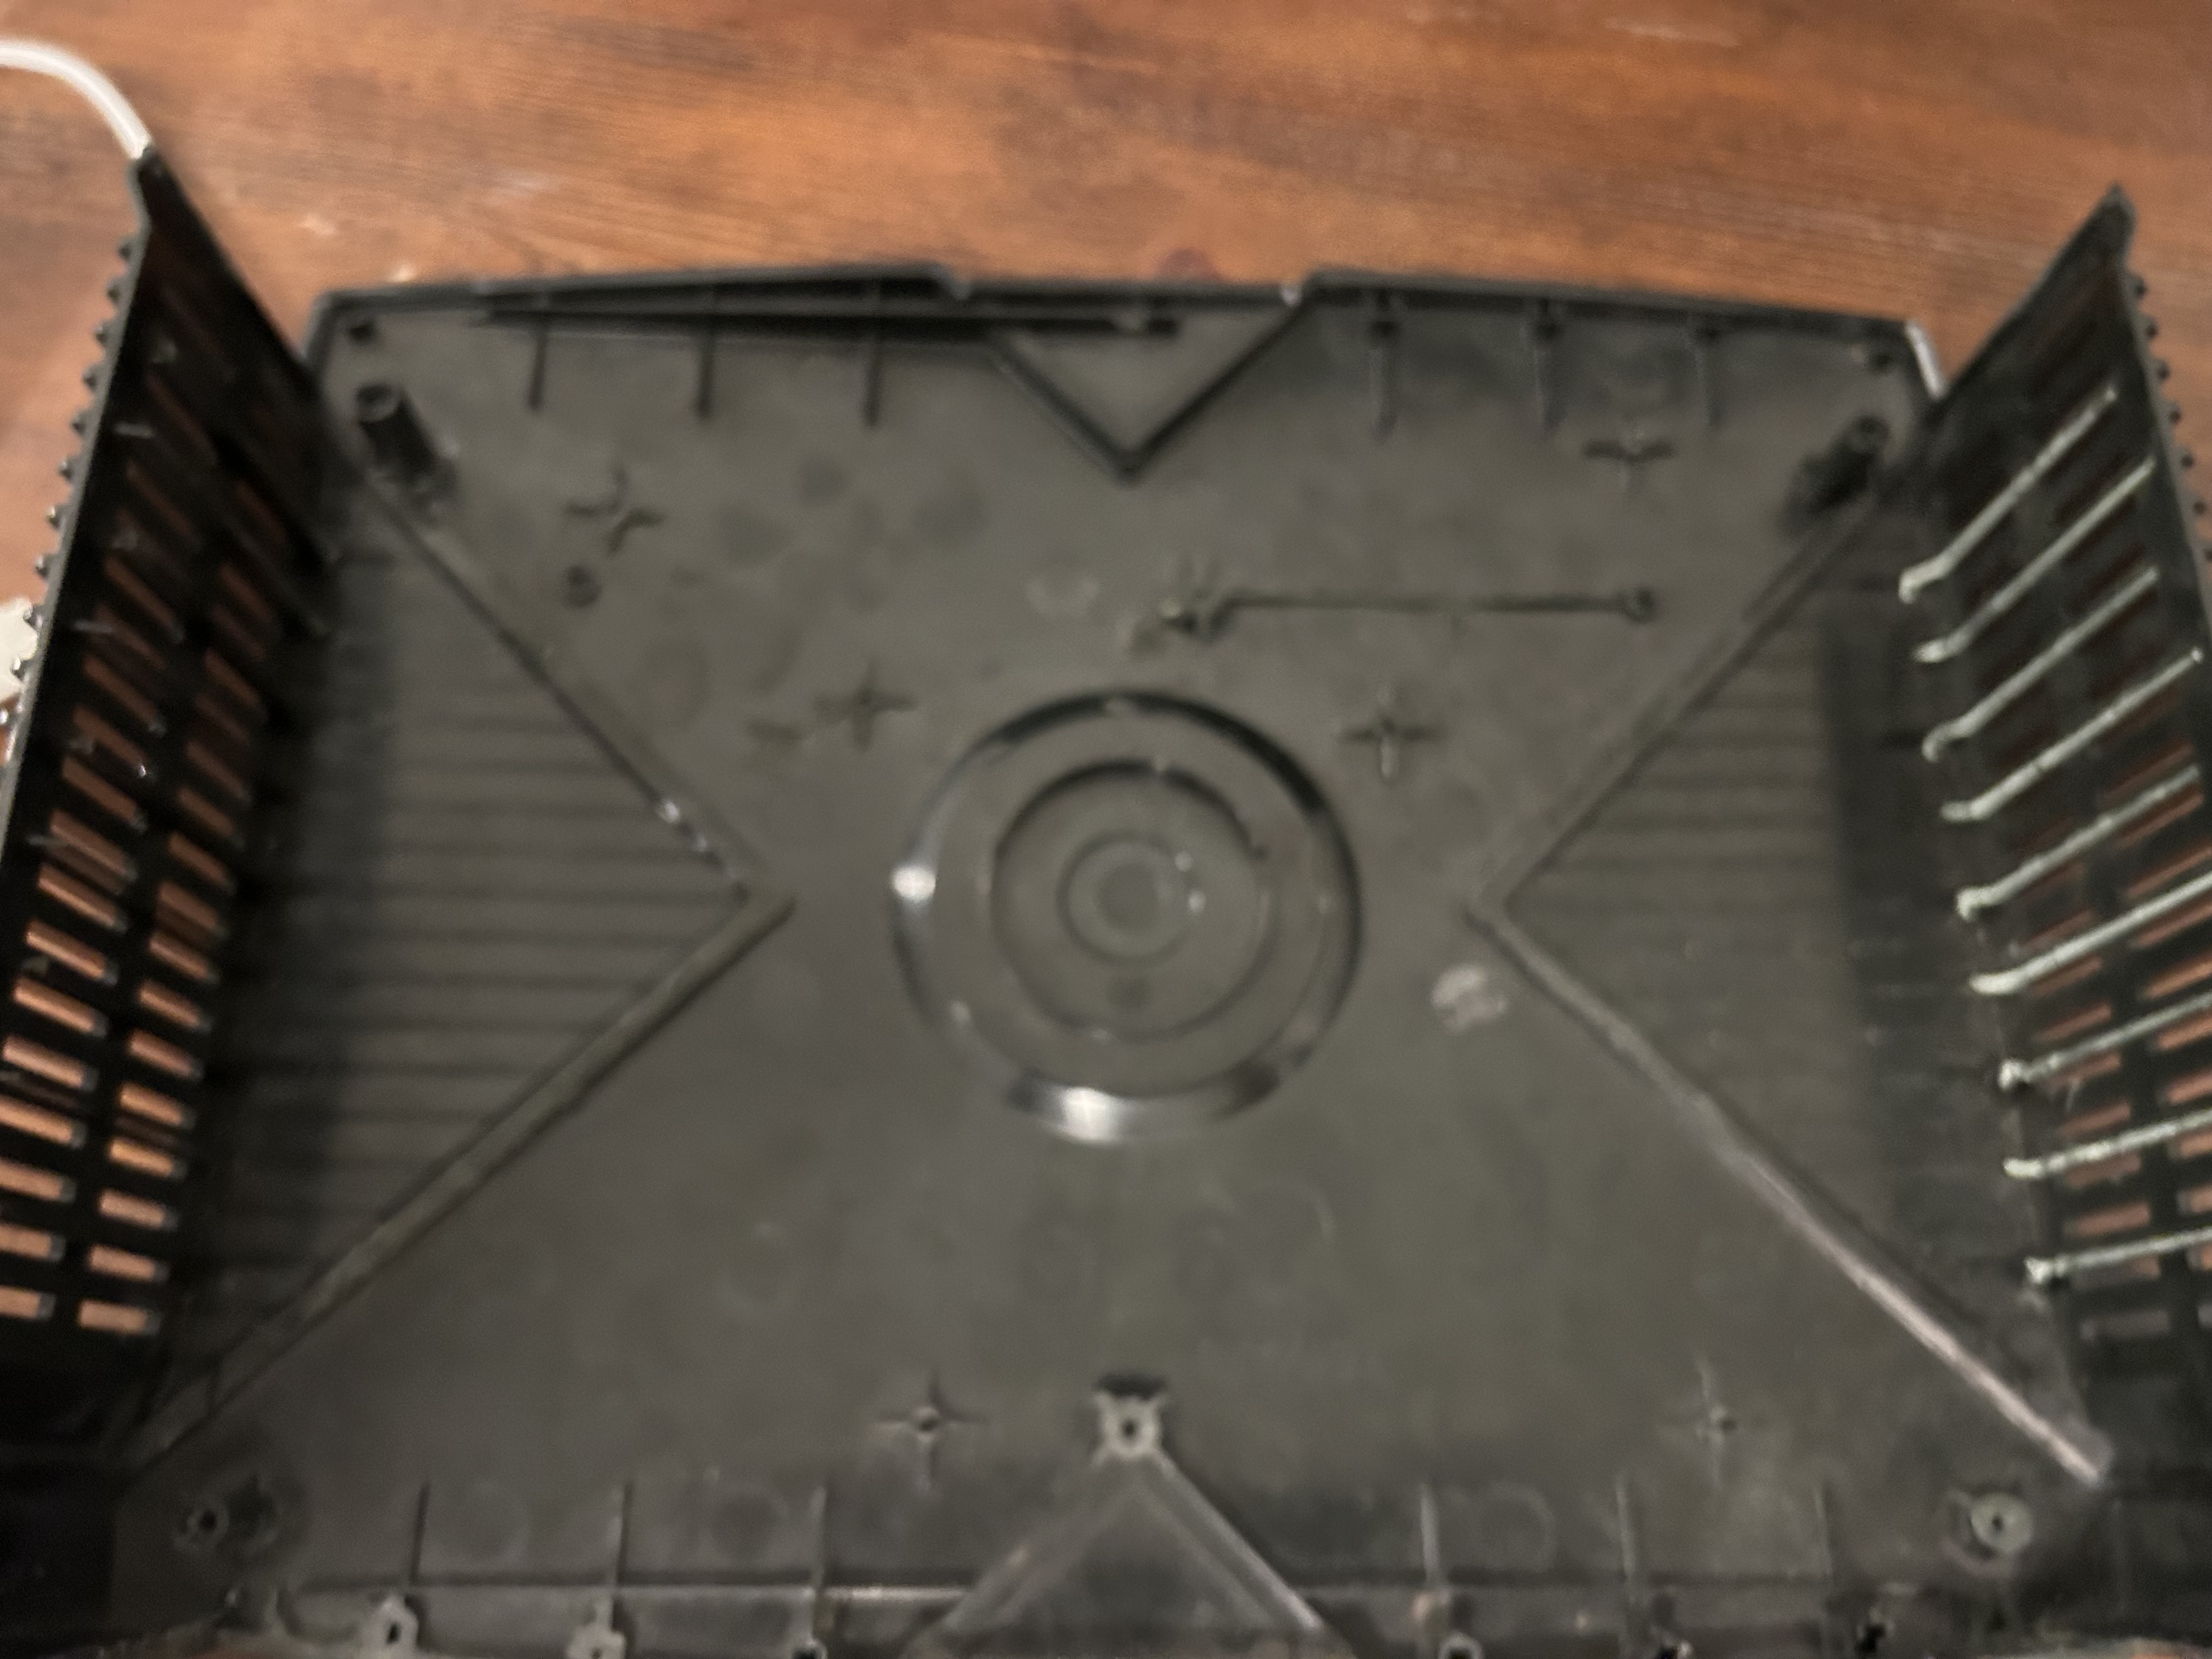
I started by tearing out the aluminium shield that covers the roof of the inner shell. This shield absorbs heat, preventing the plastic shell from getting warm. However, It was necessary to remove this shield to ensure that I had the maximum amount of vertical clearance possible inside of the shell, as the PSU would need to be stacked on top of the GPU. Here’s a (very out of focus) picture of the final gutted upper shell:
After that, I got to work with my Dremel, cutting out any extrusions in both the upper and lower plastic shells. The console is held together by four very long Torx screws that go through the entire thing. Sadly, the motherboard blocked one of those four posts so that it had to be removed. Thus, 1/4th of the console was held together by nothing, leading me to come up with an alternative solution for holding this part of the console together which I will discuss later.
Additionally, I measured out where the GPU would be and designed a large grille for its exhaust. Then, I cut out a large hole and glued the grille in. For this project I used gel-based super glue.
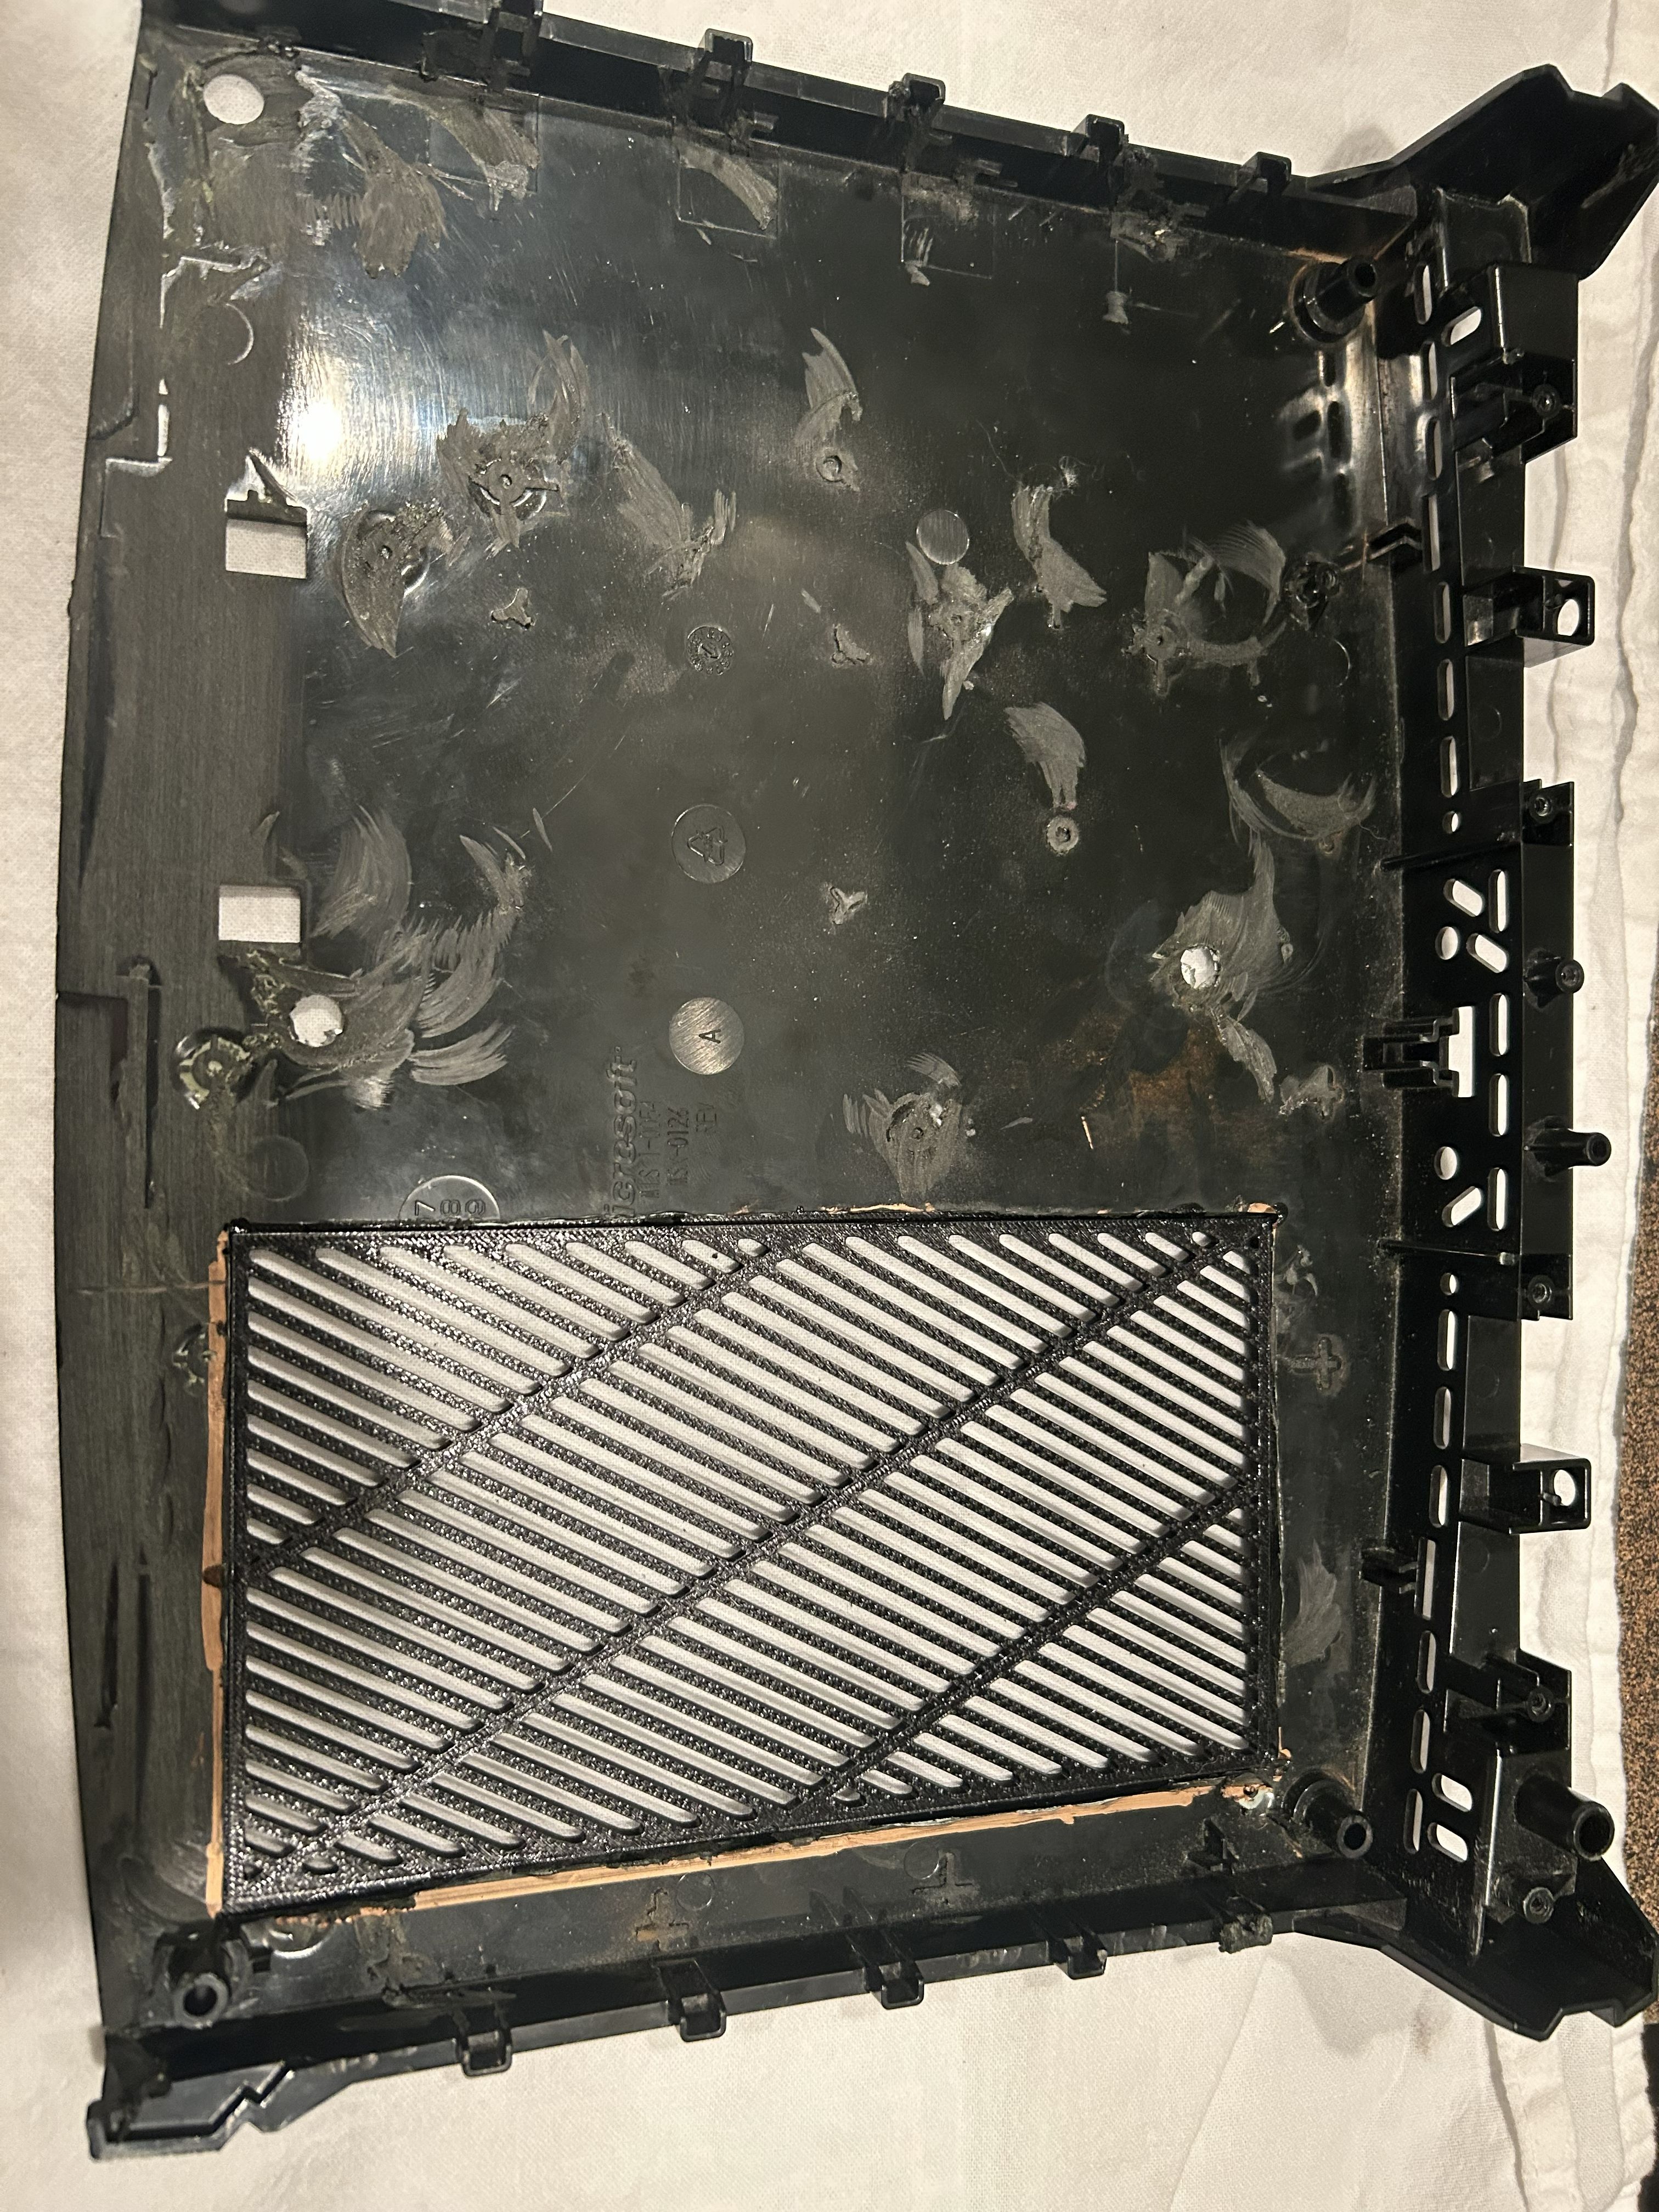
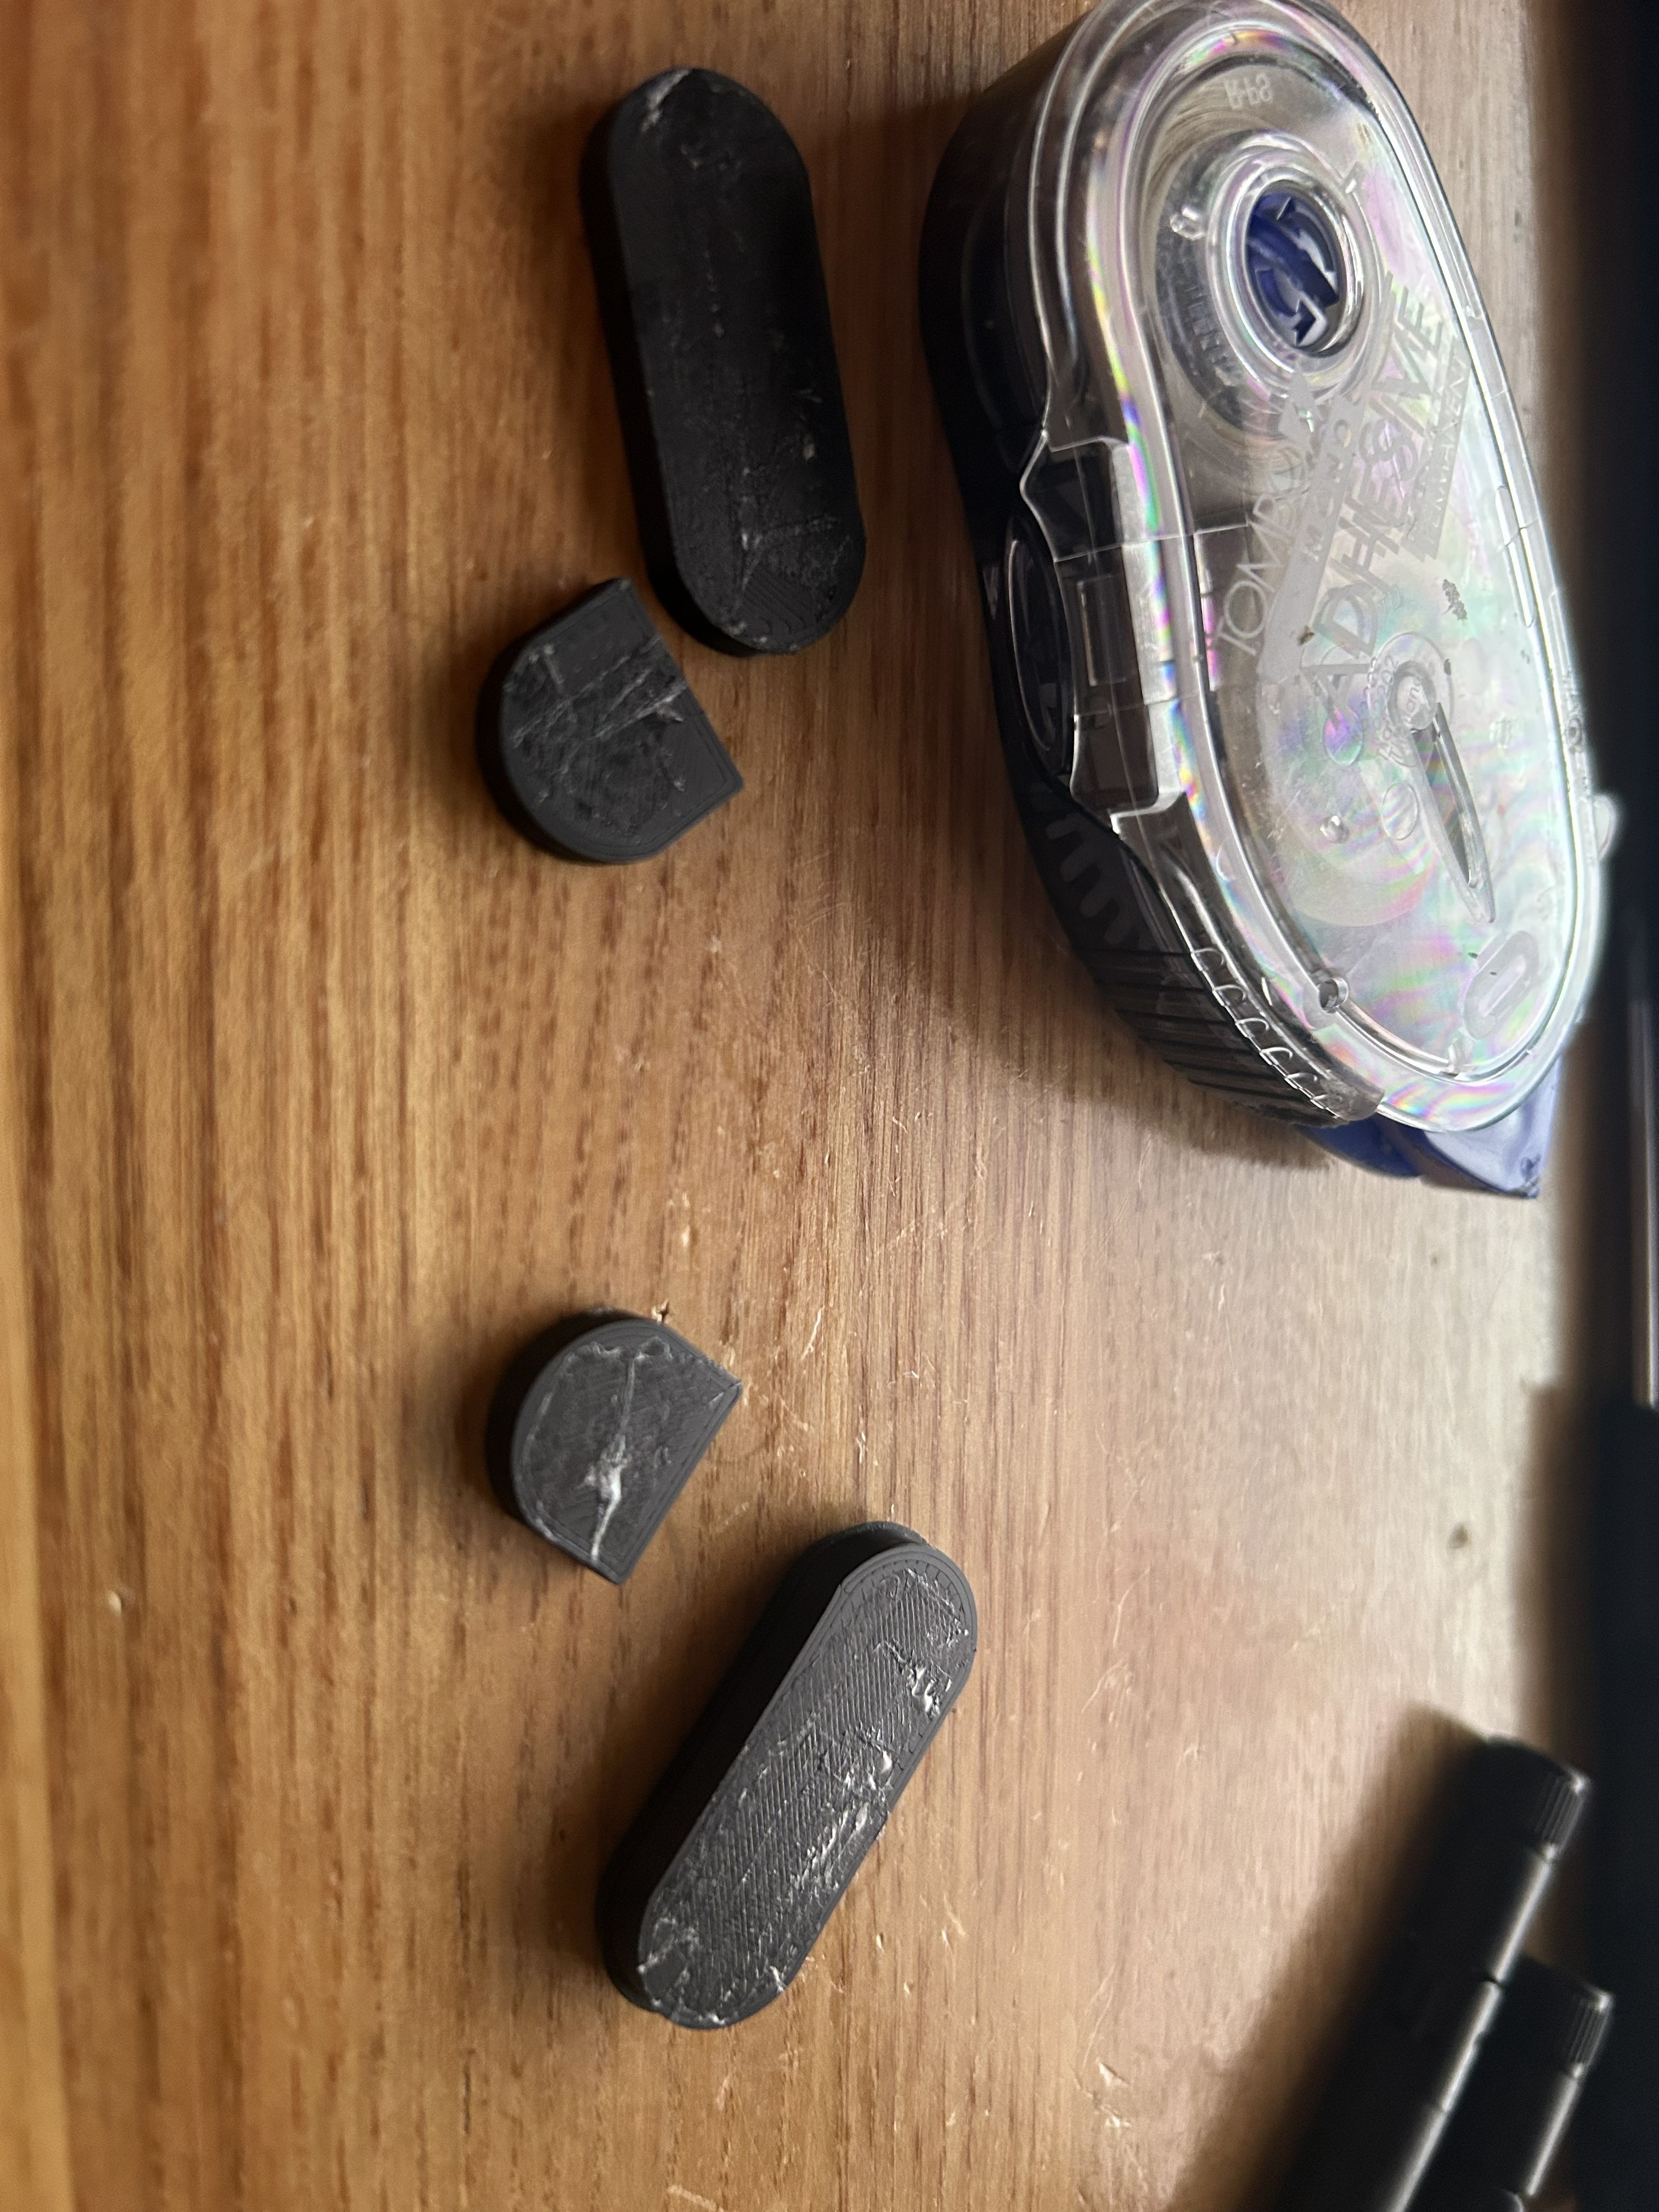
There were also some other holes that were created by removing screw posts that you can see in this picture. Later, I filled those with small 3D printed filler pieces that I then sanded slightly to fit.
Moving back to the chassis, I used my Dremel and some fiberglass cutting discs to remove the back panel of the aluminum chassis, also cutting out a large rectangular hole for the GPU’s fans.
Airflow
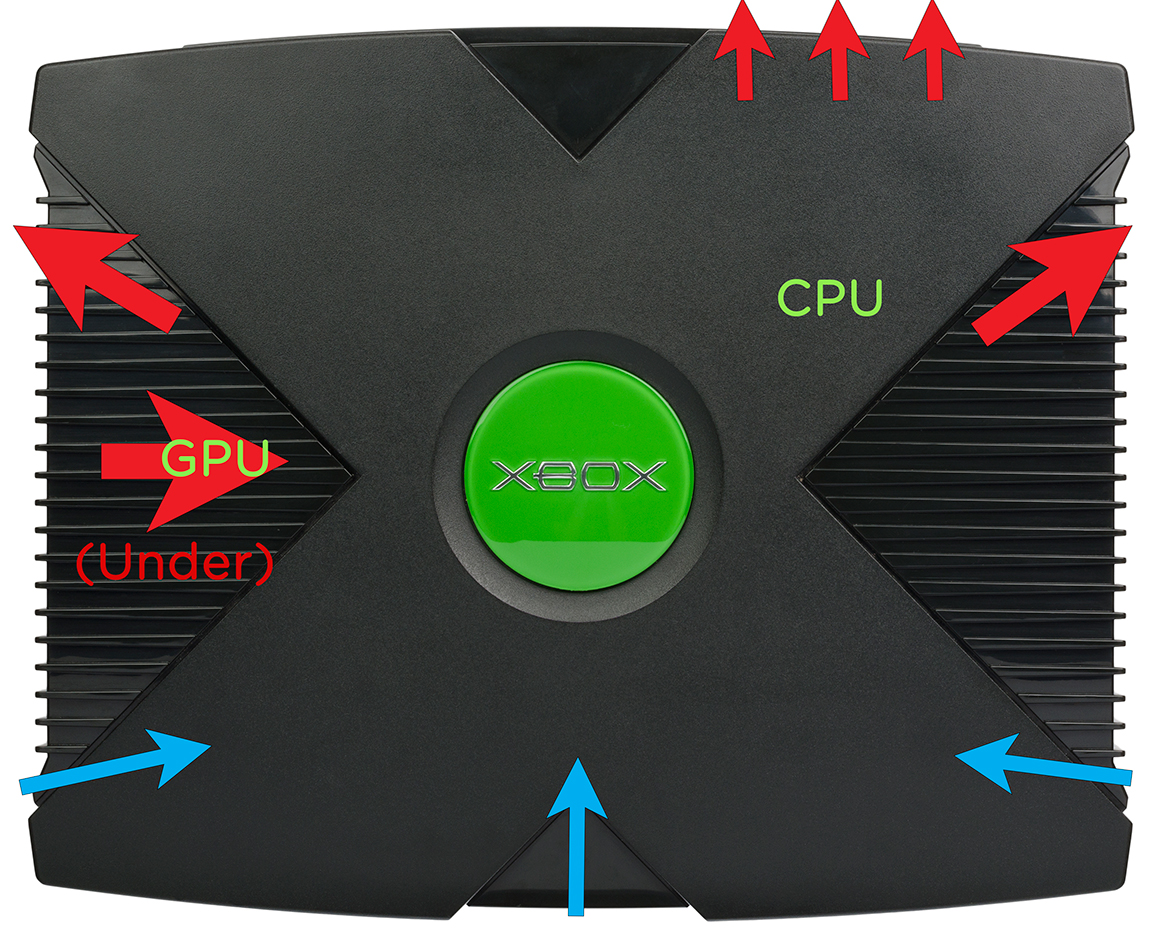
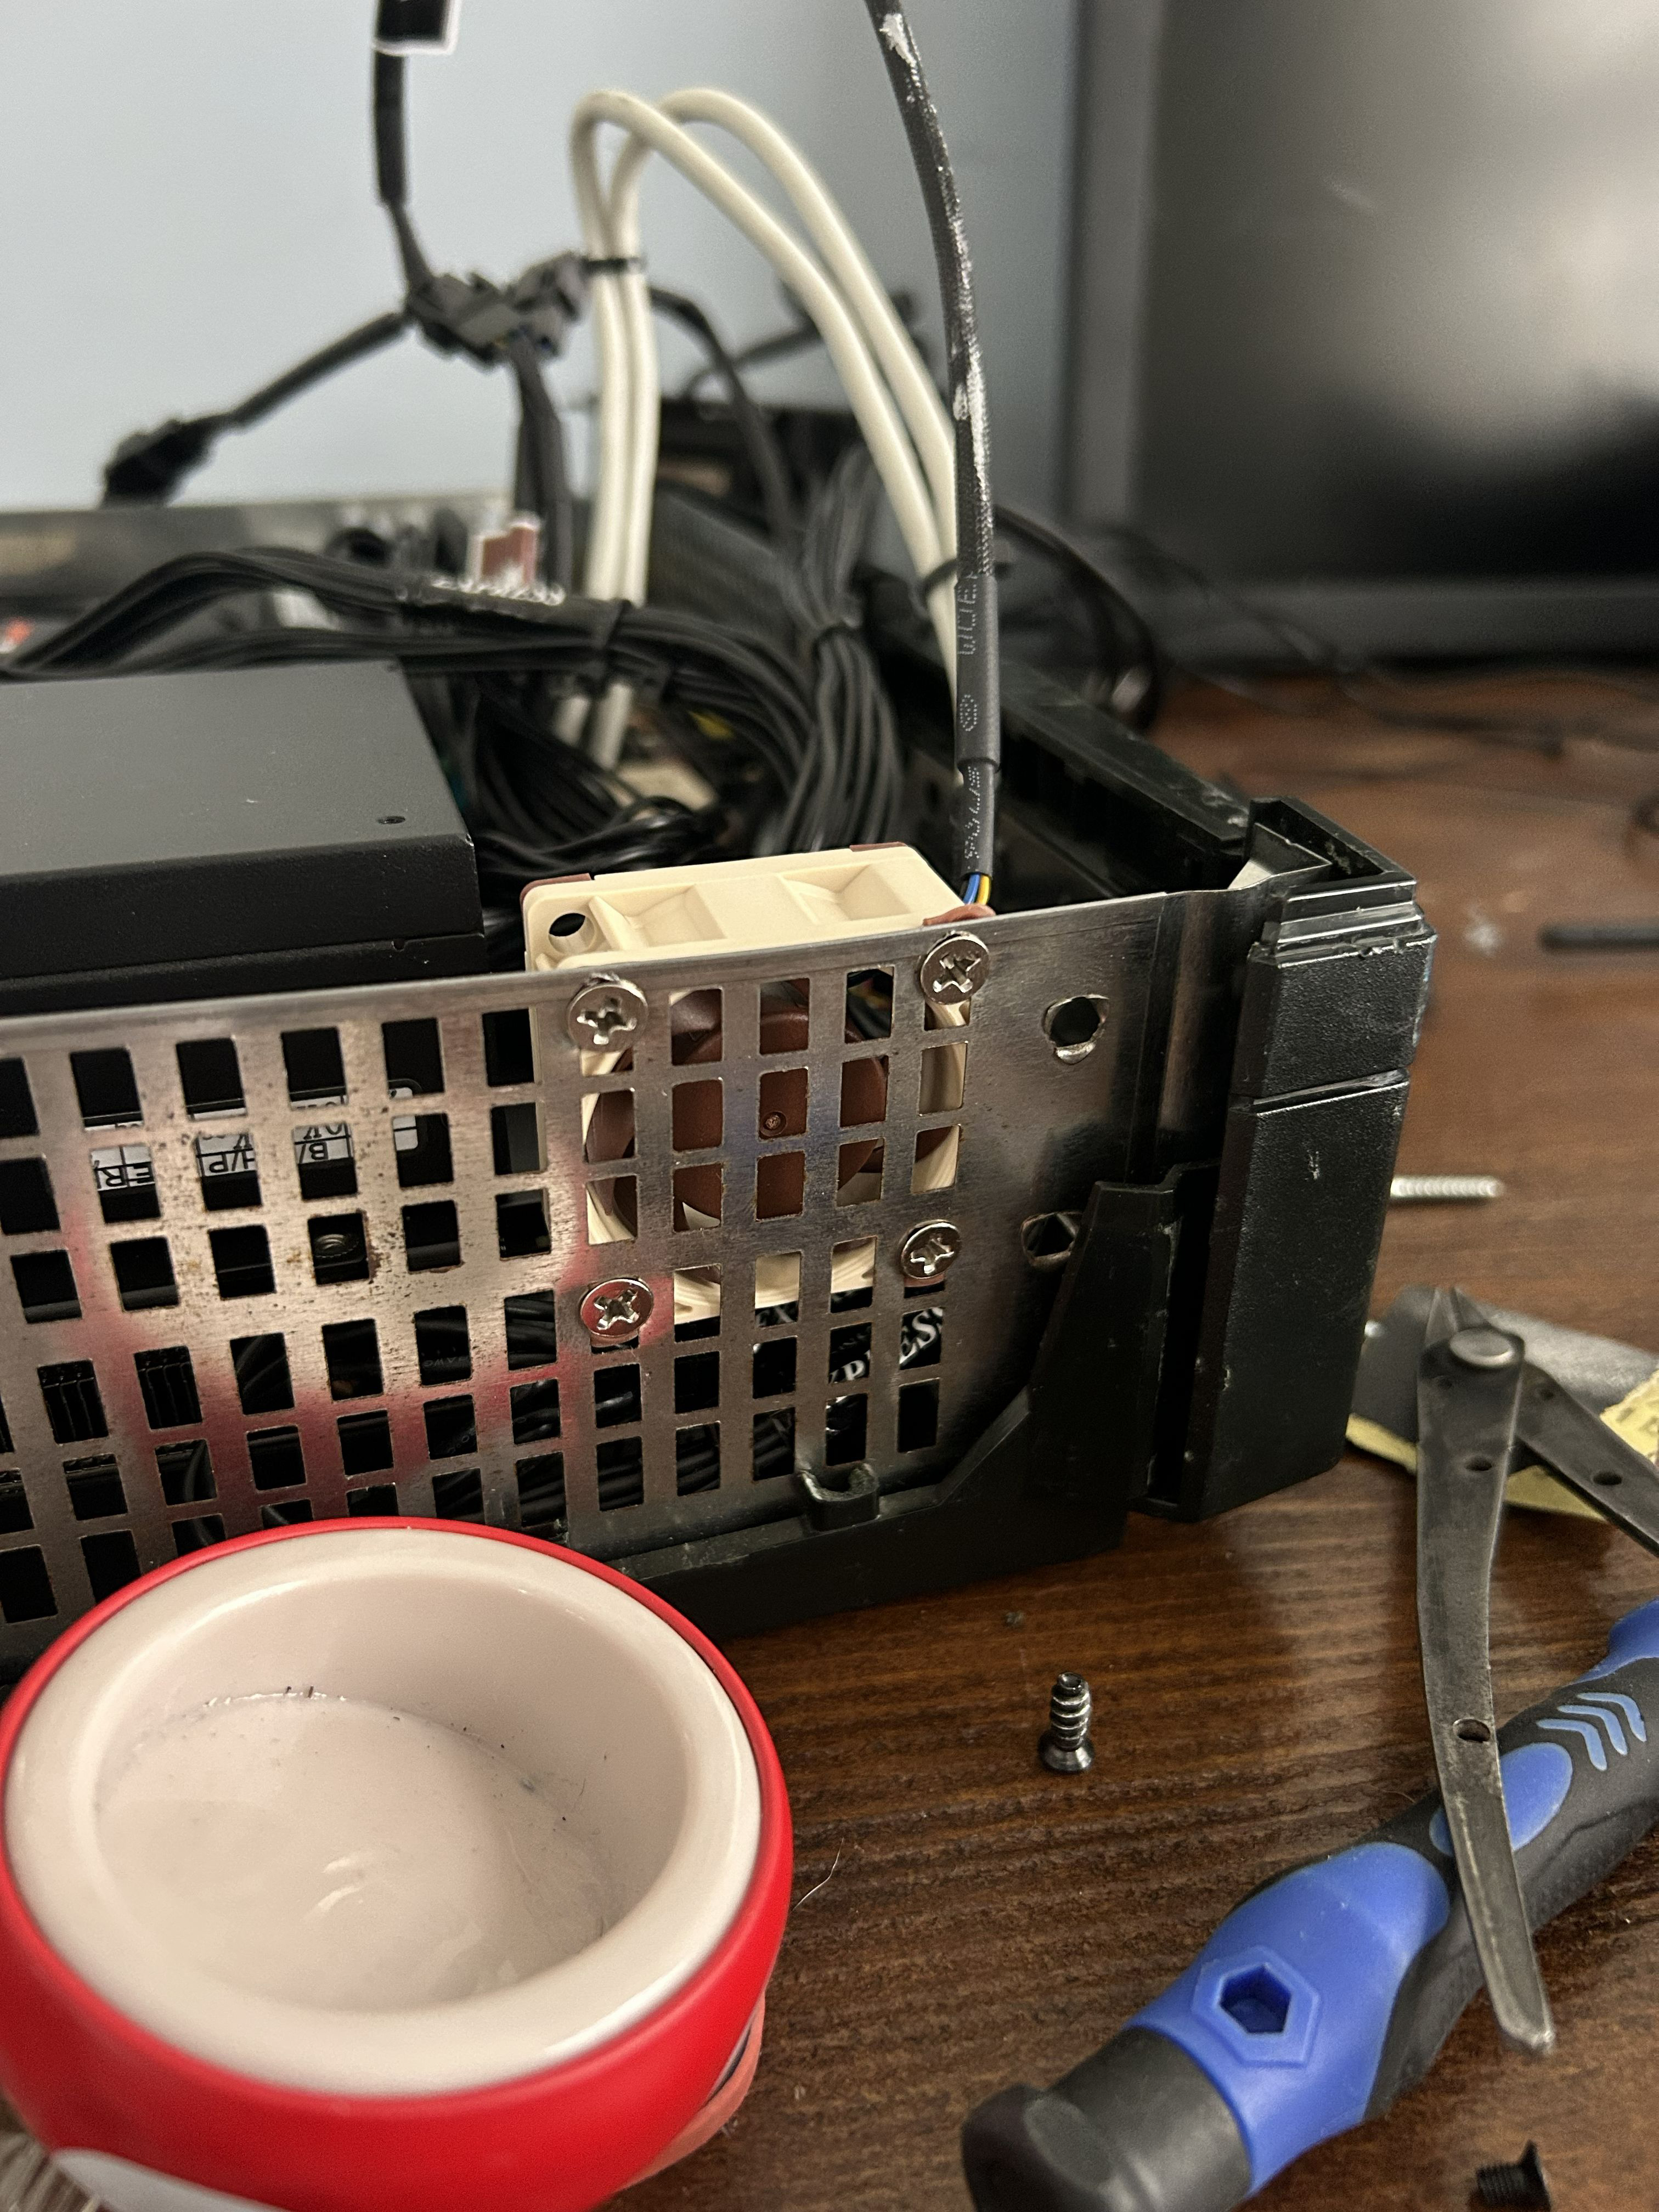
Despite only having one exhaust fan in the stock console, the Xbox’s shell is actually great for airflow; both sides are ventilated and it even has a grille along its front underside. To take advantage of this, I needed to modify the metal chassis to allow for three 40mm server fans to be installed as intakes.
The left side was extremely easy, as I was able to install the 40mm fan without any modifications to the chassis at all.
This central one was also very easy, although only two screws were possible and I had to do a little bit of drilling.
This left one was the tricky one; the chassis had no holes so I had to do everything. Once I drilled a bunch of holes, I filed their rough protrusions down. Not pretty, but it worked out fine.
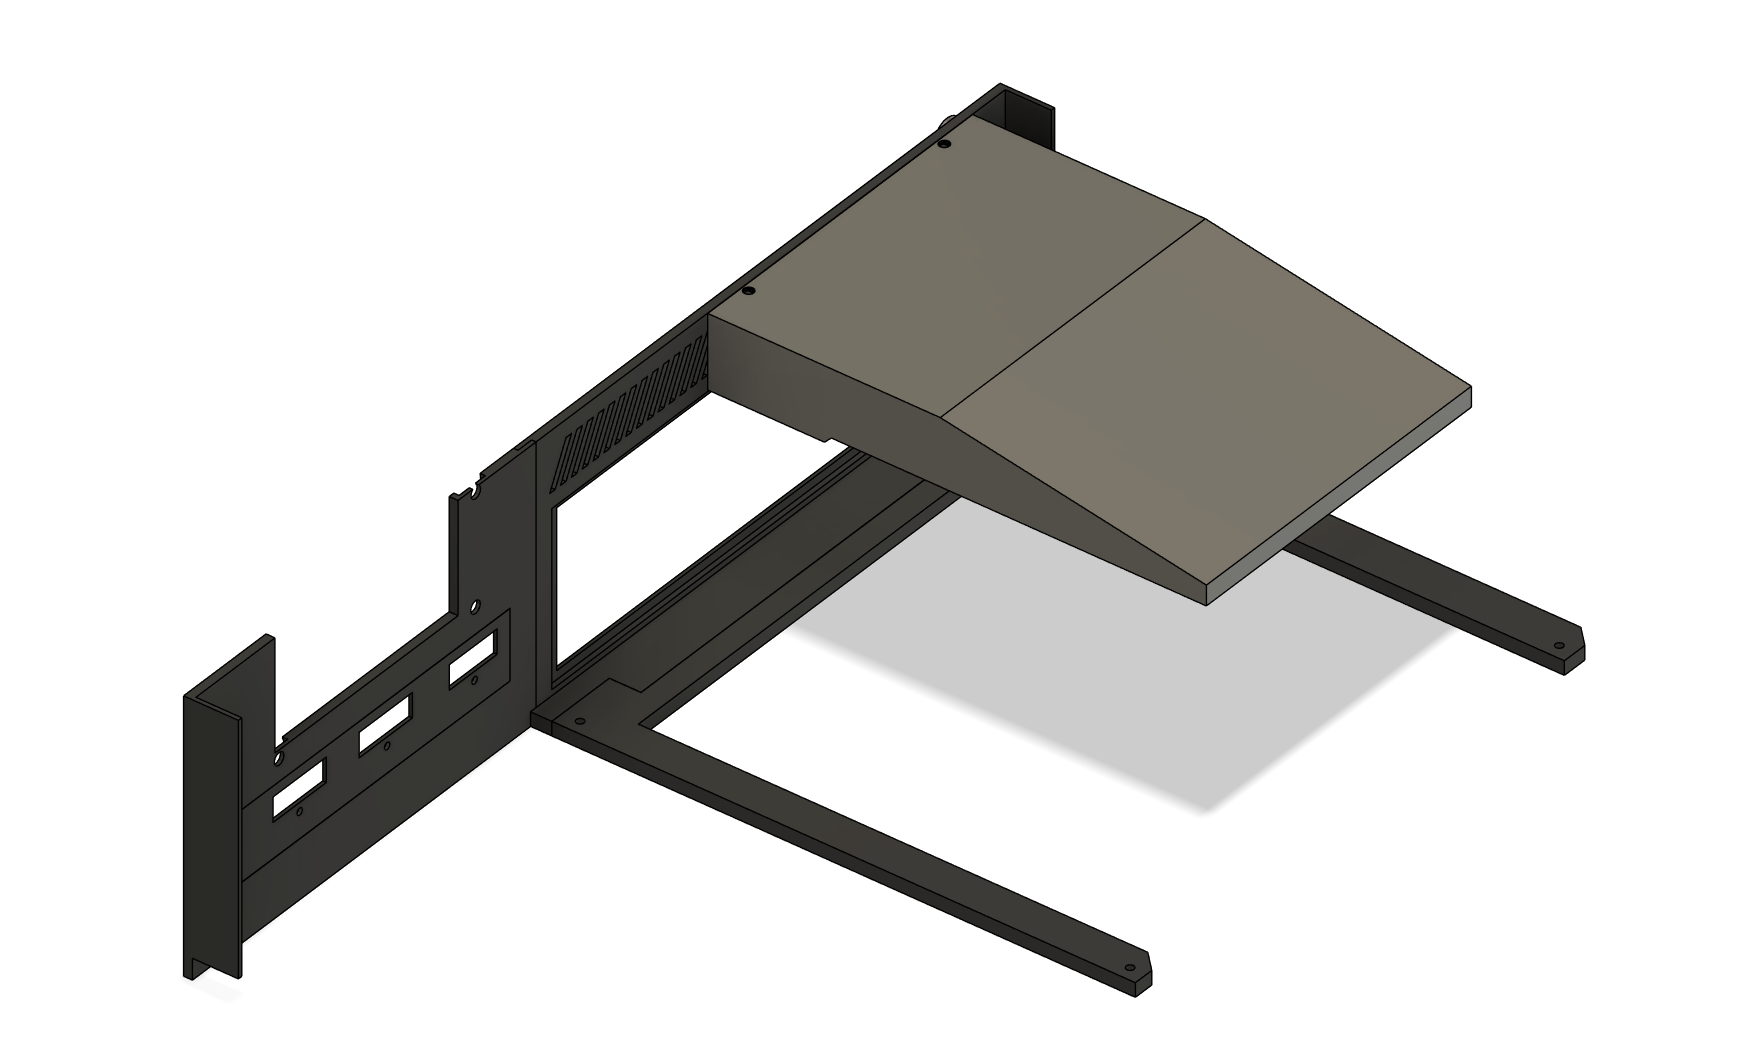
The CAD
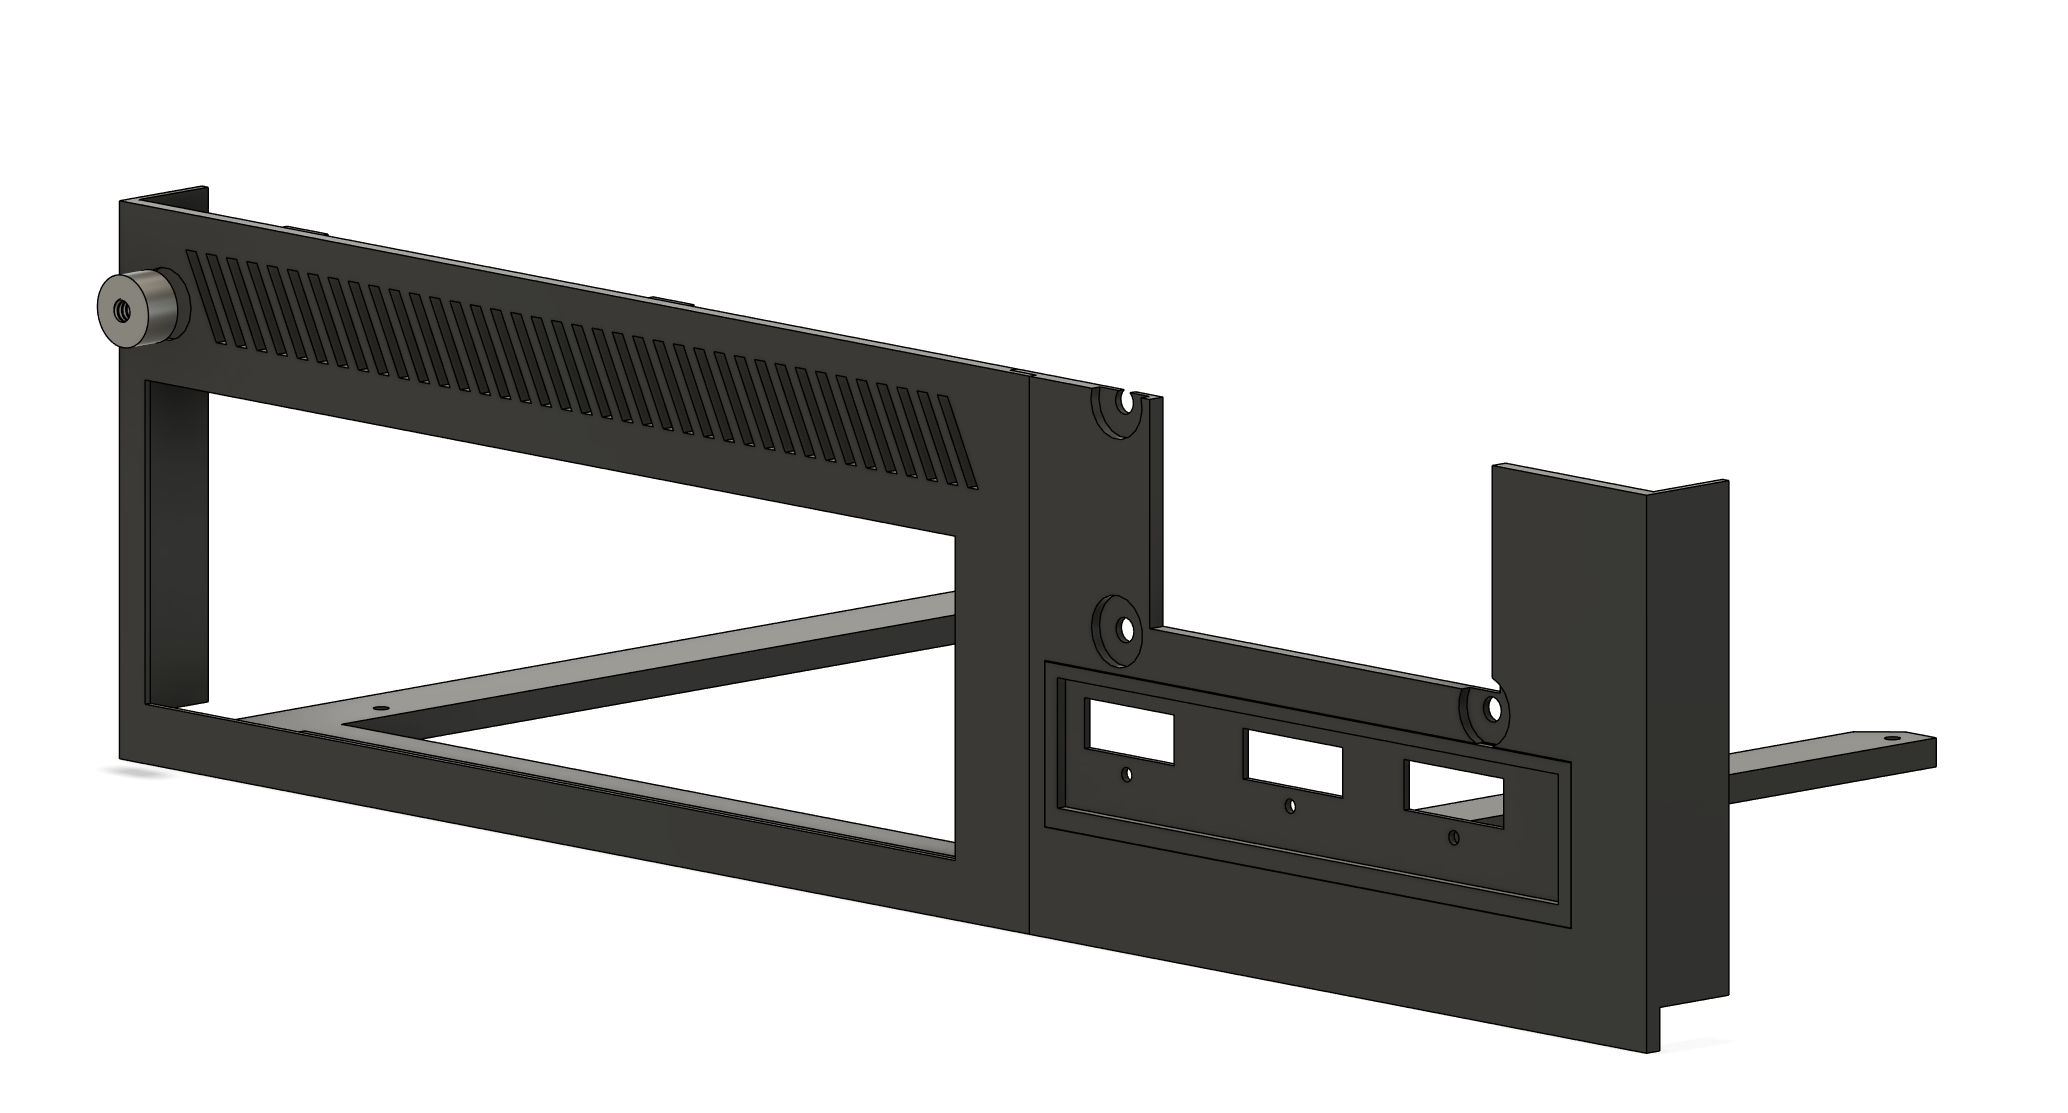
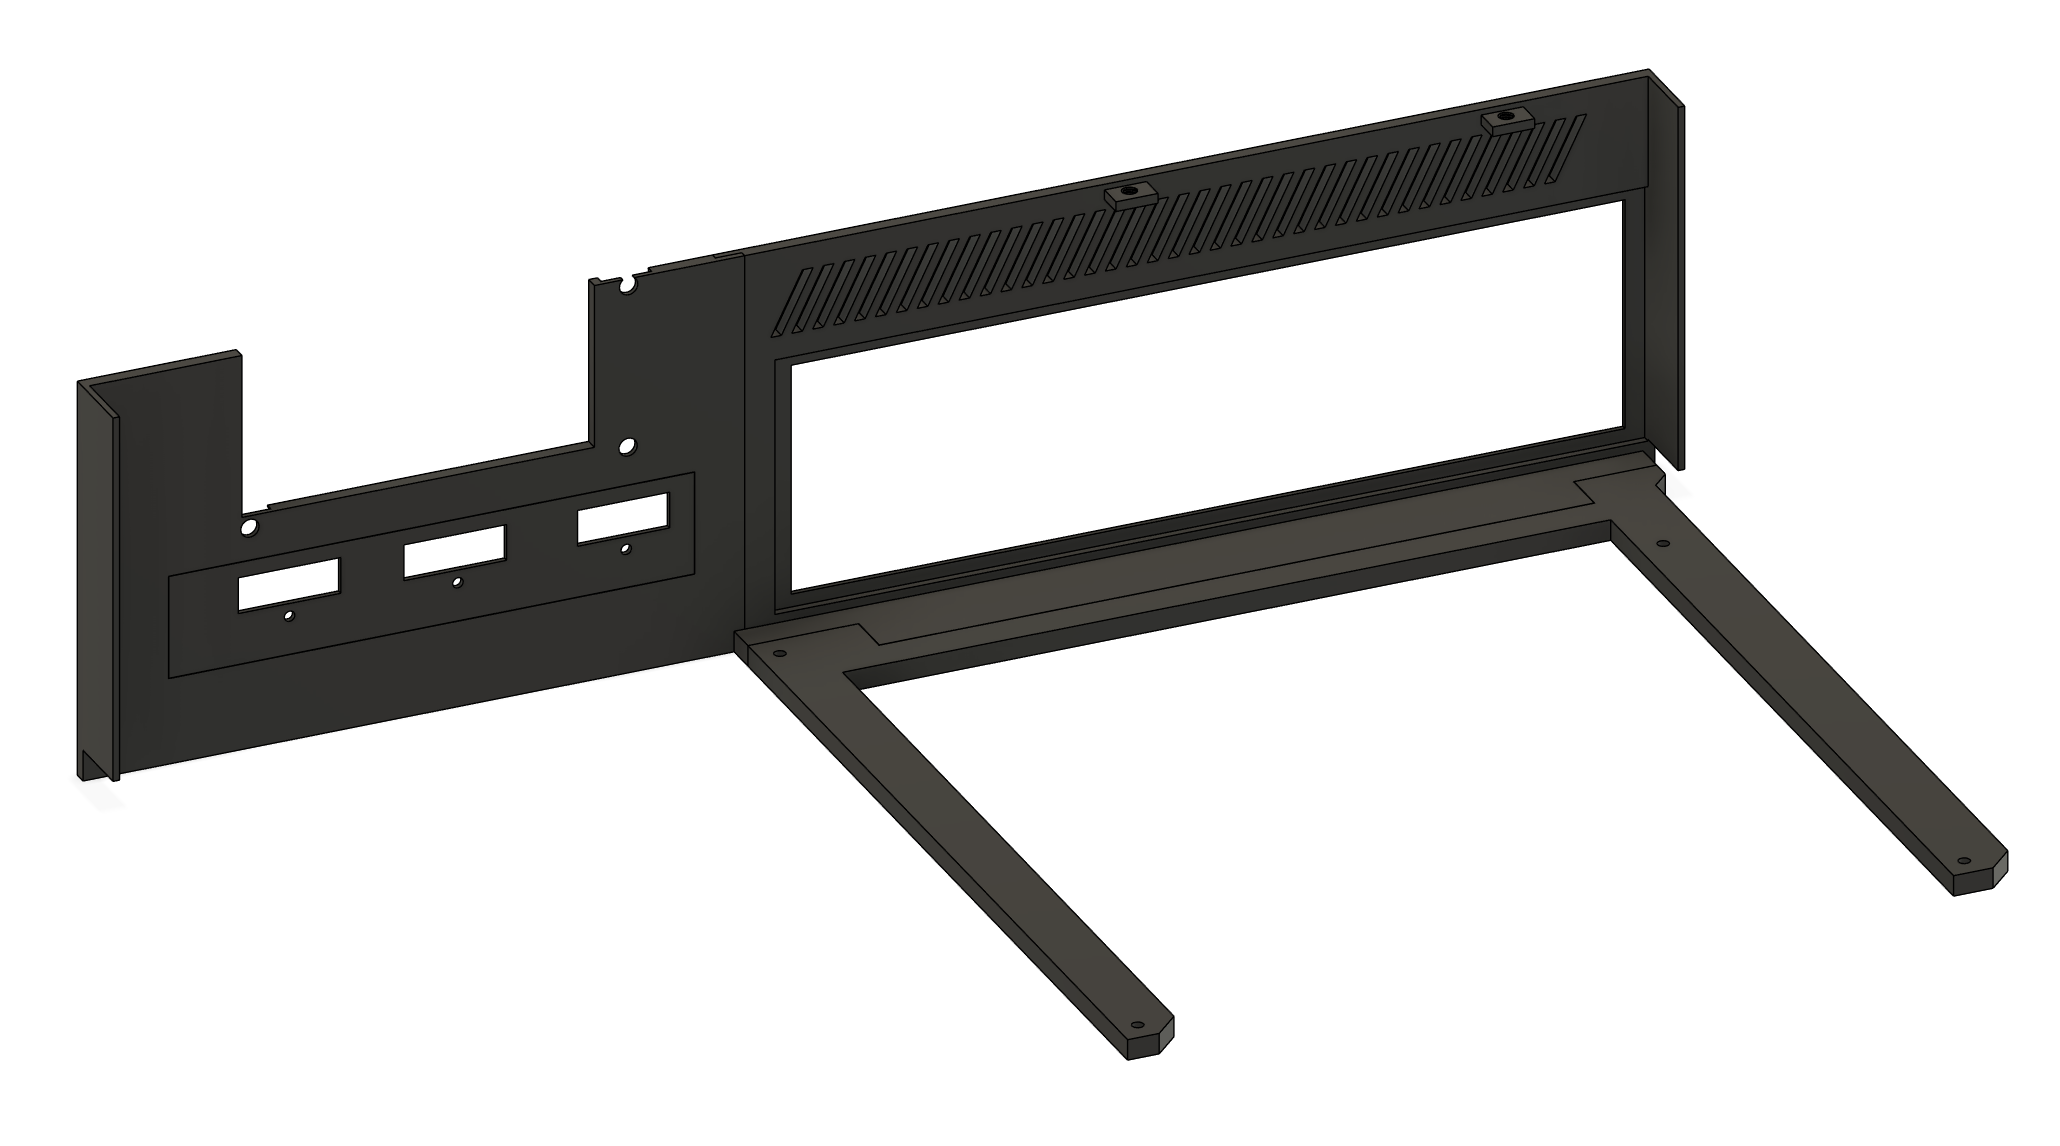
The 3D-printed “conversion kit” includes four pieces which are glued together and then glued to the chassis.
The right half of the frame supports the motherboard. Just like my other PC case designs, this one has four holes around its “U” shaped body that correspond to standoffs for anchoring a Mini-ITX motherboard. These standoffs should be inset with a soldering iron, allowing their threads to grip into the plastic.
Above the I/O shield is a small vented area that provides some exhaust for the CPU. In the 3rd photograph, the duct that I experimented with for the CPU is visible, being able to be mounted with M3 screws.
The left portion of the frame is for the GPU and TFX PSU stack. Stacking these components was something that I was a little doubtful about (thermally and structurally), but it actually worked out fine in the end. Both the left and right sides have extruded flaps that are glued onto the side of the chassis, meaning that the frame is fully secured into the chassis from all 3 sides.
Earlier, I mentioned how I needed to find an alternative way to bind the upper and lower shell together in the back-right corner near the motherboard, as I had needed to remove an integral screw post. My solution to this issue was the thread you can see in the first picture. This thread is printed as a seperate object and then glued into the corresponding recessed circle on the right part of the frame. It then allows for a large chassis screw to be inserted through the back of the top shell into the frame.
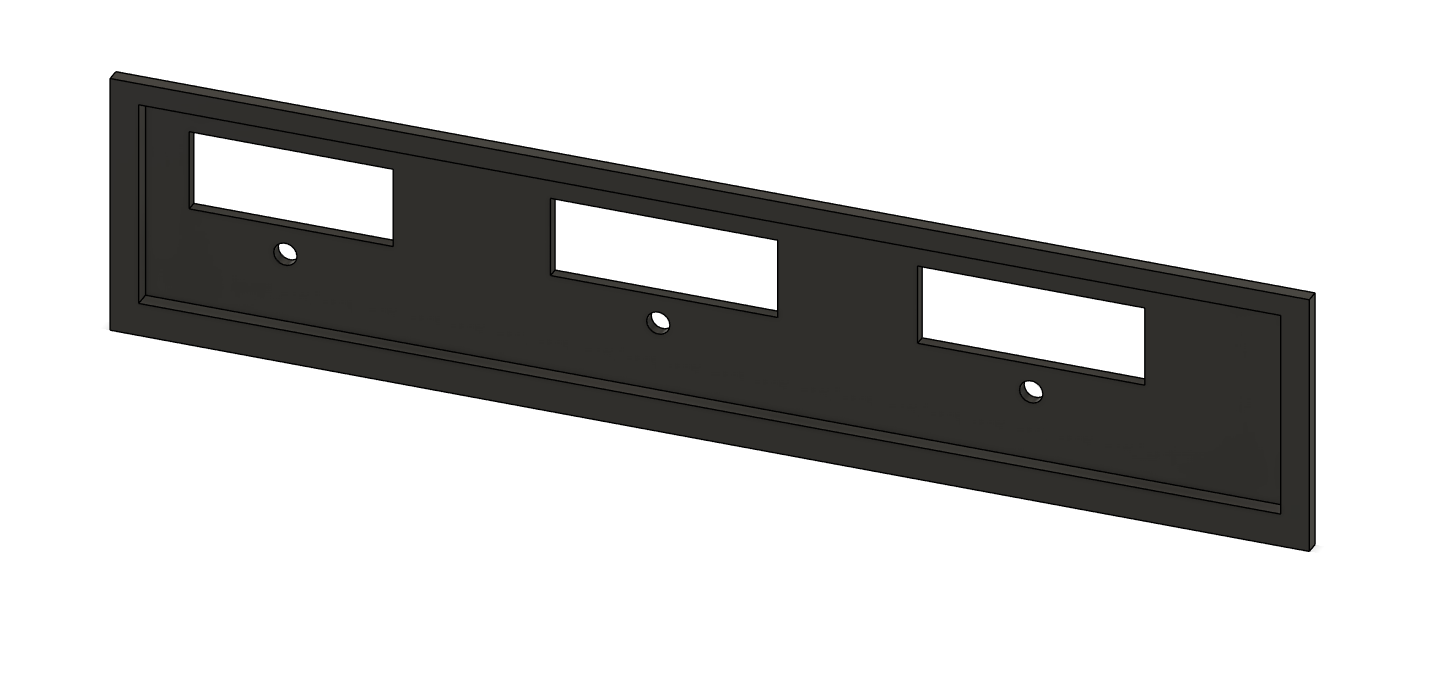
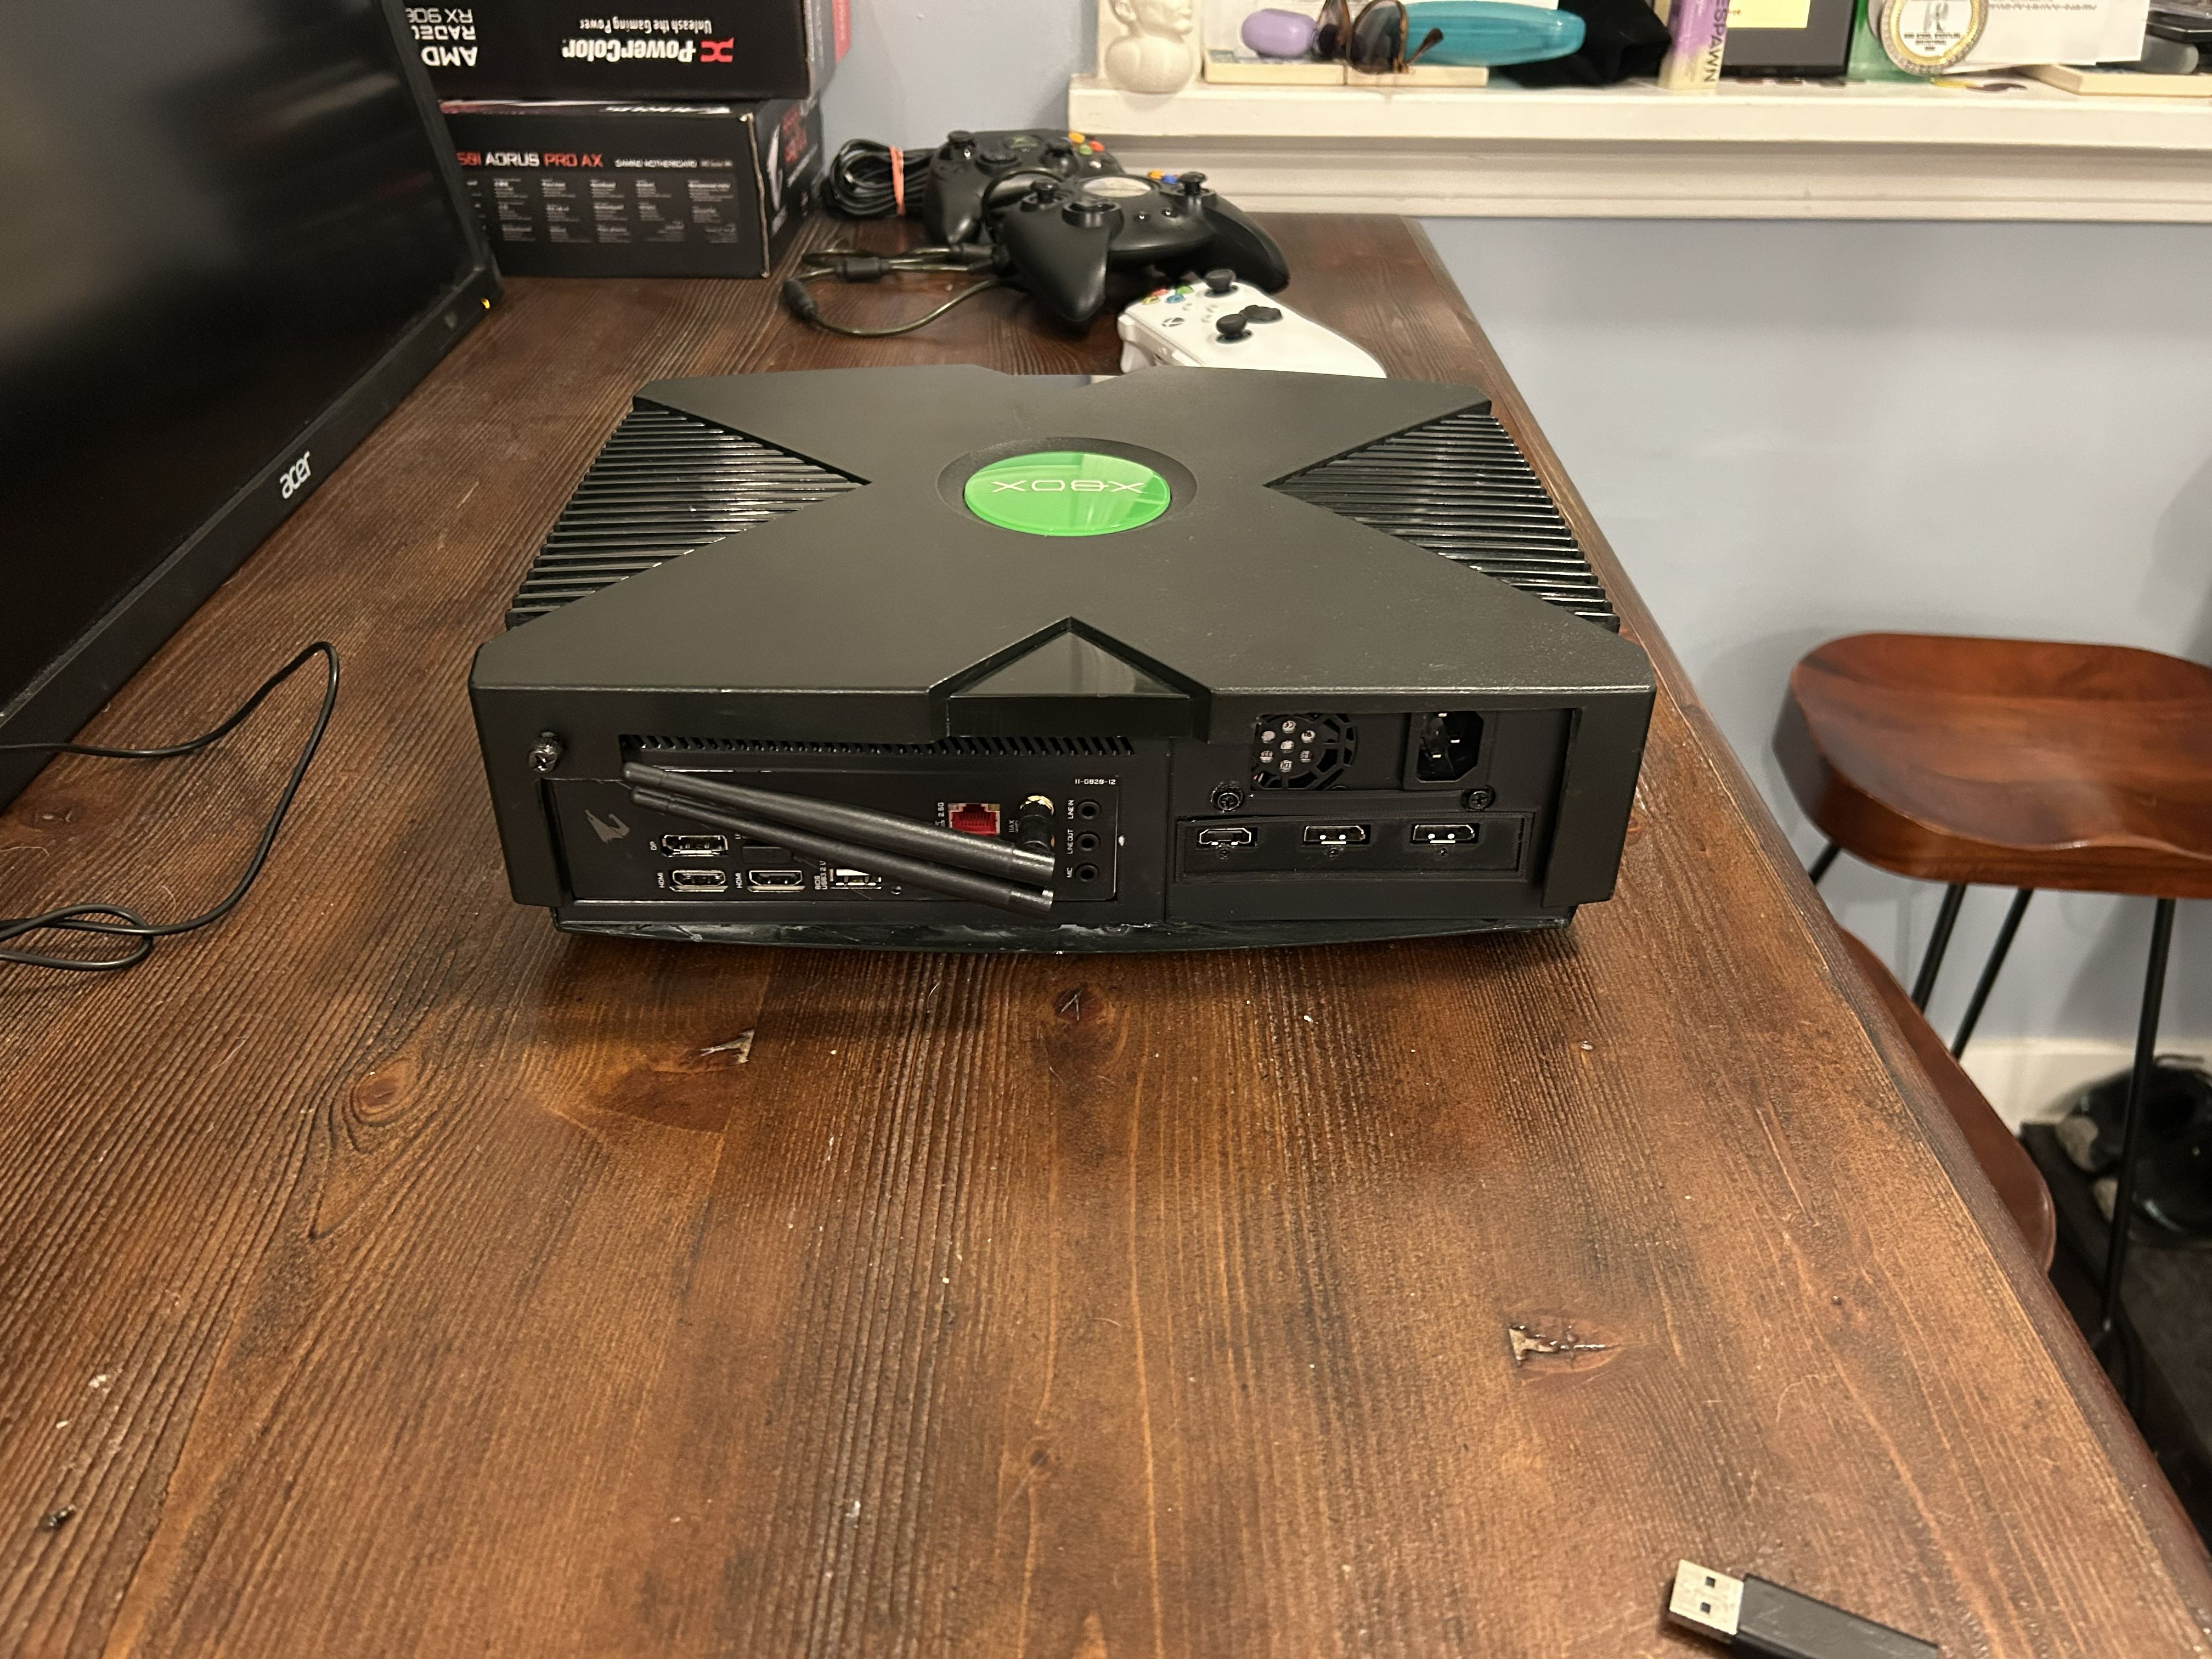
If you wind up reading this and making your own Xbox PC, you’ll likely need to design your own GPU I/O plate (unless you use the Reaper 9060 XT like me). The plate is basically just a 103x23mm piece of plastic that fits around the GPU’s ports and is anchored in via the GPU’s shield screws. With a caliper and 30 minutes of trial and error, you can easily crank one out in CAD.
Front I/O and Controller Ports
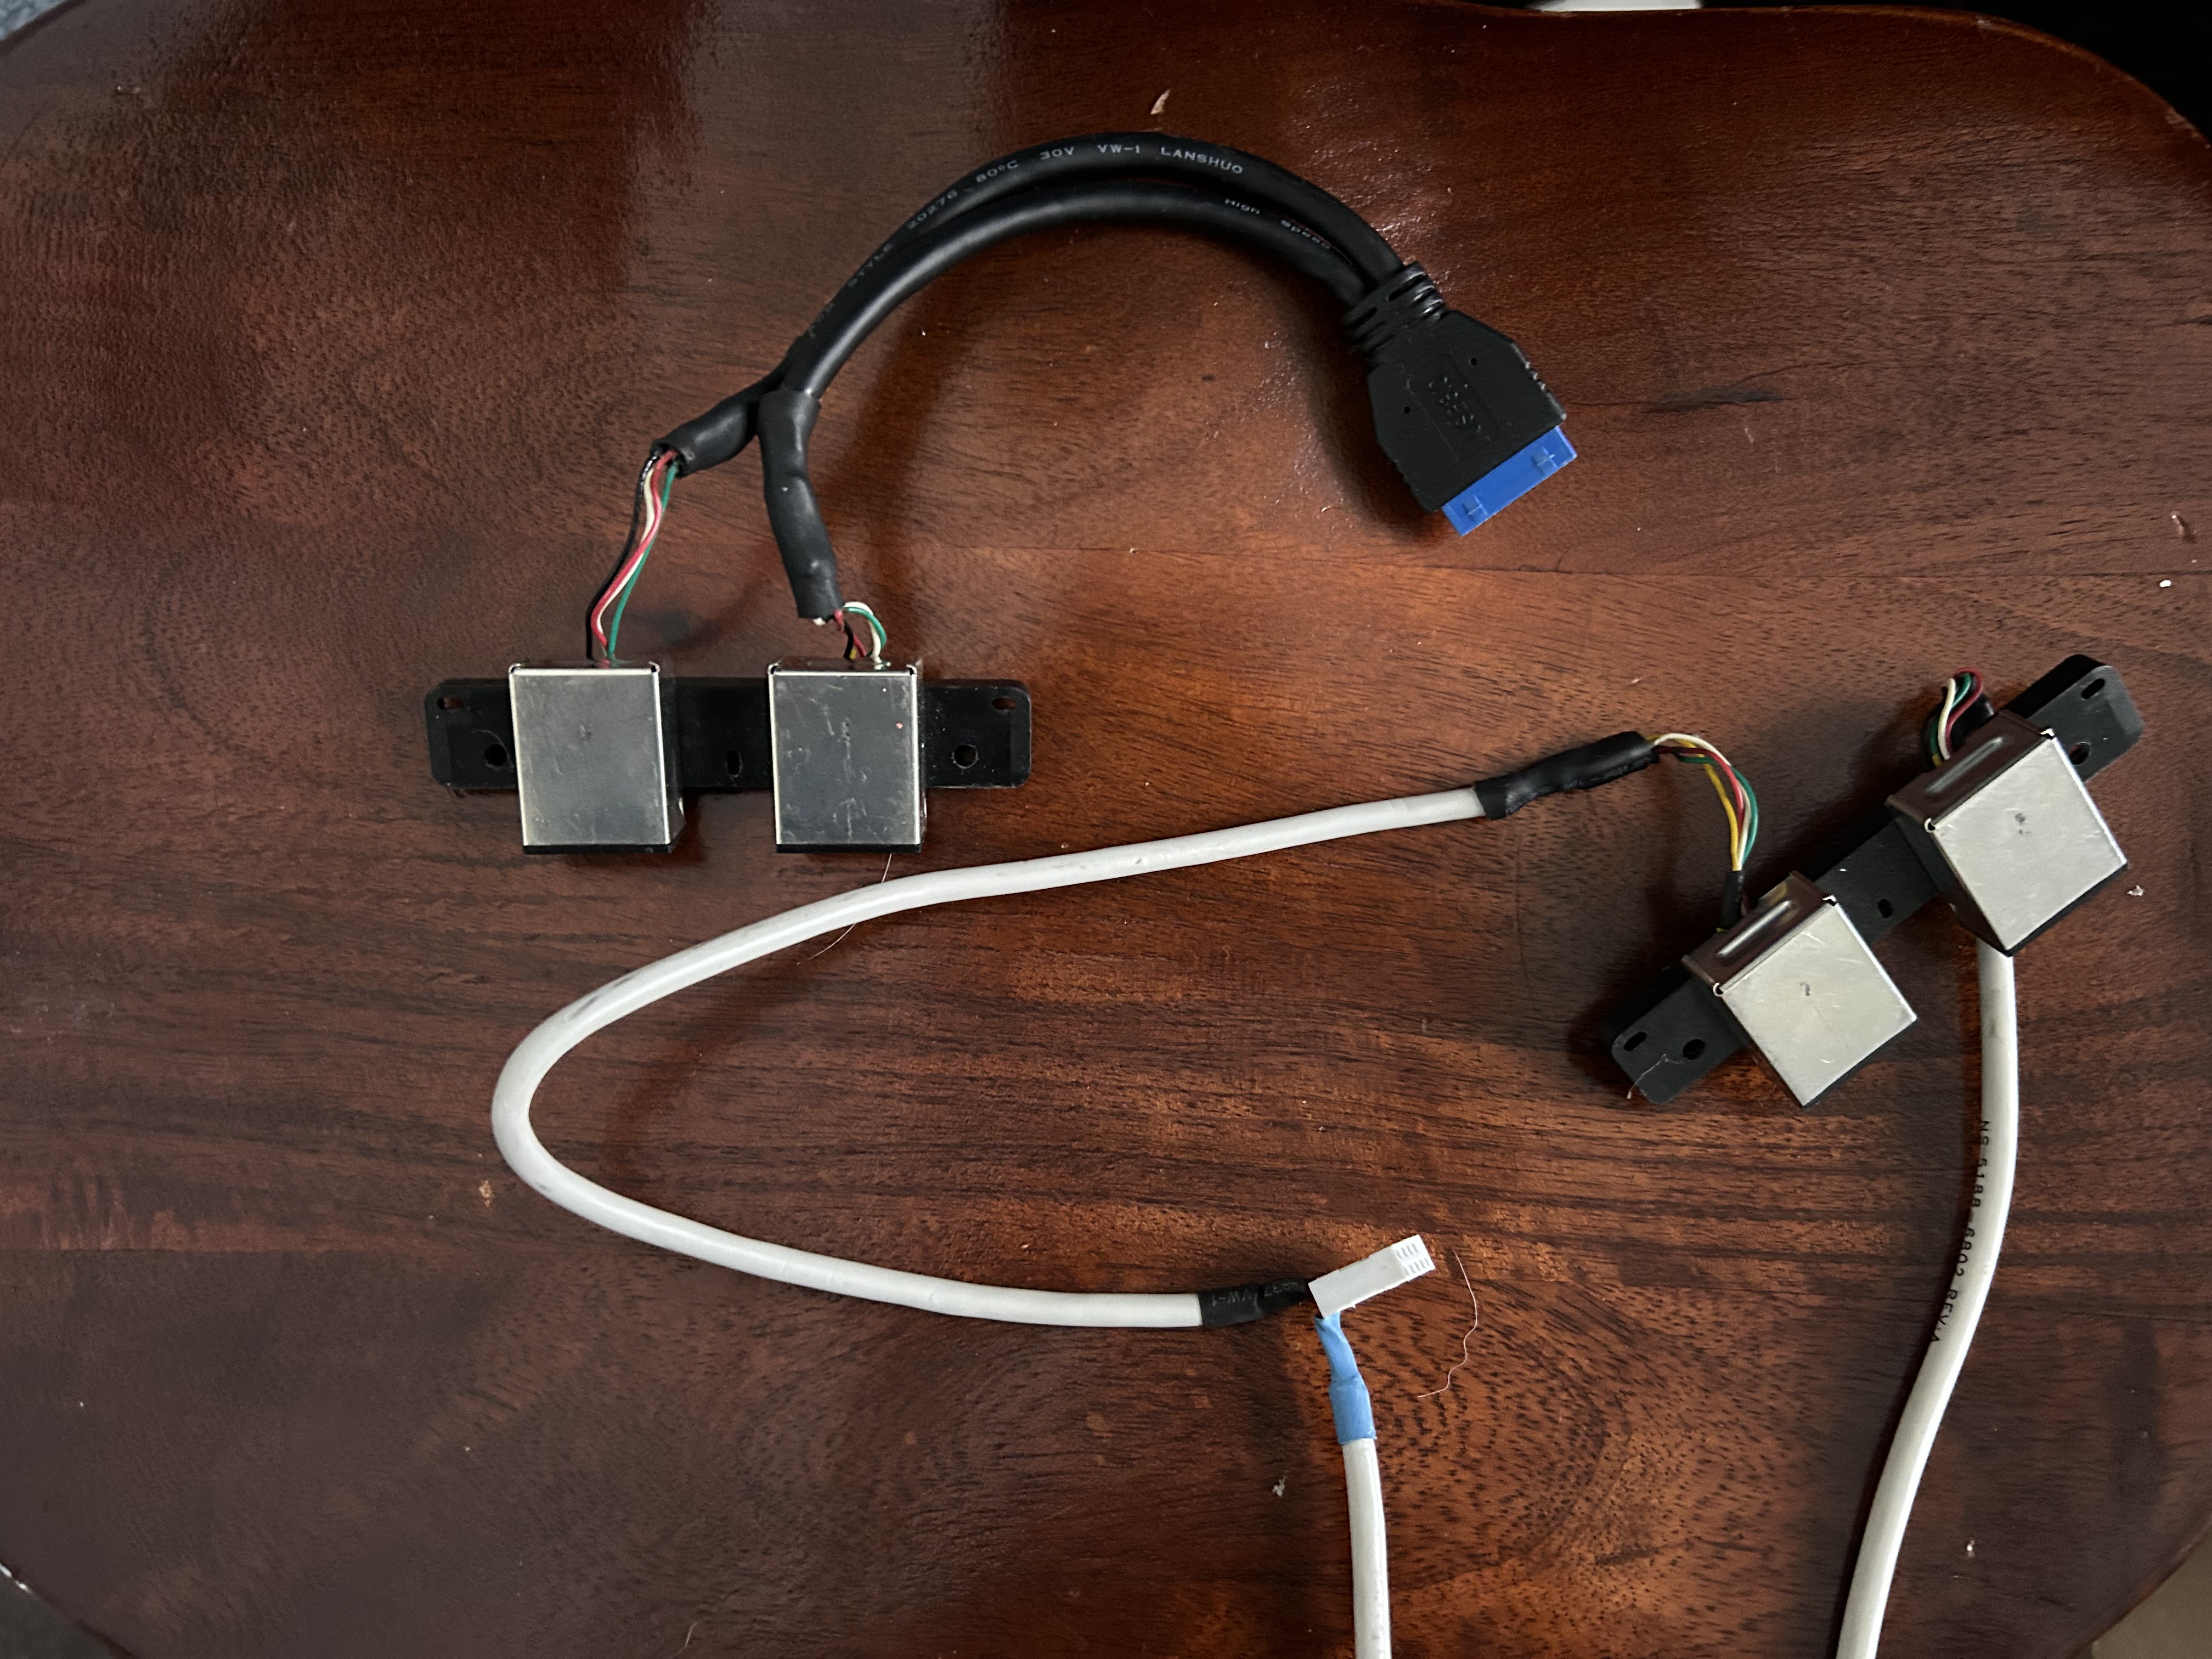
Modifying the Xbox’s stock controller ports for use with PC USB headers is extremely easy. An Xbox controller port carries 5 signals: 4 for what is essentially USB 2.0 (although the controllers themselves use a specialized protocol) + a composite video signal. All I did was cut the video signal and solder the four wires to an internal USB 2.0 cable. I had to modify the other two ports with an internal 3.0 cable, due to the limitations of my motherboard (only one header for each).
Modifying the front panel I/O was a bit more complex.
The green/orange ring around the eject button that shows the system status is actually composed of two LEDs, one for the right side of the ring and one for the left. These have both a green and orange diode inside. I hooked up both green LEDs in parallel to female dupont wires that were glued together, creating a female header that could be attached to the power LED header on the motherboard.
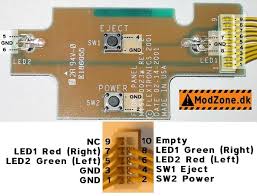
The buttons were the hard part. I tried connecting the pins labeled for the power and eject buttons directly to the motherboard, but this resulted in inconsistent starting behavior. To fix this, I tried cutting any traces around the buttons and then soldering to the buttons themselves: no luck. The only solution I could find was desoldering the buttons, gluing new ones into their place, and soldering wires to those, effectively bypassing the board entirely.
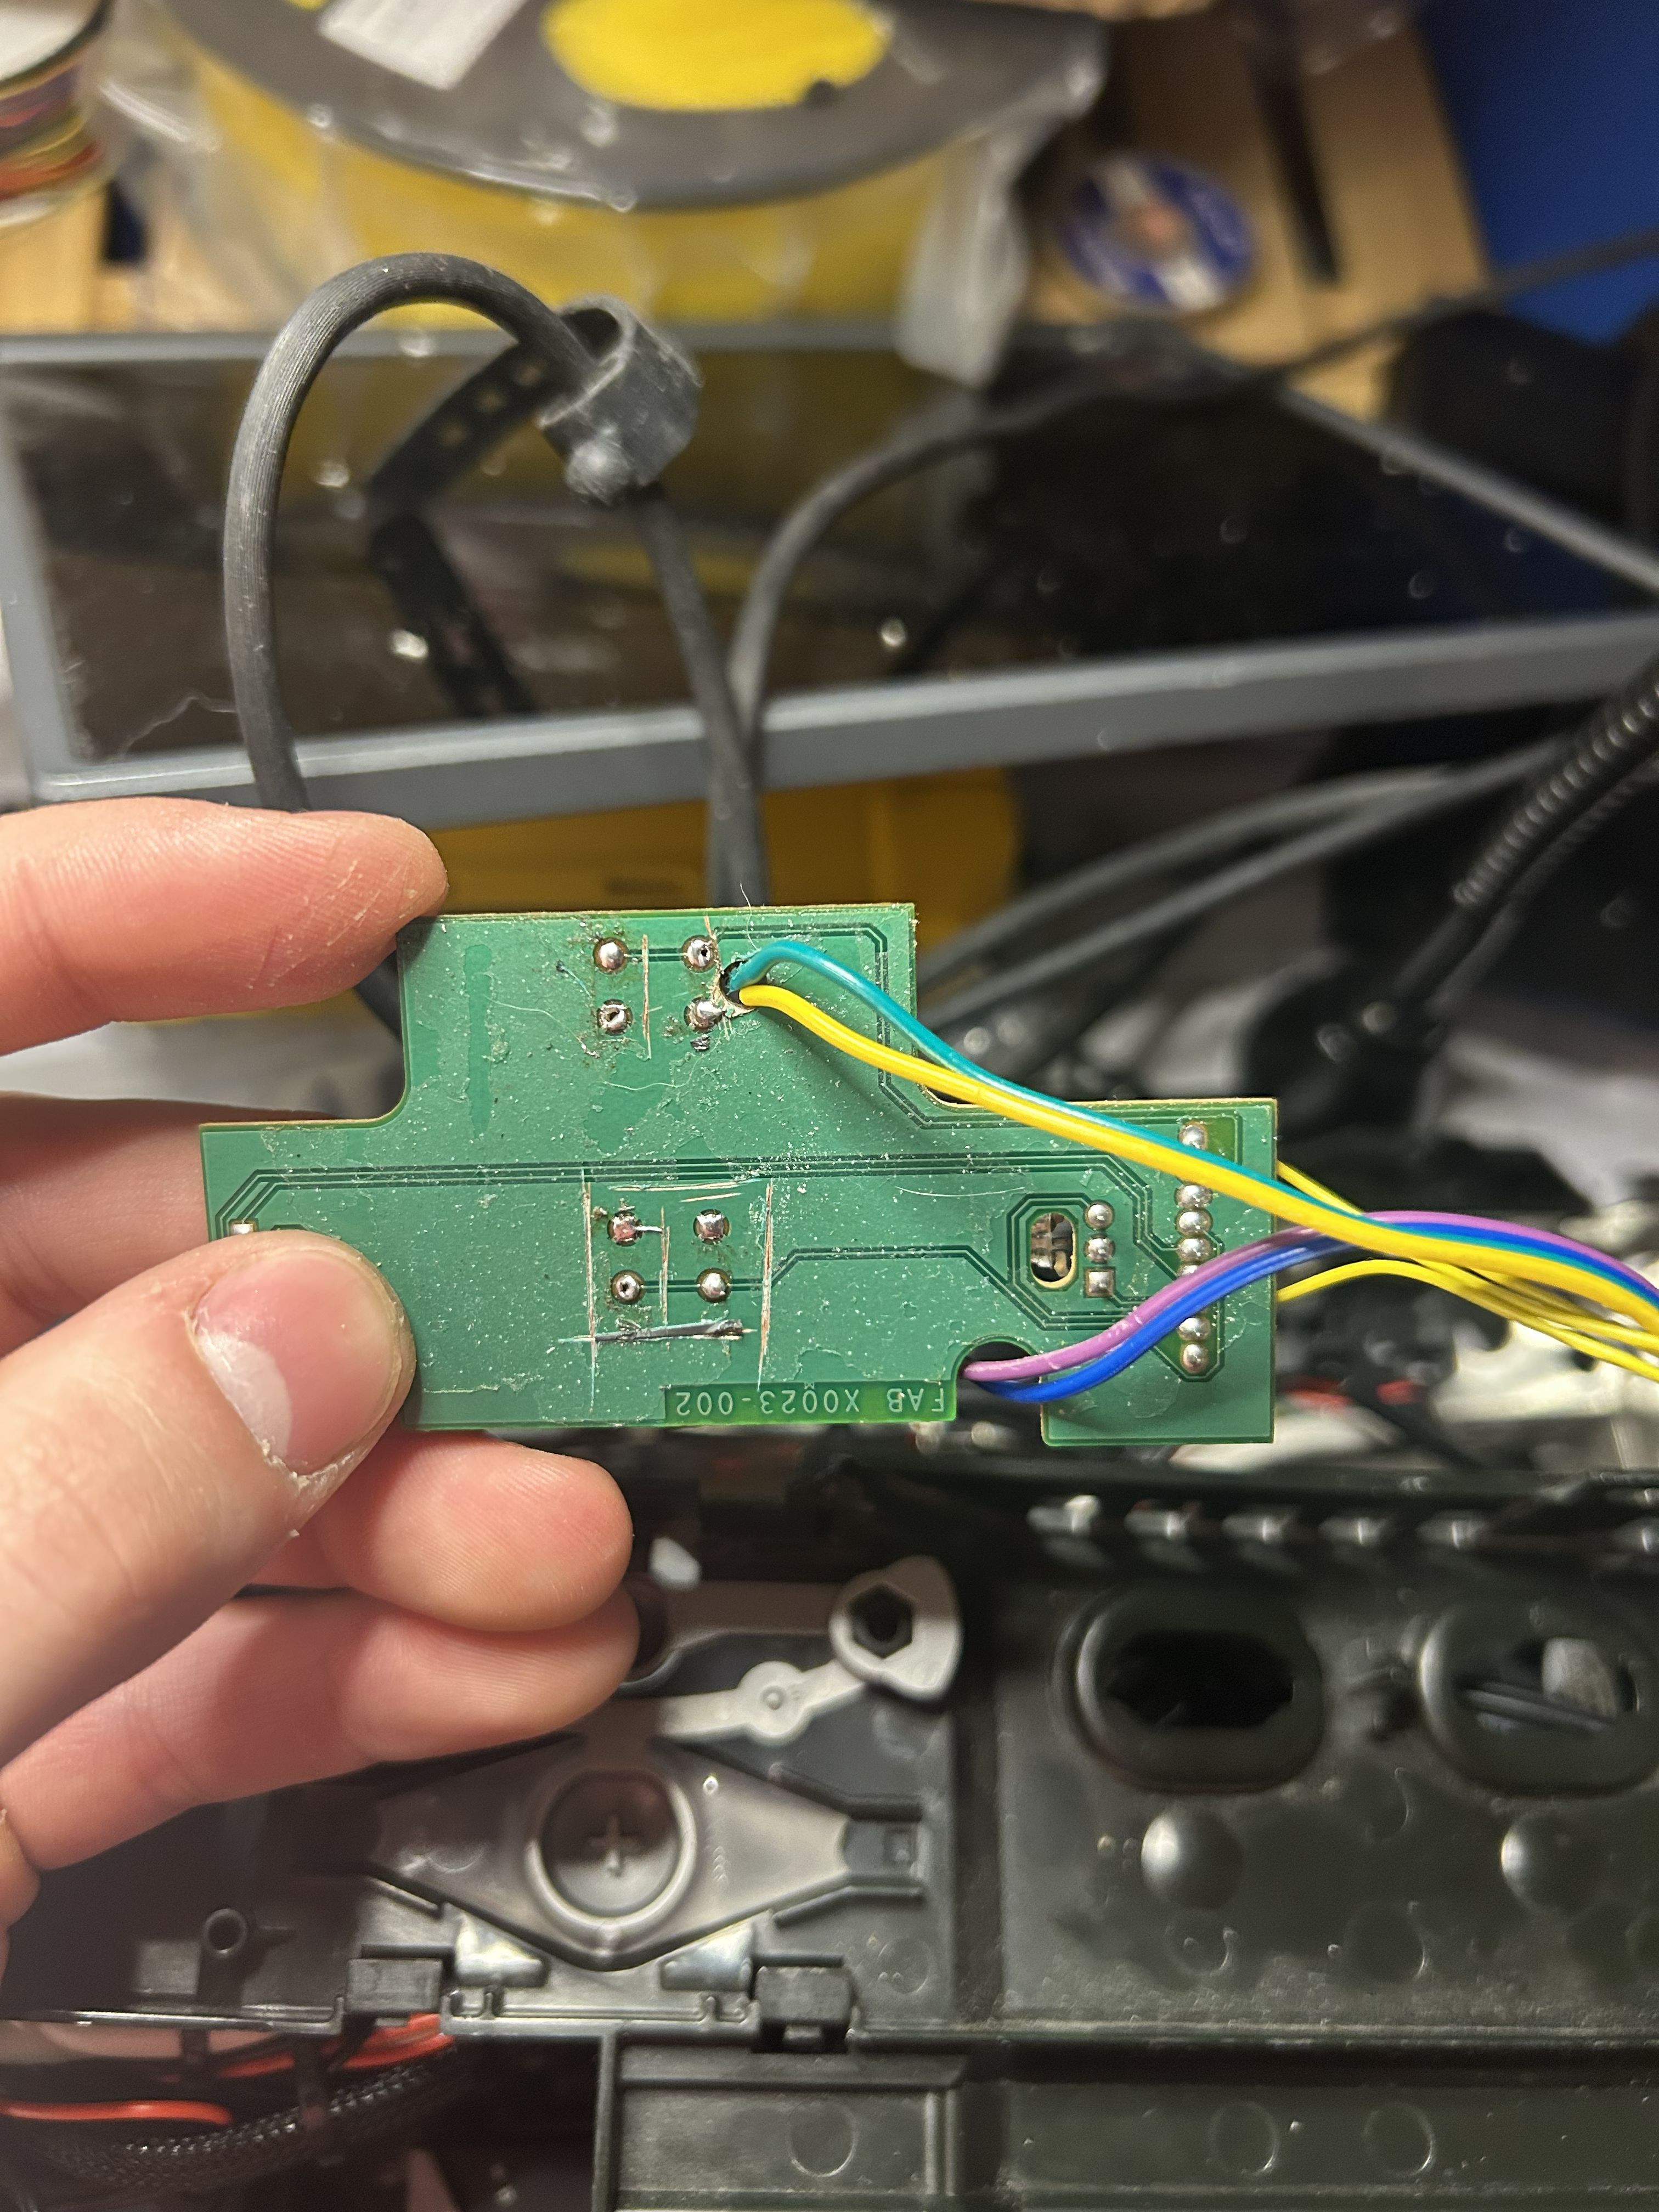
Super janky, but it works.
Feet Extenders
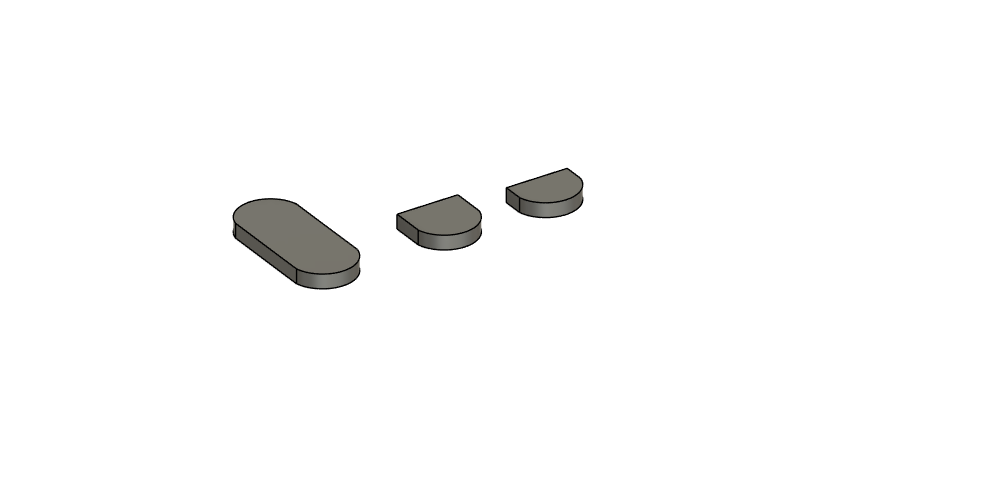
The Xbox’s original rubber feet raise it a few millimeters, but, for the sake of the GPU, I wanted more. So, I made some extenders that could raise the Xbox up by an extra 3.5mm, giving the GPU even more room to blow out its hot air. I applied some craft adhesive to stick the original rubber feet to my extensions, and then the extensions to the console.
Assembly and Configuration
With the CAD finalized, I printed everything with black SUNLU PETG at 100% infill and glued everything together. From there, I glued the 3D-printed frame into the metal chassis and inset the standoffs with my soldering iron. I used the same M3 standoffs as in the Herringbone project. Finally, I glued the DVD drive cover into place on the shell.
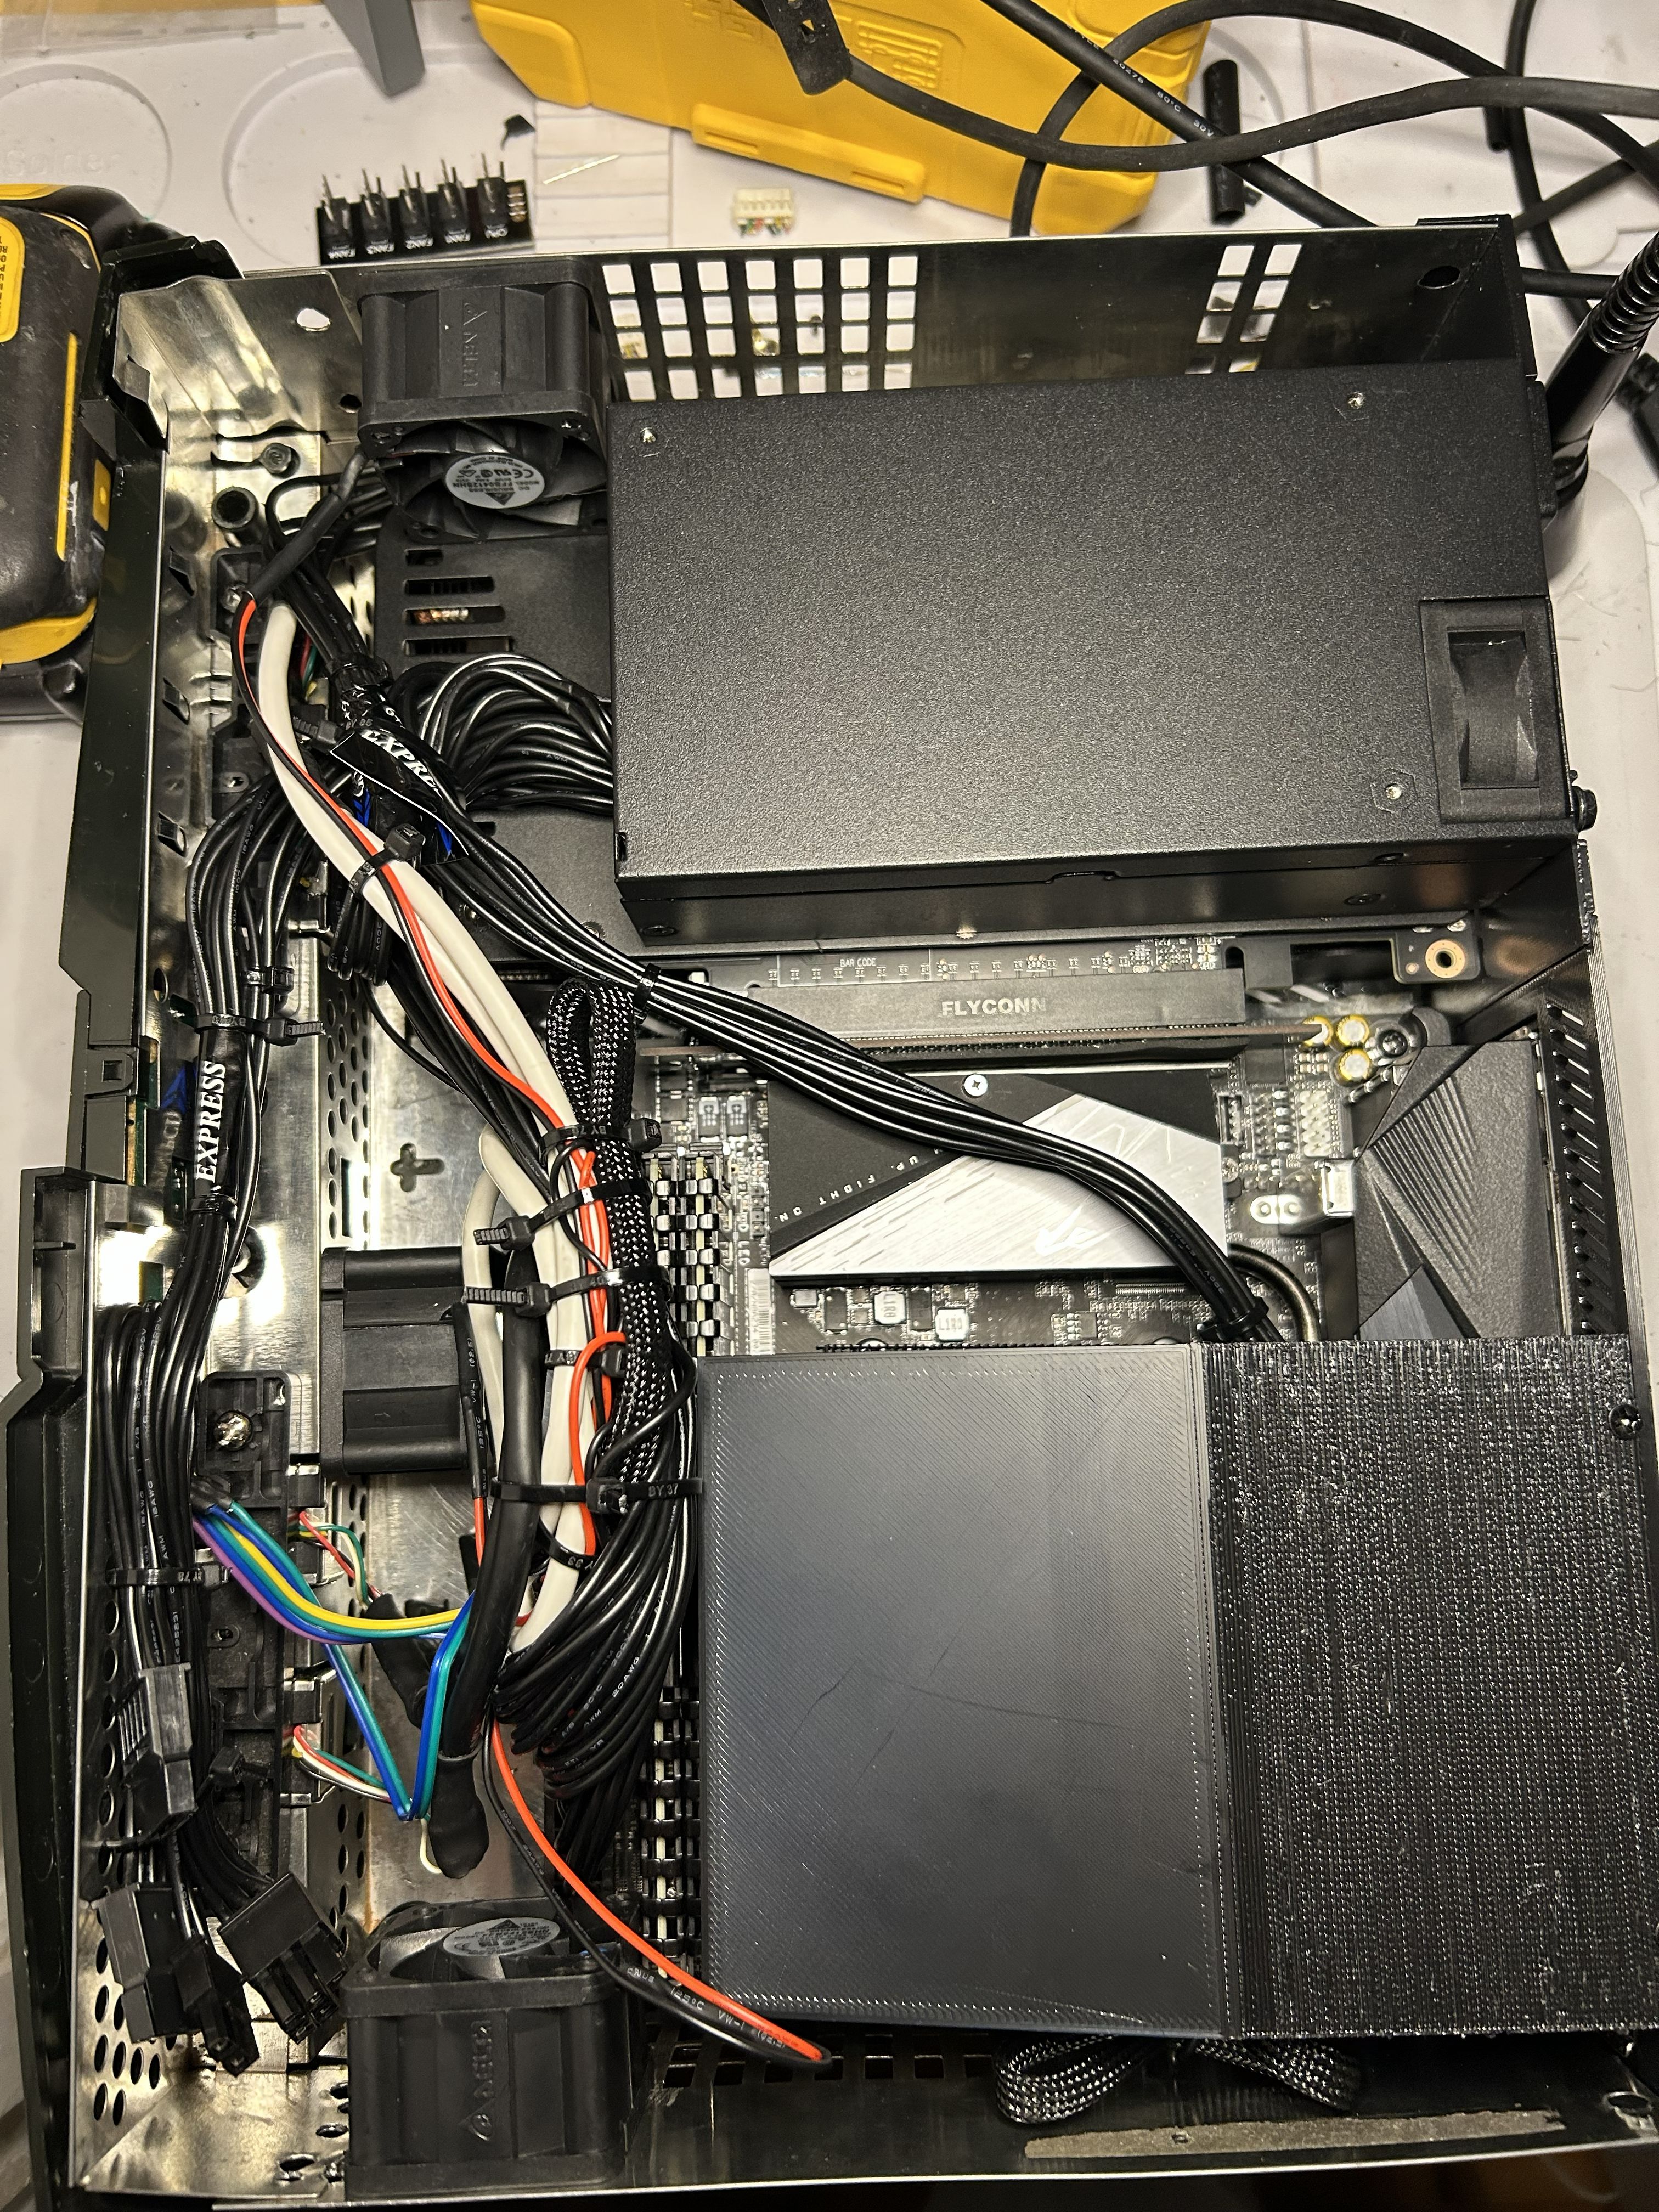
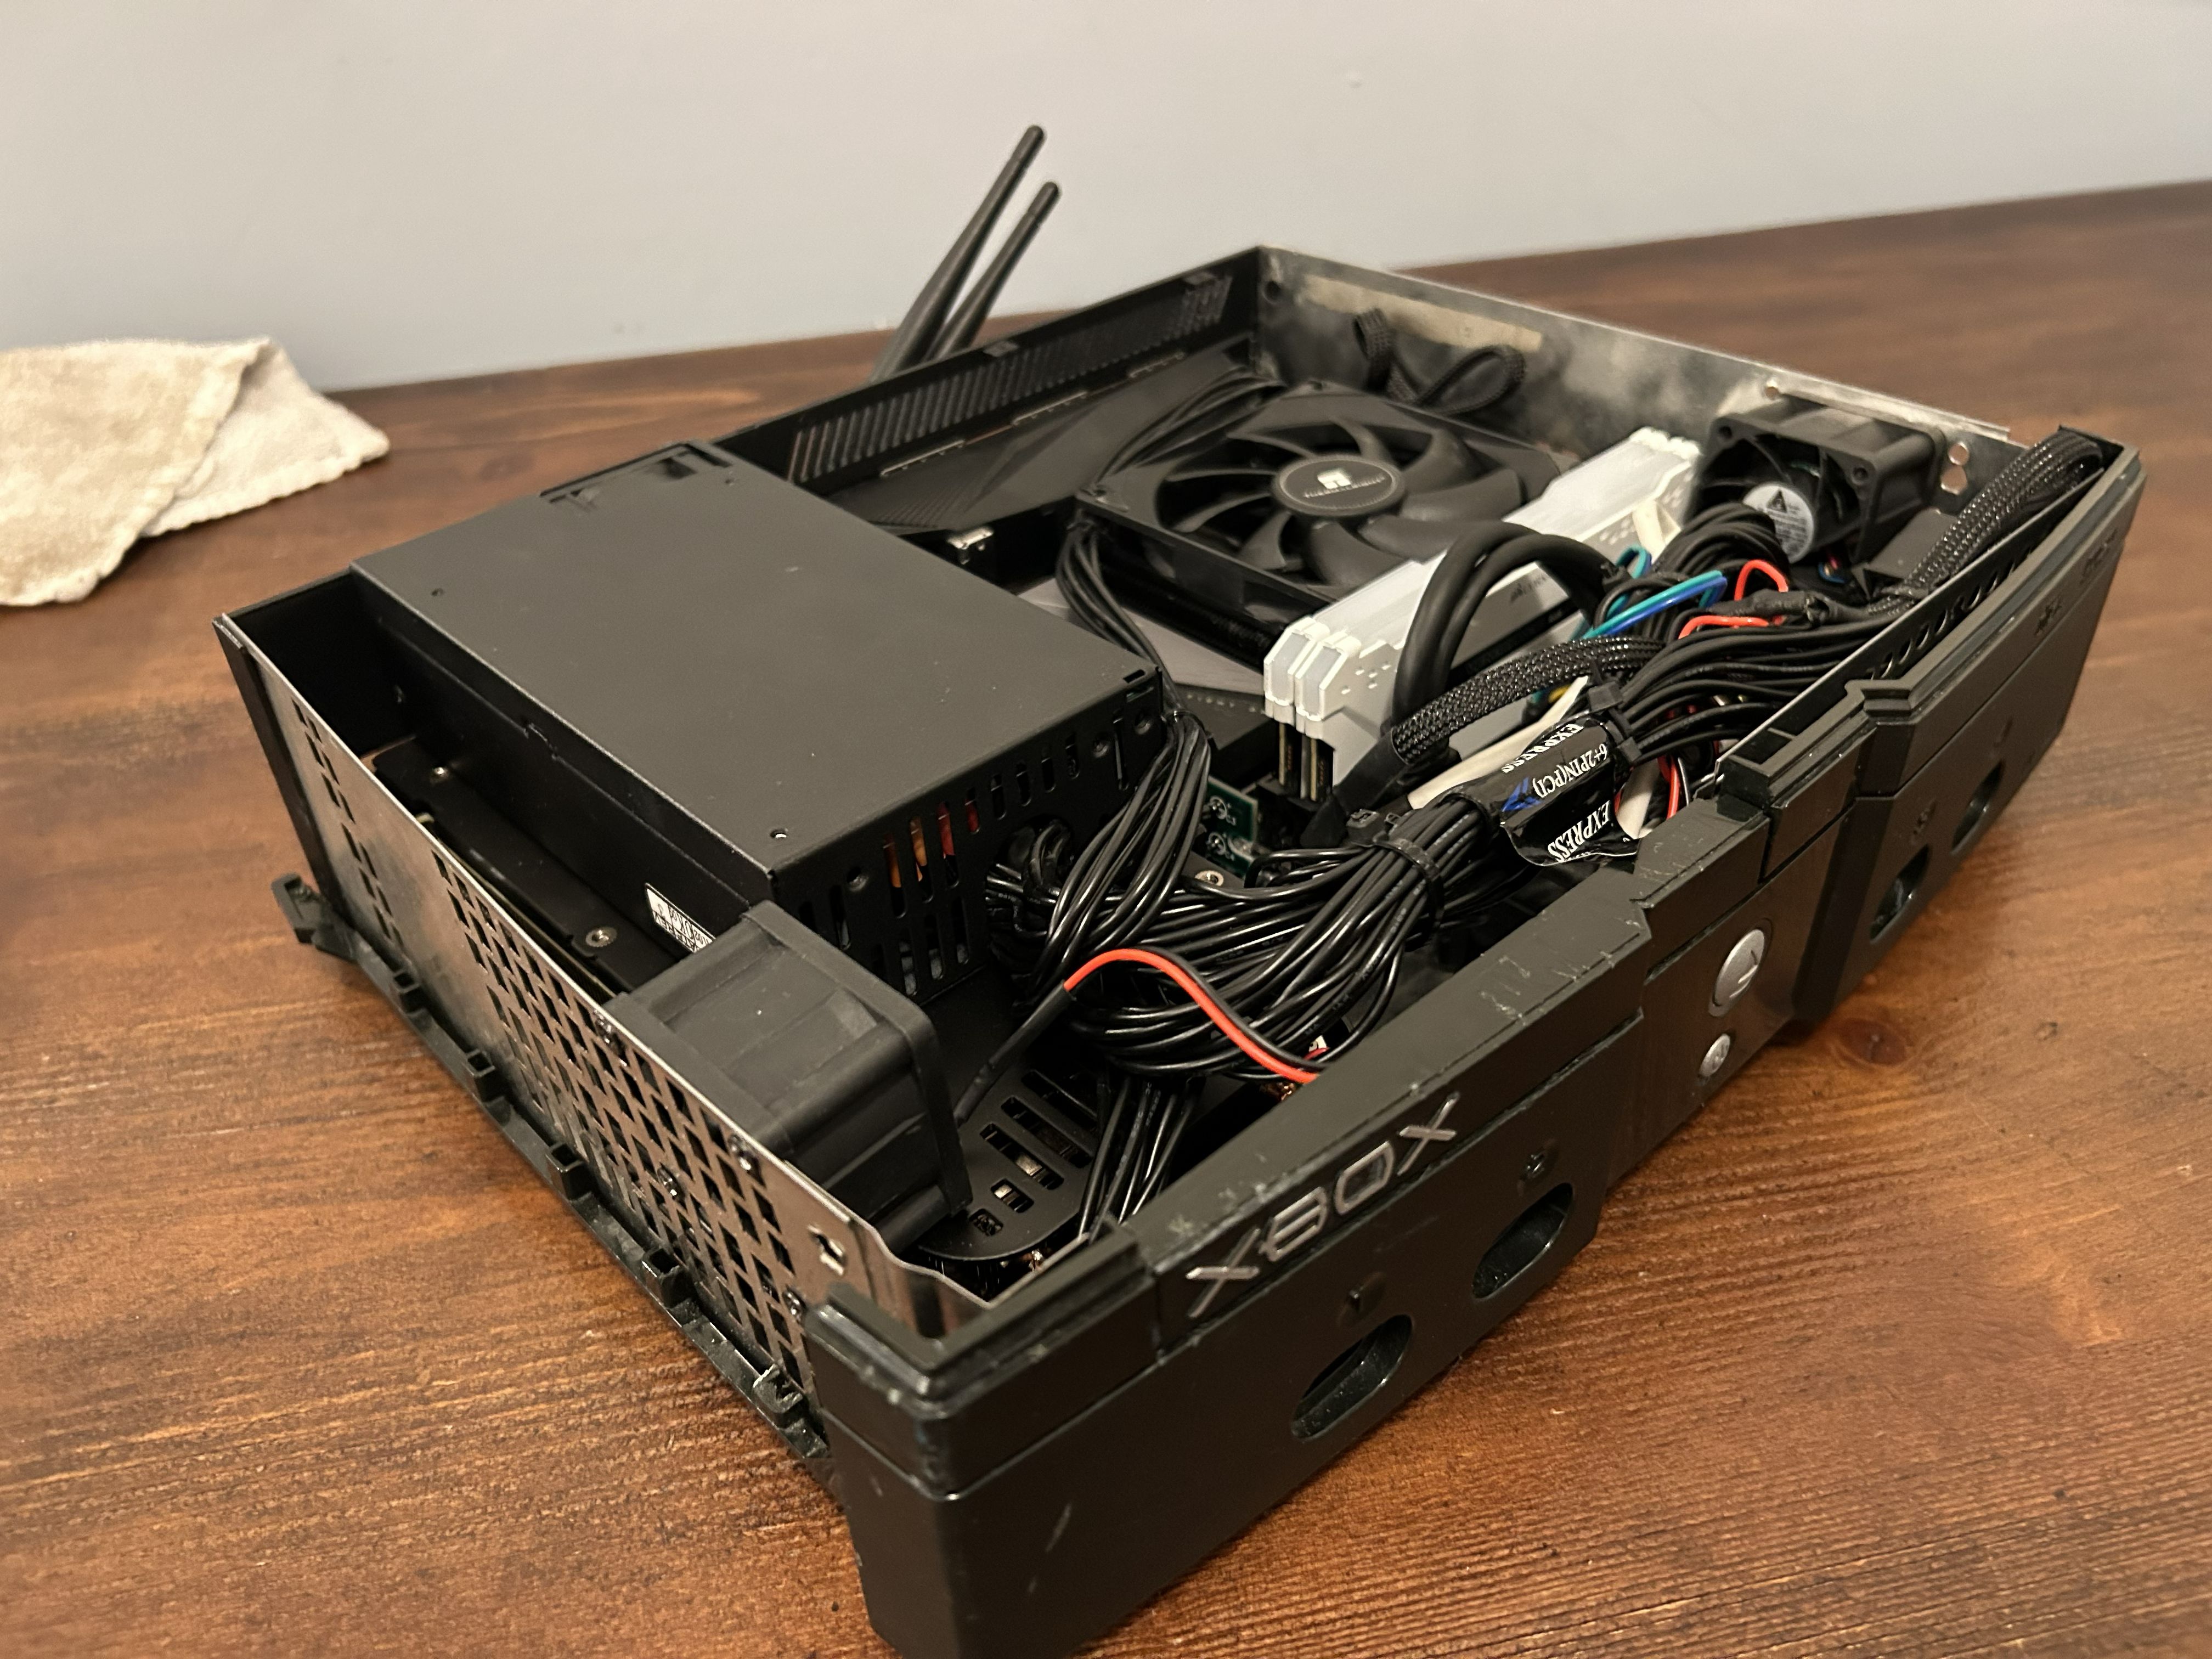
With this, the conversion was complete. I installed all the components and tried my best to manage the cables with zip ties.
These were the initial internals, before I had upgraded anything:
After RAM Upgrade:

Initial Testing and Troubleshooting
I went with Windows for two reasons: HDMI 2.1 support and exclusive HTPC software. Linux is blocked from HDMI 2.1, meaning that it also lacks support for 4K@120Hz or VRR. Normally, this isn’t that big of a deal because DisplayPort supports both of those things and works on Linux just fine. However, my Samsung, like almost all modern smart TVs, does not have ANY DisplayPort, only HDMI. Furthermore, the software that I like to use, Playnite, currently does not support Linux, although it is planned. So, once Playnite makes the jump to Linux, I might try an active DisplayPort to HDMI 2.1 Adapter and Fedora or something. For now, I’m stuck with Win 11.
After installing Windows and RMAing the defective CPU I mentioned earlier, I ran into a new problem:
Ryzen 5000 Series CPUs tap out at 95 degrees Celsius, and I was hitting that regularly after light gaming.
I had managed to cram three 40mm server fans into the casing and, while they moved plenty of air at 100%, they were EXTREMELY LOUD. The noise on startup was insane.
Previously, when selecting my fans, I faced limited options. I narrowed it down to two: a three pack of Delta fans for $12 OR three Noctua fans for $45 total. Considering that there was no viable median between these two options, it’s not hard to see why I cheaped out. I also went with a cheap Thermaltake LP heatsink.
Fixing the Thermals
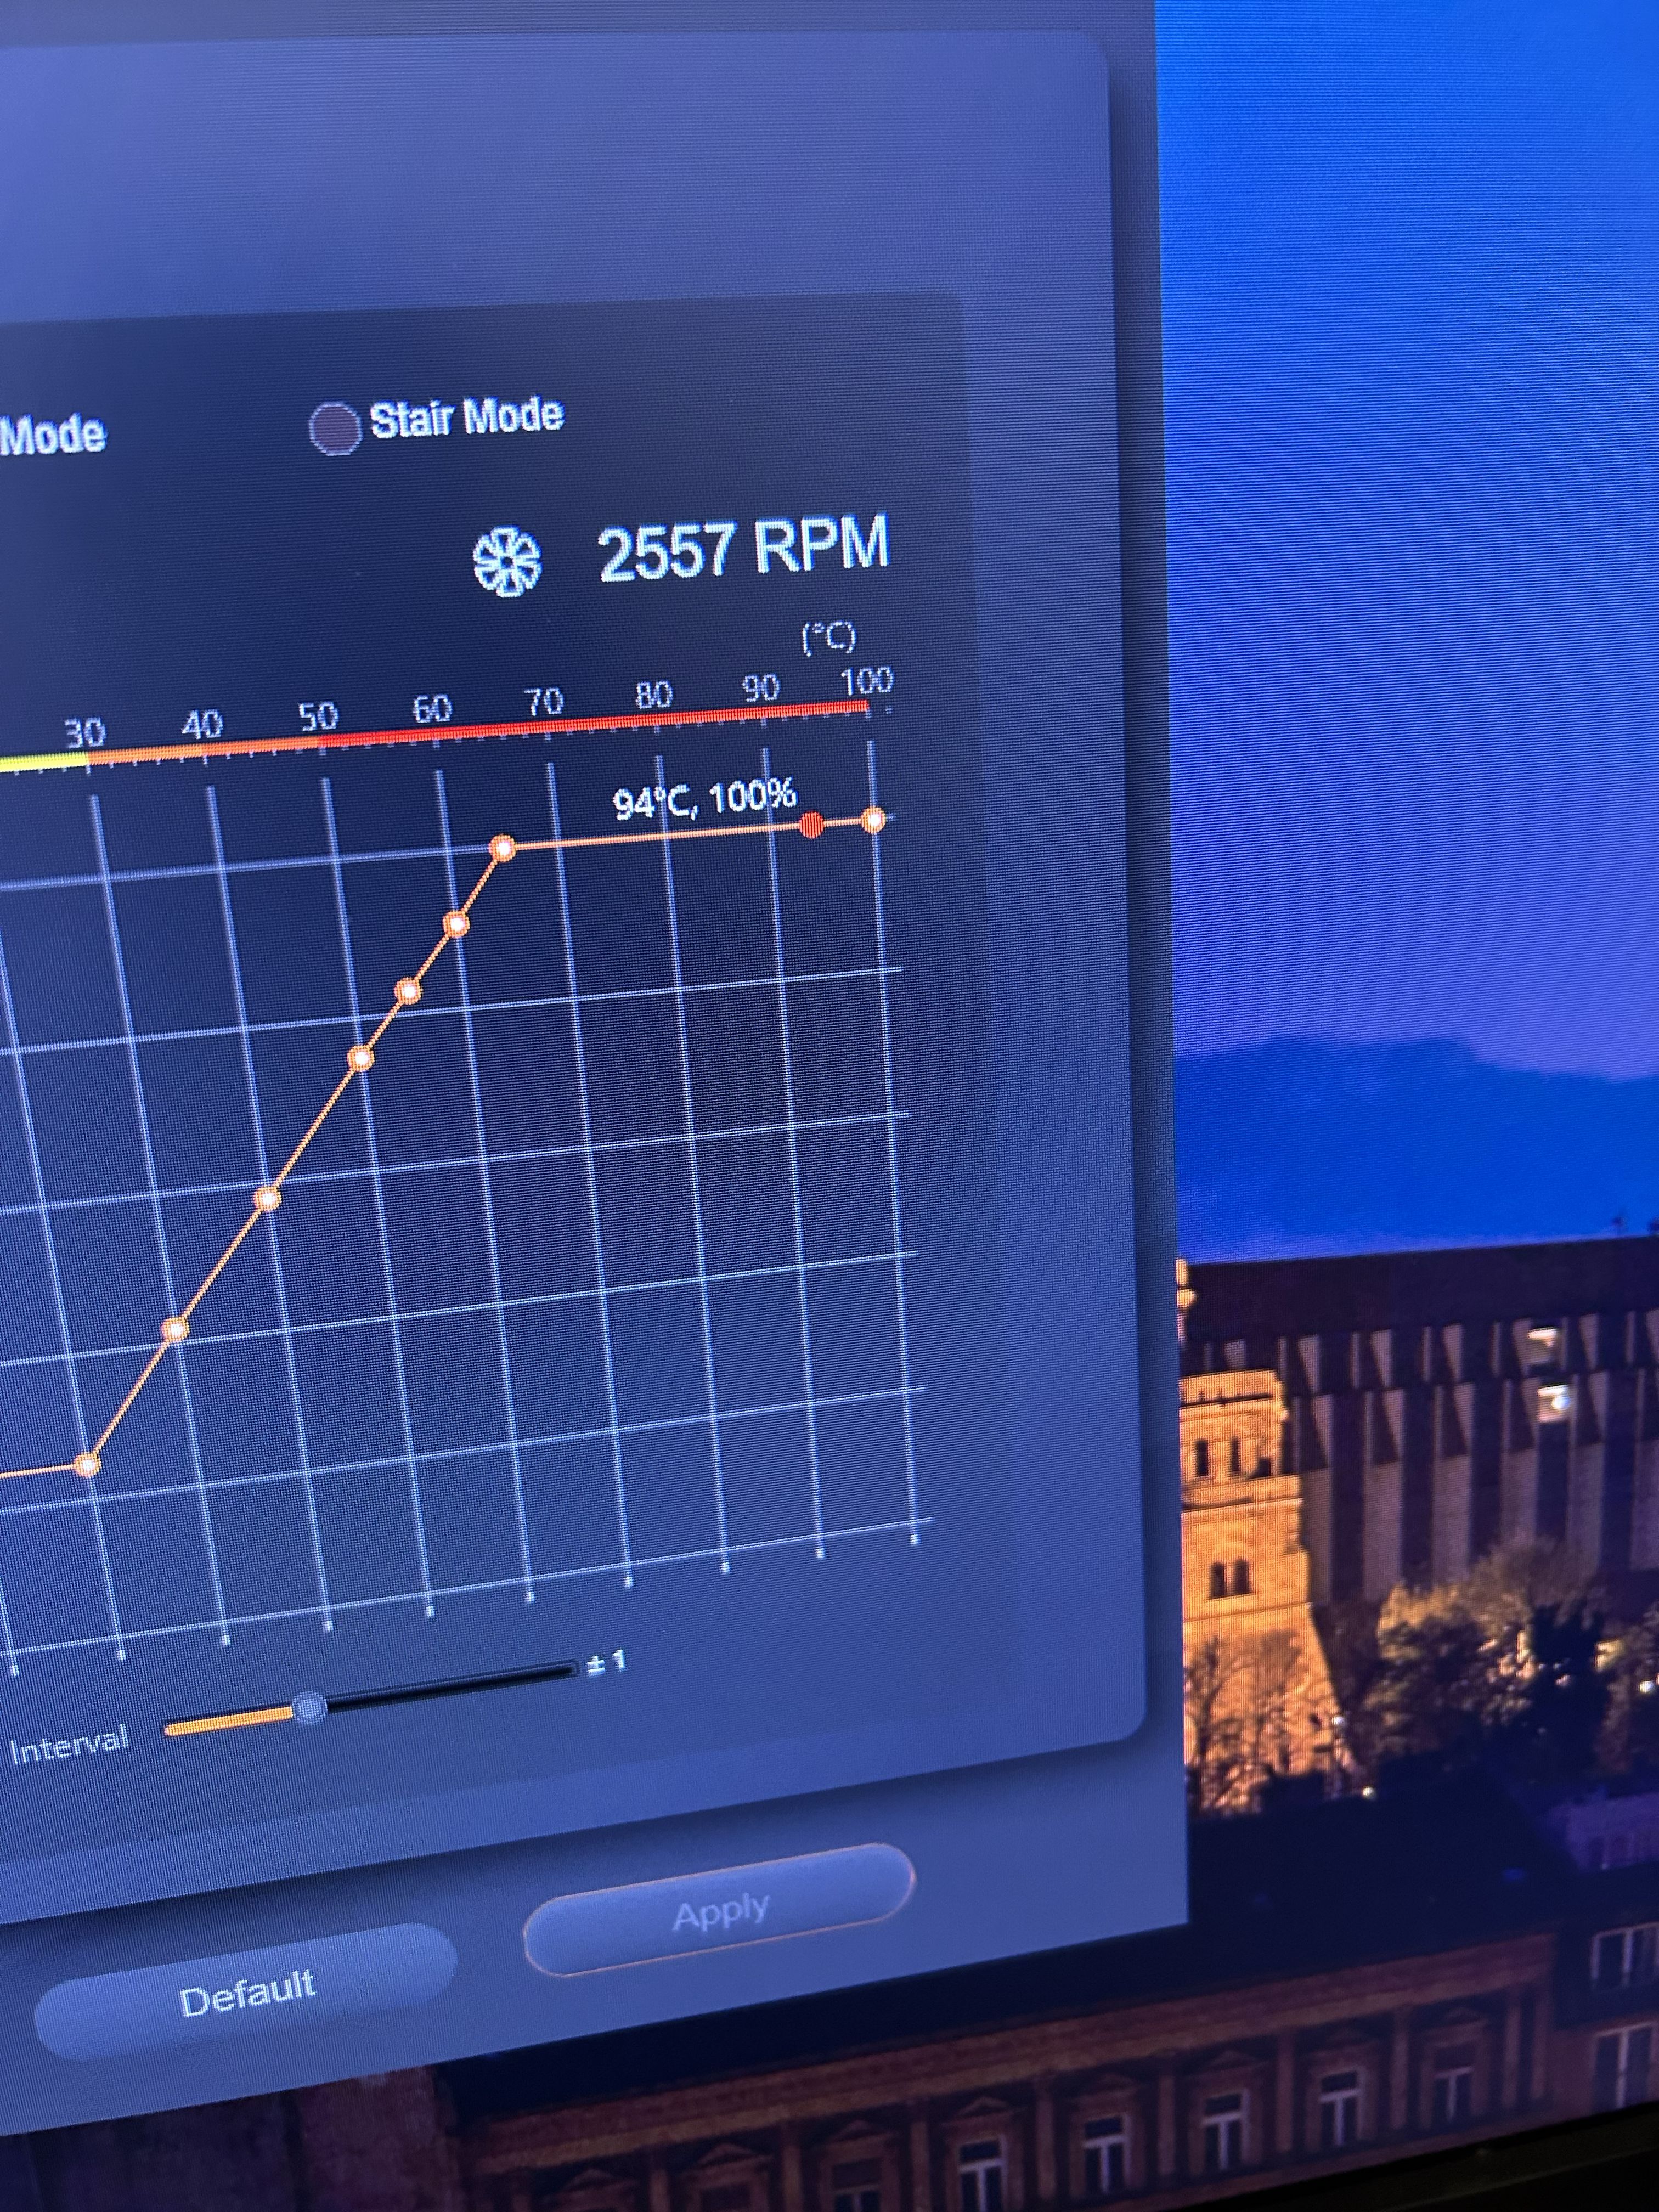
To fix the thermals, I first bit the bullet, ordering the three 40mm Noctua fans and a Be Quiet! Pure Rock LP, the largest cooler that could fit. The Noctua fans were impressively quiet, so much so that I could set them to run at 100% nearly all the time. I also gave the cooler’s fan an agressive curve. This managed to drop the temps to the 80-85 range while gaming. Technically acceptable, but not good enough. It was at this point that I also removed the duct, as it didn’t seem to do much from my testing.
To really reduce the thermals I was going to have to limit the 5600X with PBO in the BIOS. This took a lot of tweaking, as I had to get the balance between performance and thermals just right. These are the values I went with in the end:
PPT: 65
TDC: 55
EDC: 70
Software Configuration
Here’s a list of the software I used to create a console-like experience on Windows:
1.) Game Console Mode
2.) JoyXOff
3.) Playnite
4.) Xb2XInput (configured with GCM to run on startup)
Xb2XInput is one of a couple driver options for original Xbox controllers. It’s pretty good, although it will sometimes need to be restarted and doesn’t have any joystick deadzones by default for some reason. To my suprise, most modern games actually play pretty well with the original Duke or S type controller; the substitution of black and white in place of shoulder buttons isn’t as much of a departure as I expected.
Playnite Plugins Used:
1.) Extra Metadata Loader
2.) Extra Metadata Loader Fullscreen Helper
3.) ThemeOptions
4.) SteamGridDb Metadata Provider
5.) DuplicateHider
6.) Playnite Overlay
7.) Solaris Fullscreen Theme (used in demo video)
I’m really happy with this setup for now, but I anticipate that I’ll rework it as the new Windows FSE develops. Hopefully Linux will become a more viable option once Valve’s new Steam Machine drops, allowing me to make the switch to Linux.
Final Pictures
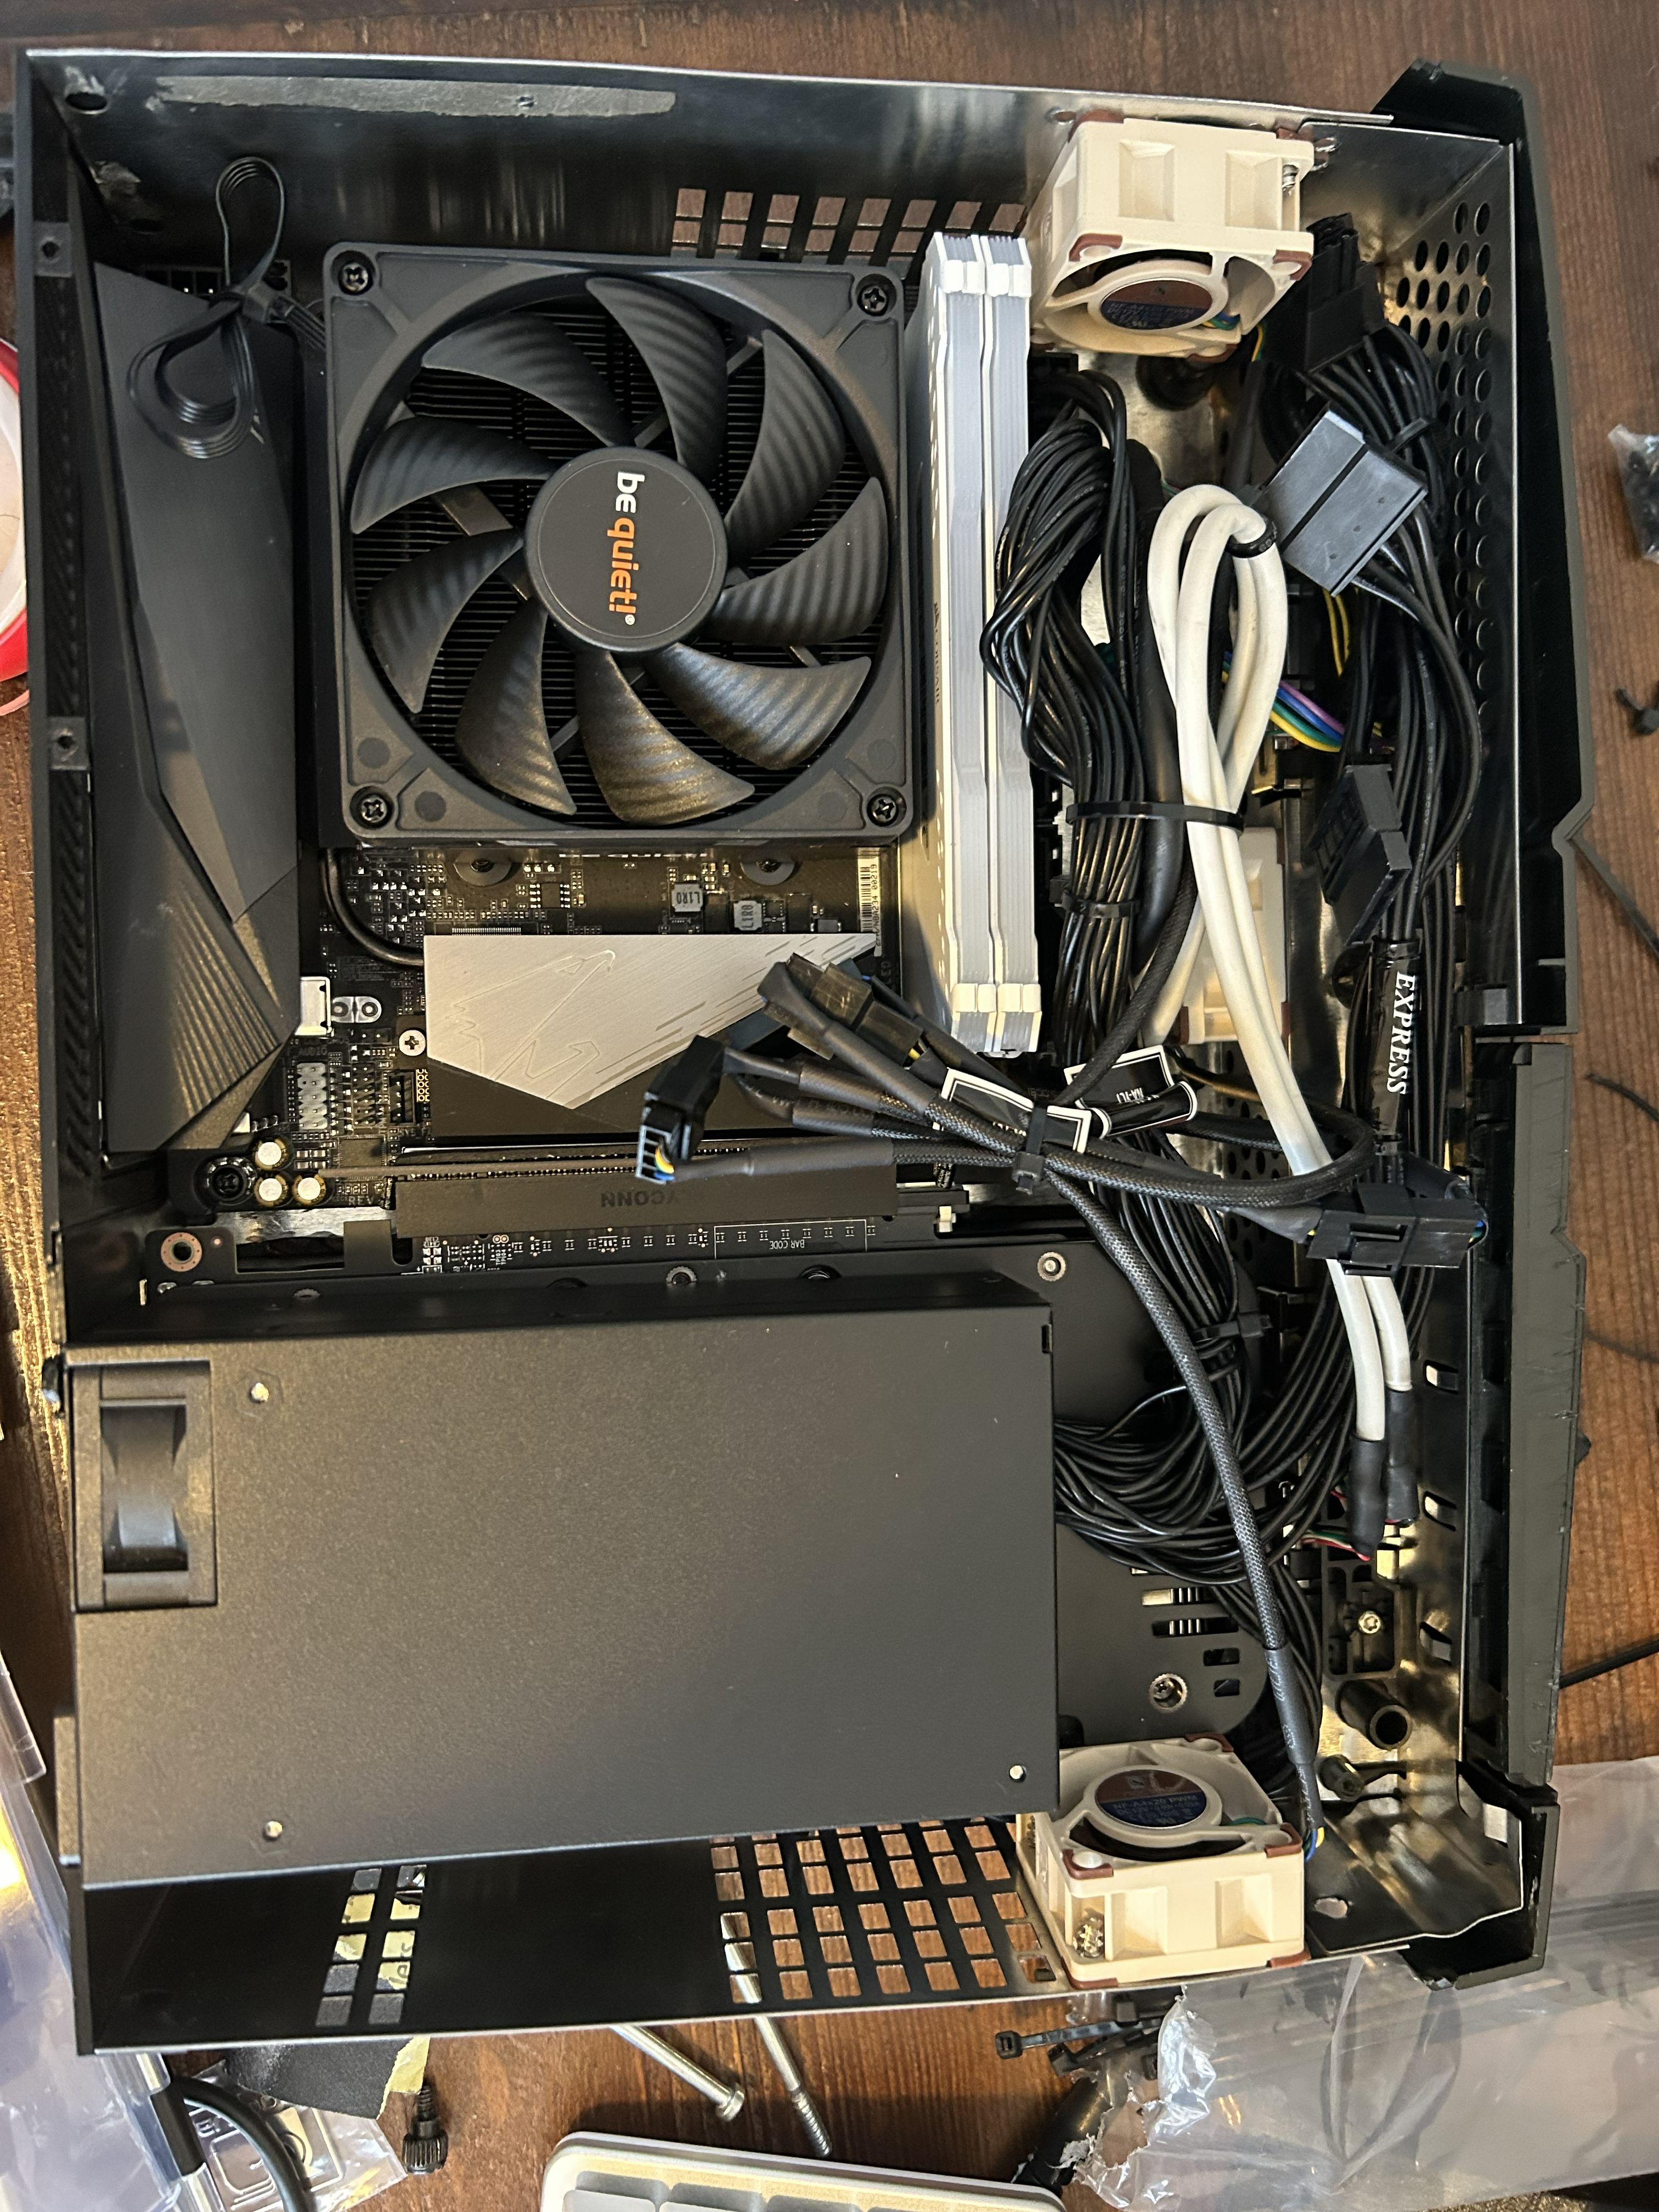
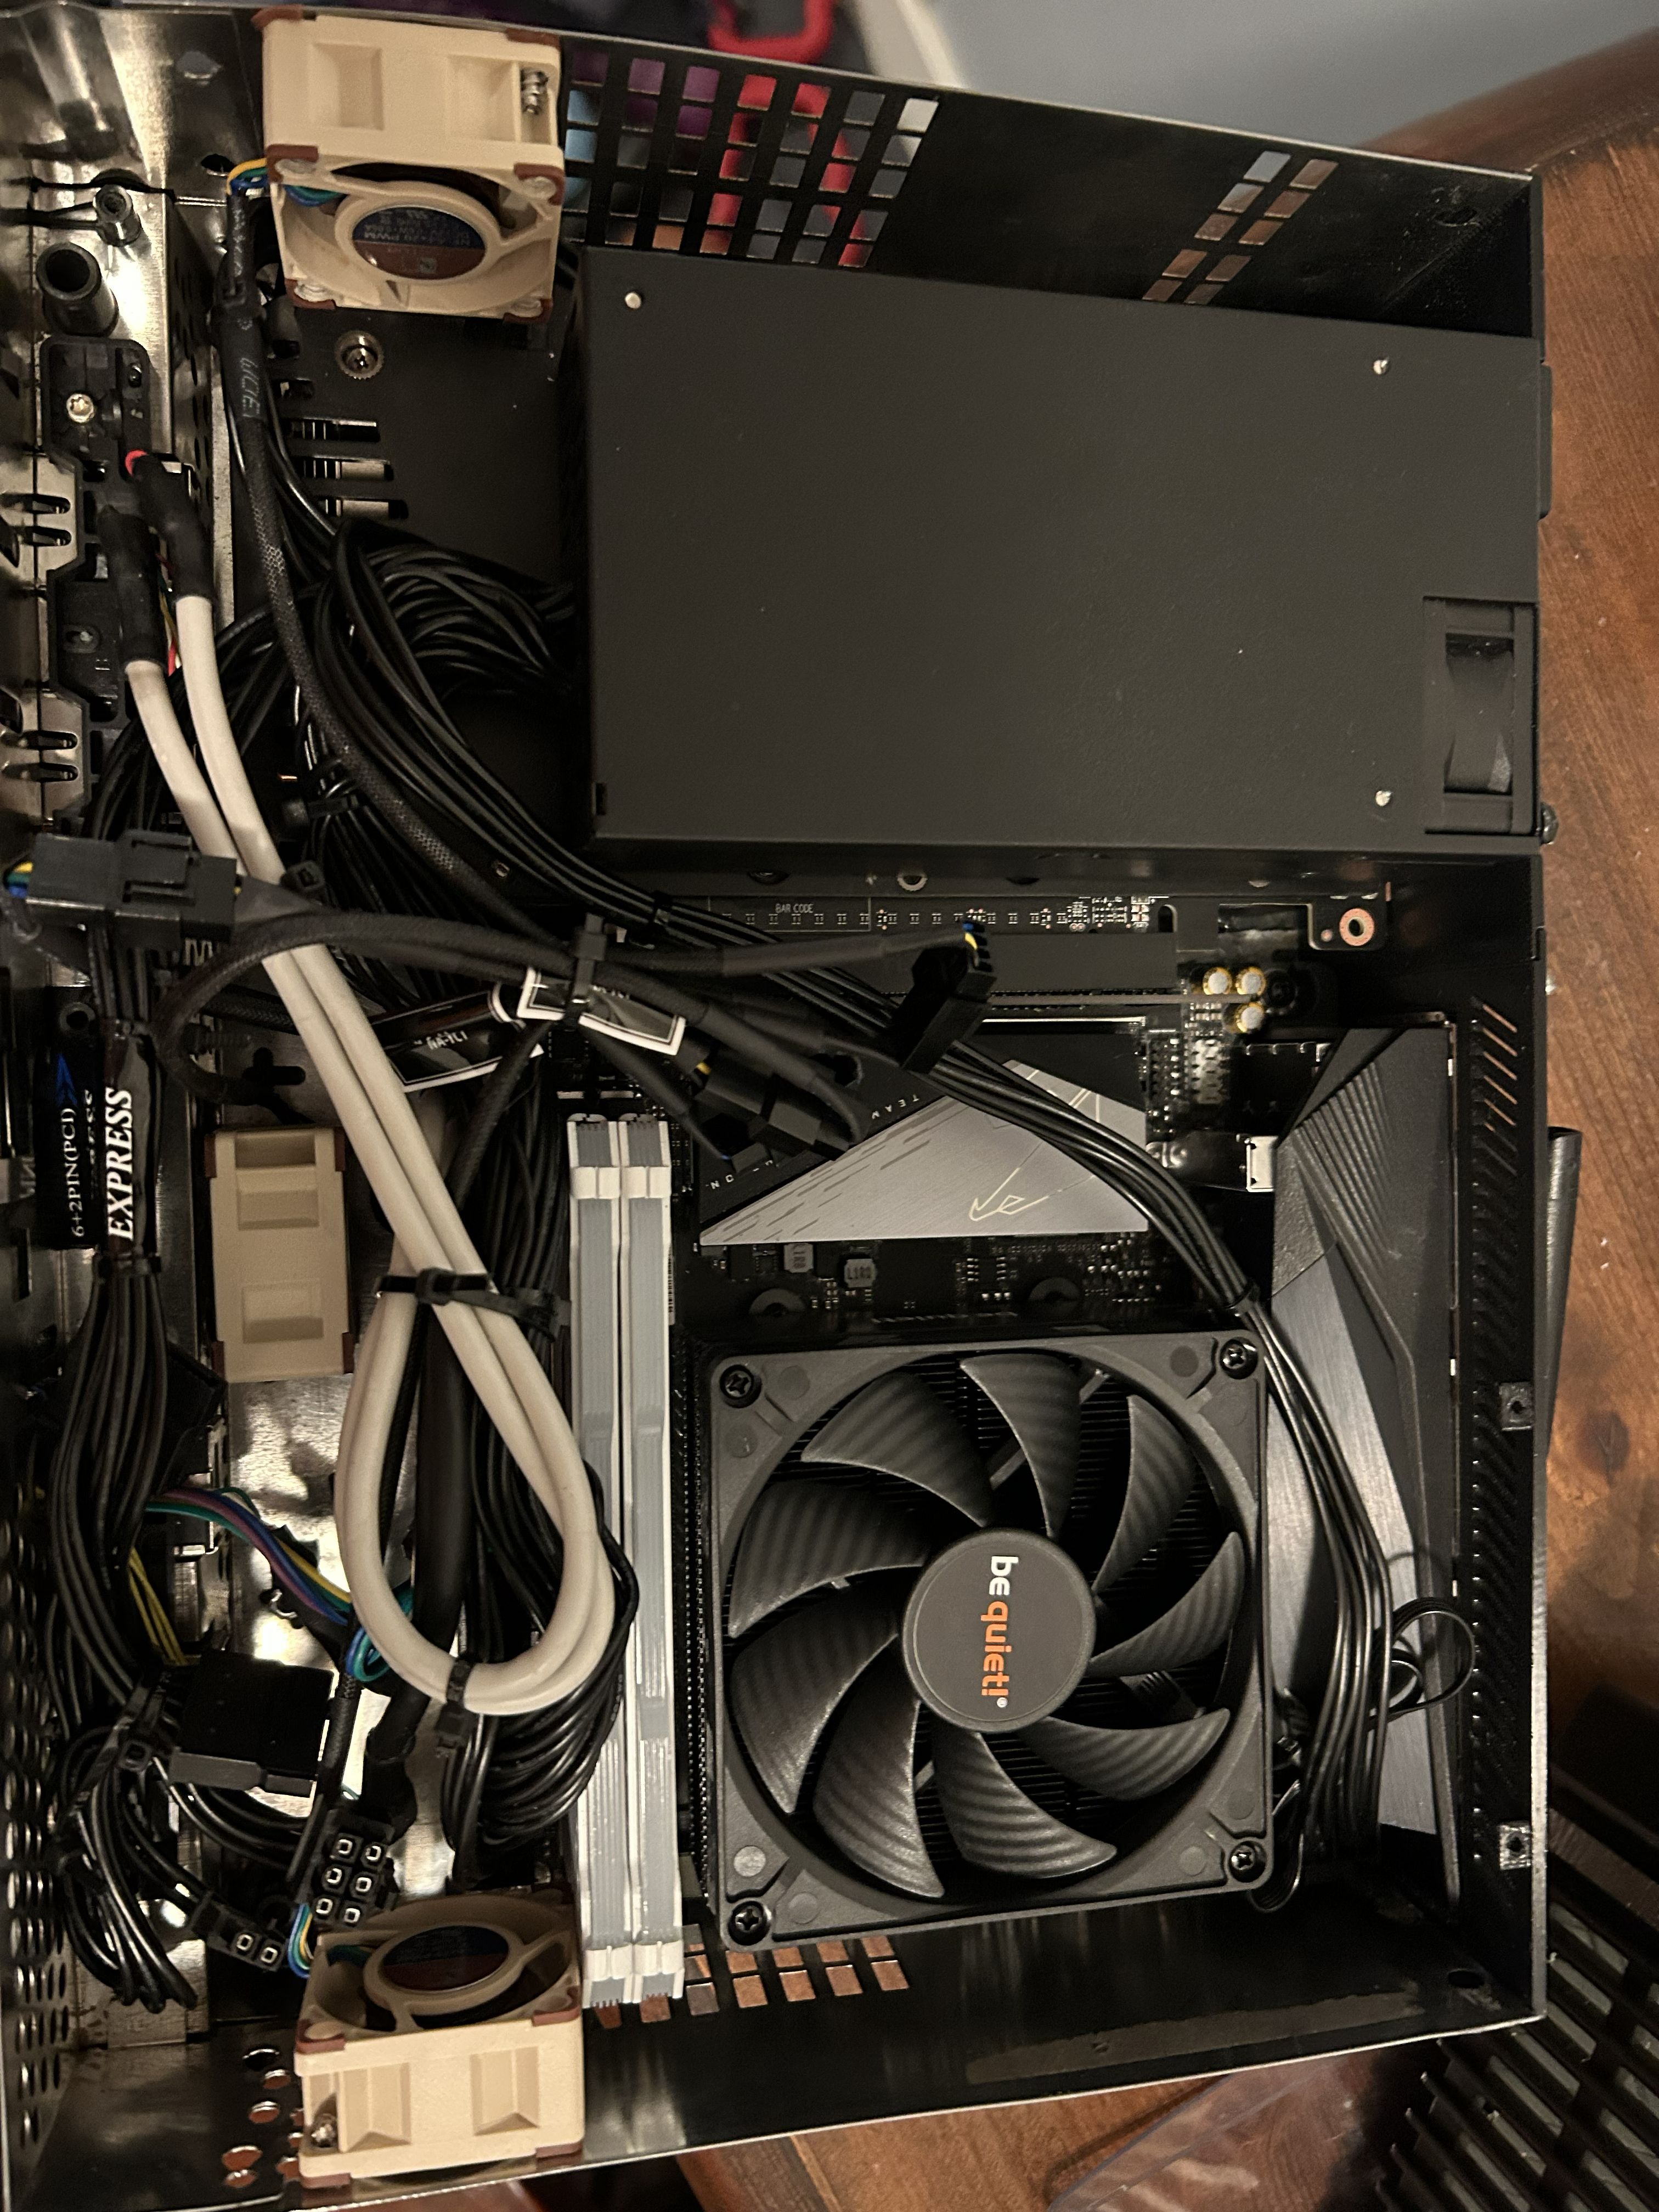
Visible in these pictures are the final internals of the Xbox PC, with the new fans and cooler. Yes, the cable management is a mess, but there wasn’t much more I could do. I was able to thread zipties through the front of the metal chassis to anchor the unused and excess cables, ensuring that nothing moved around.
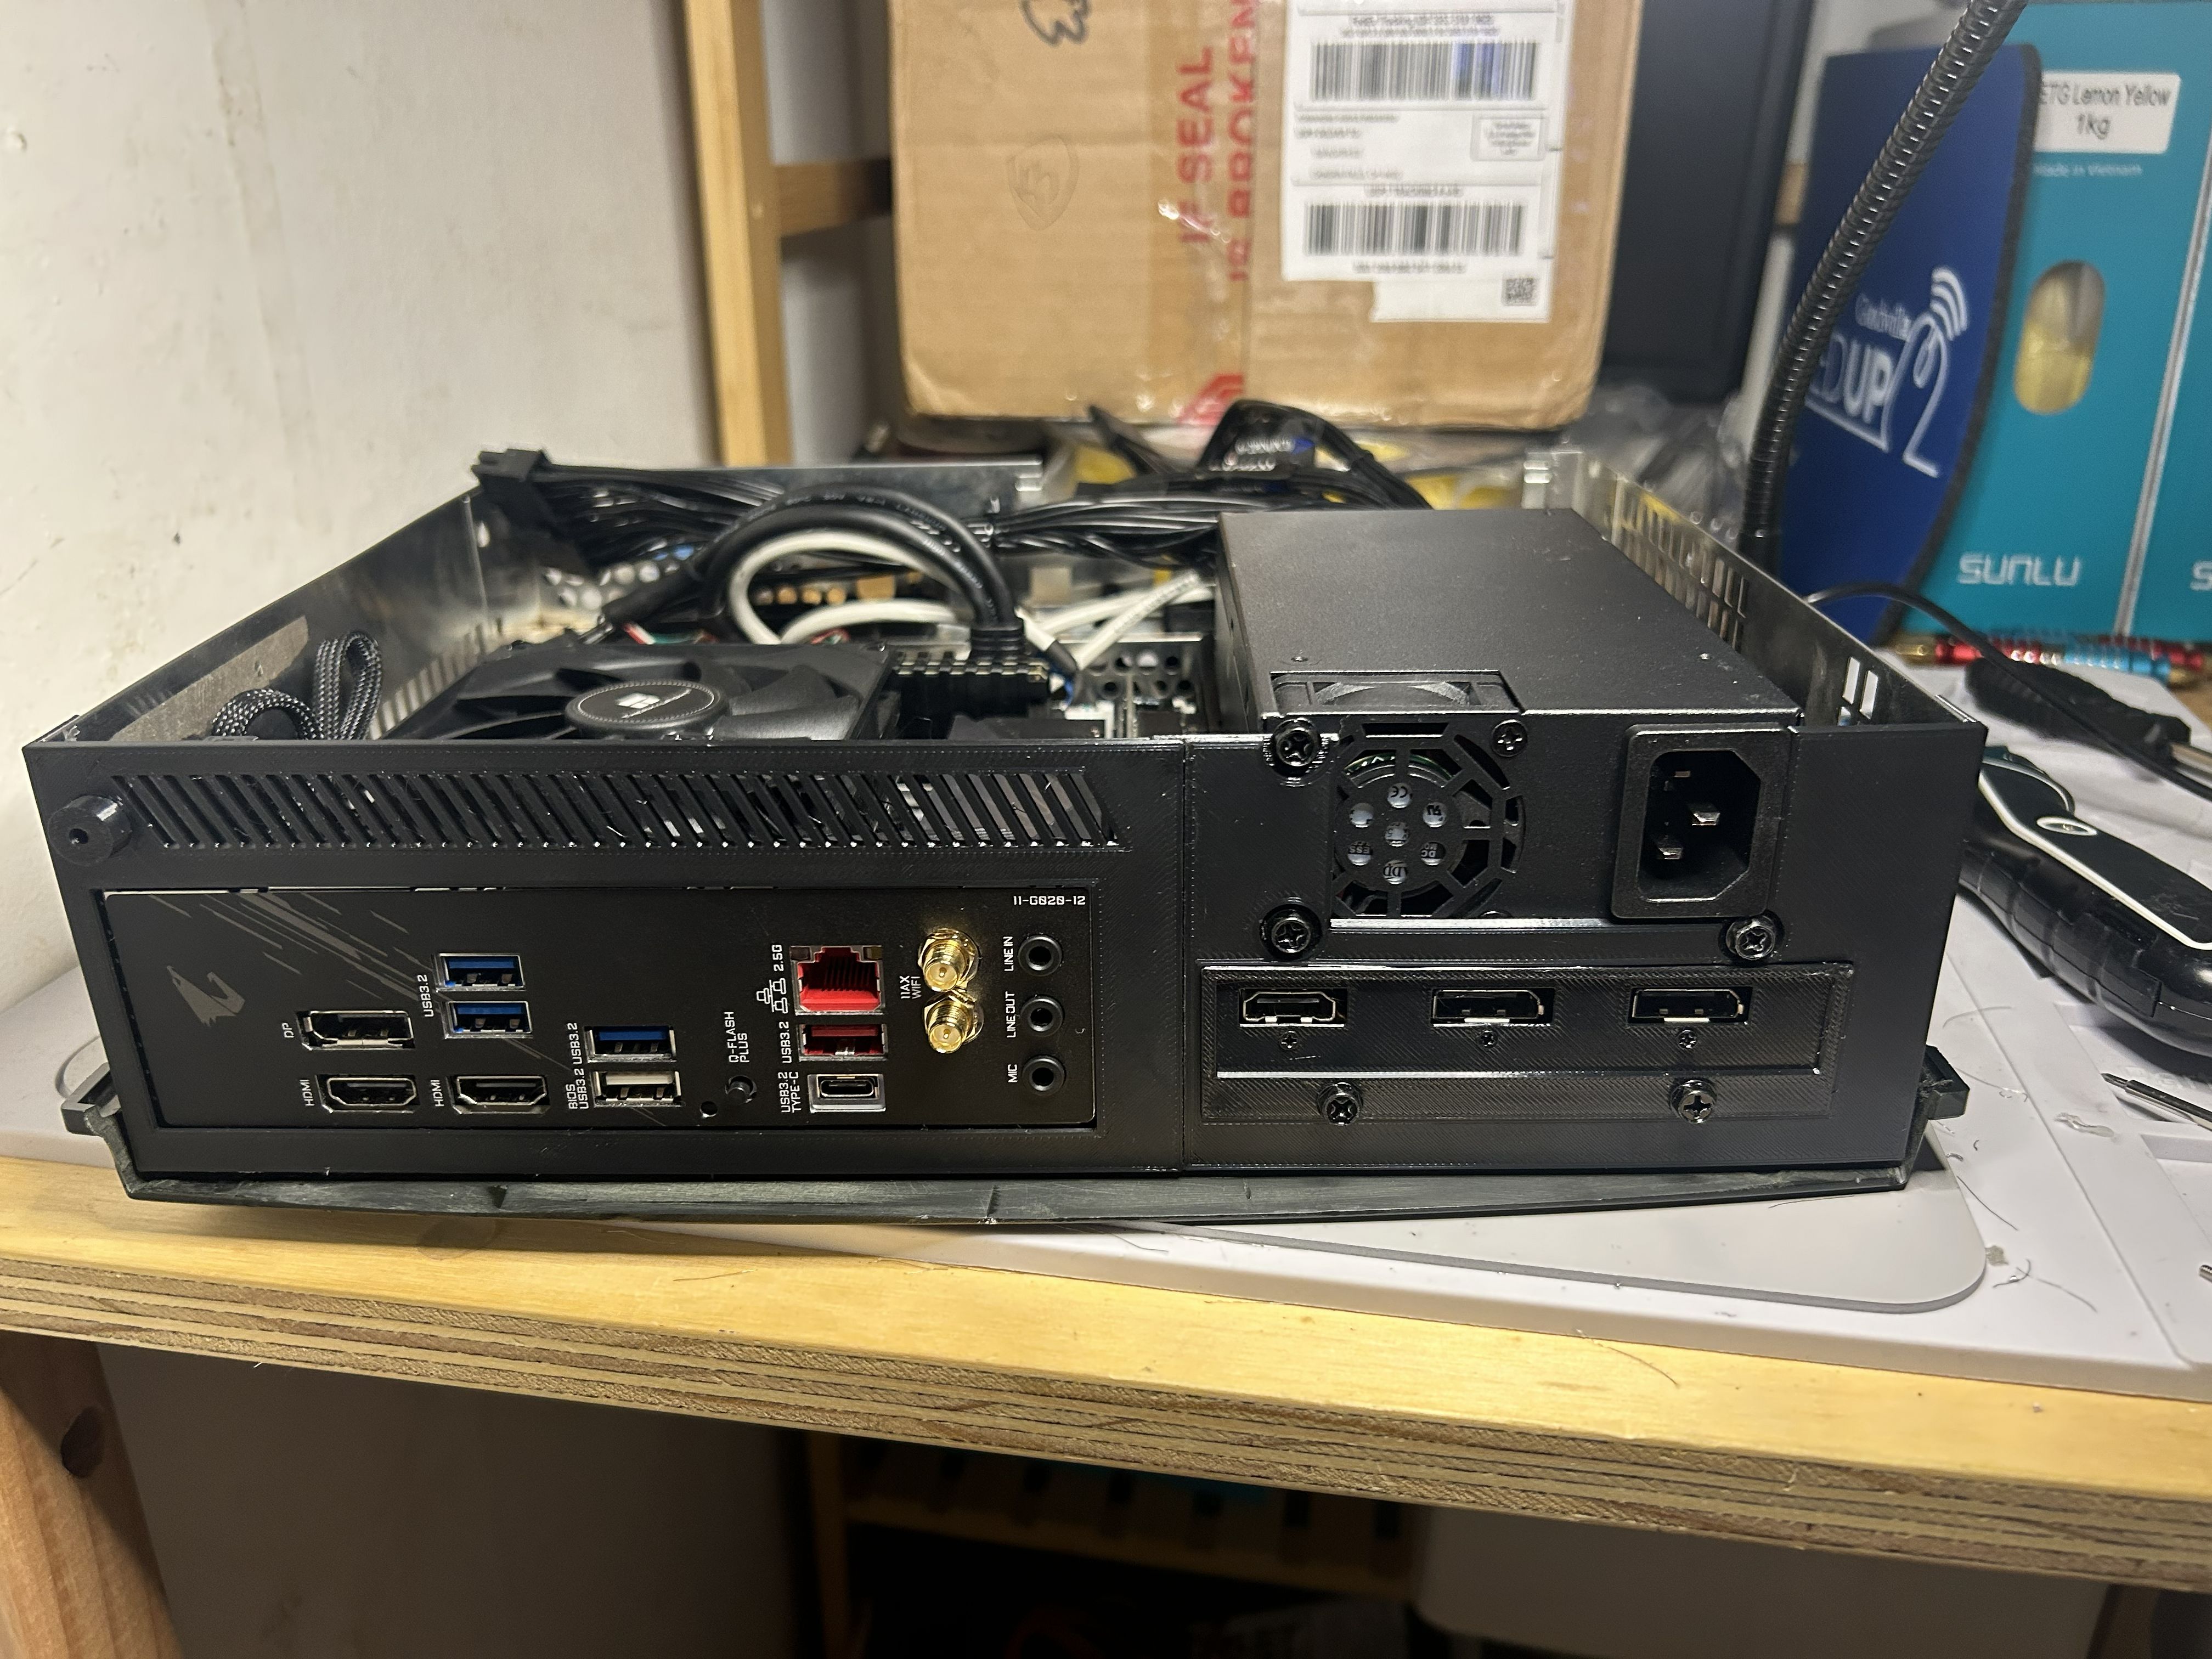
Exterior Shots:
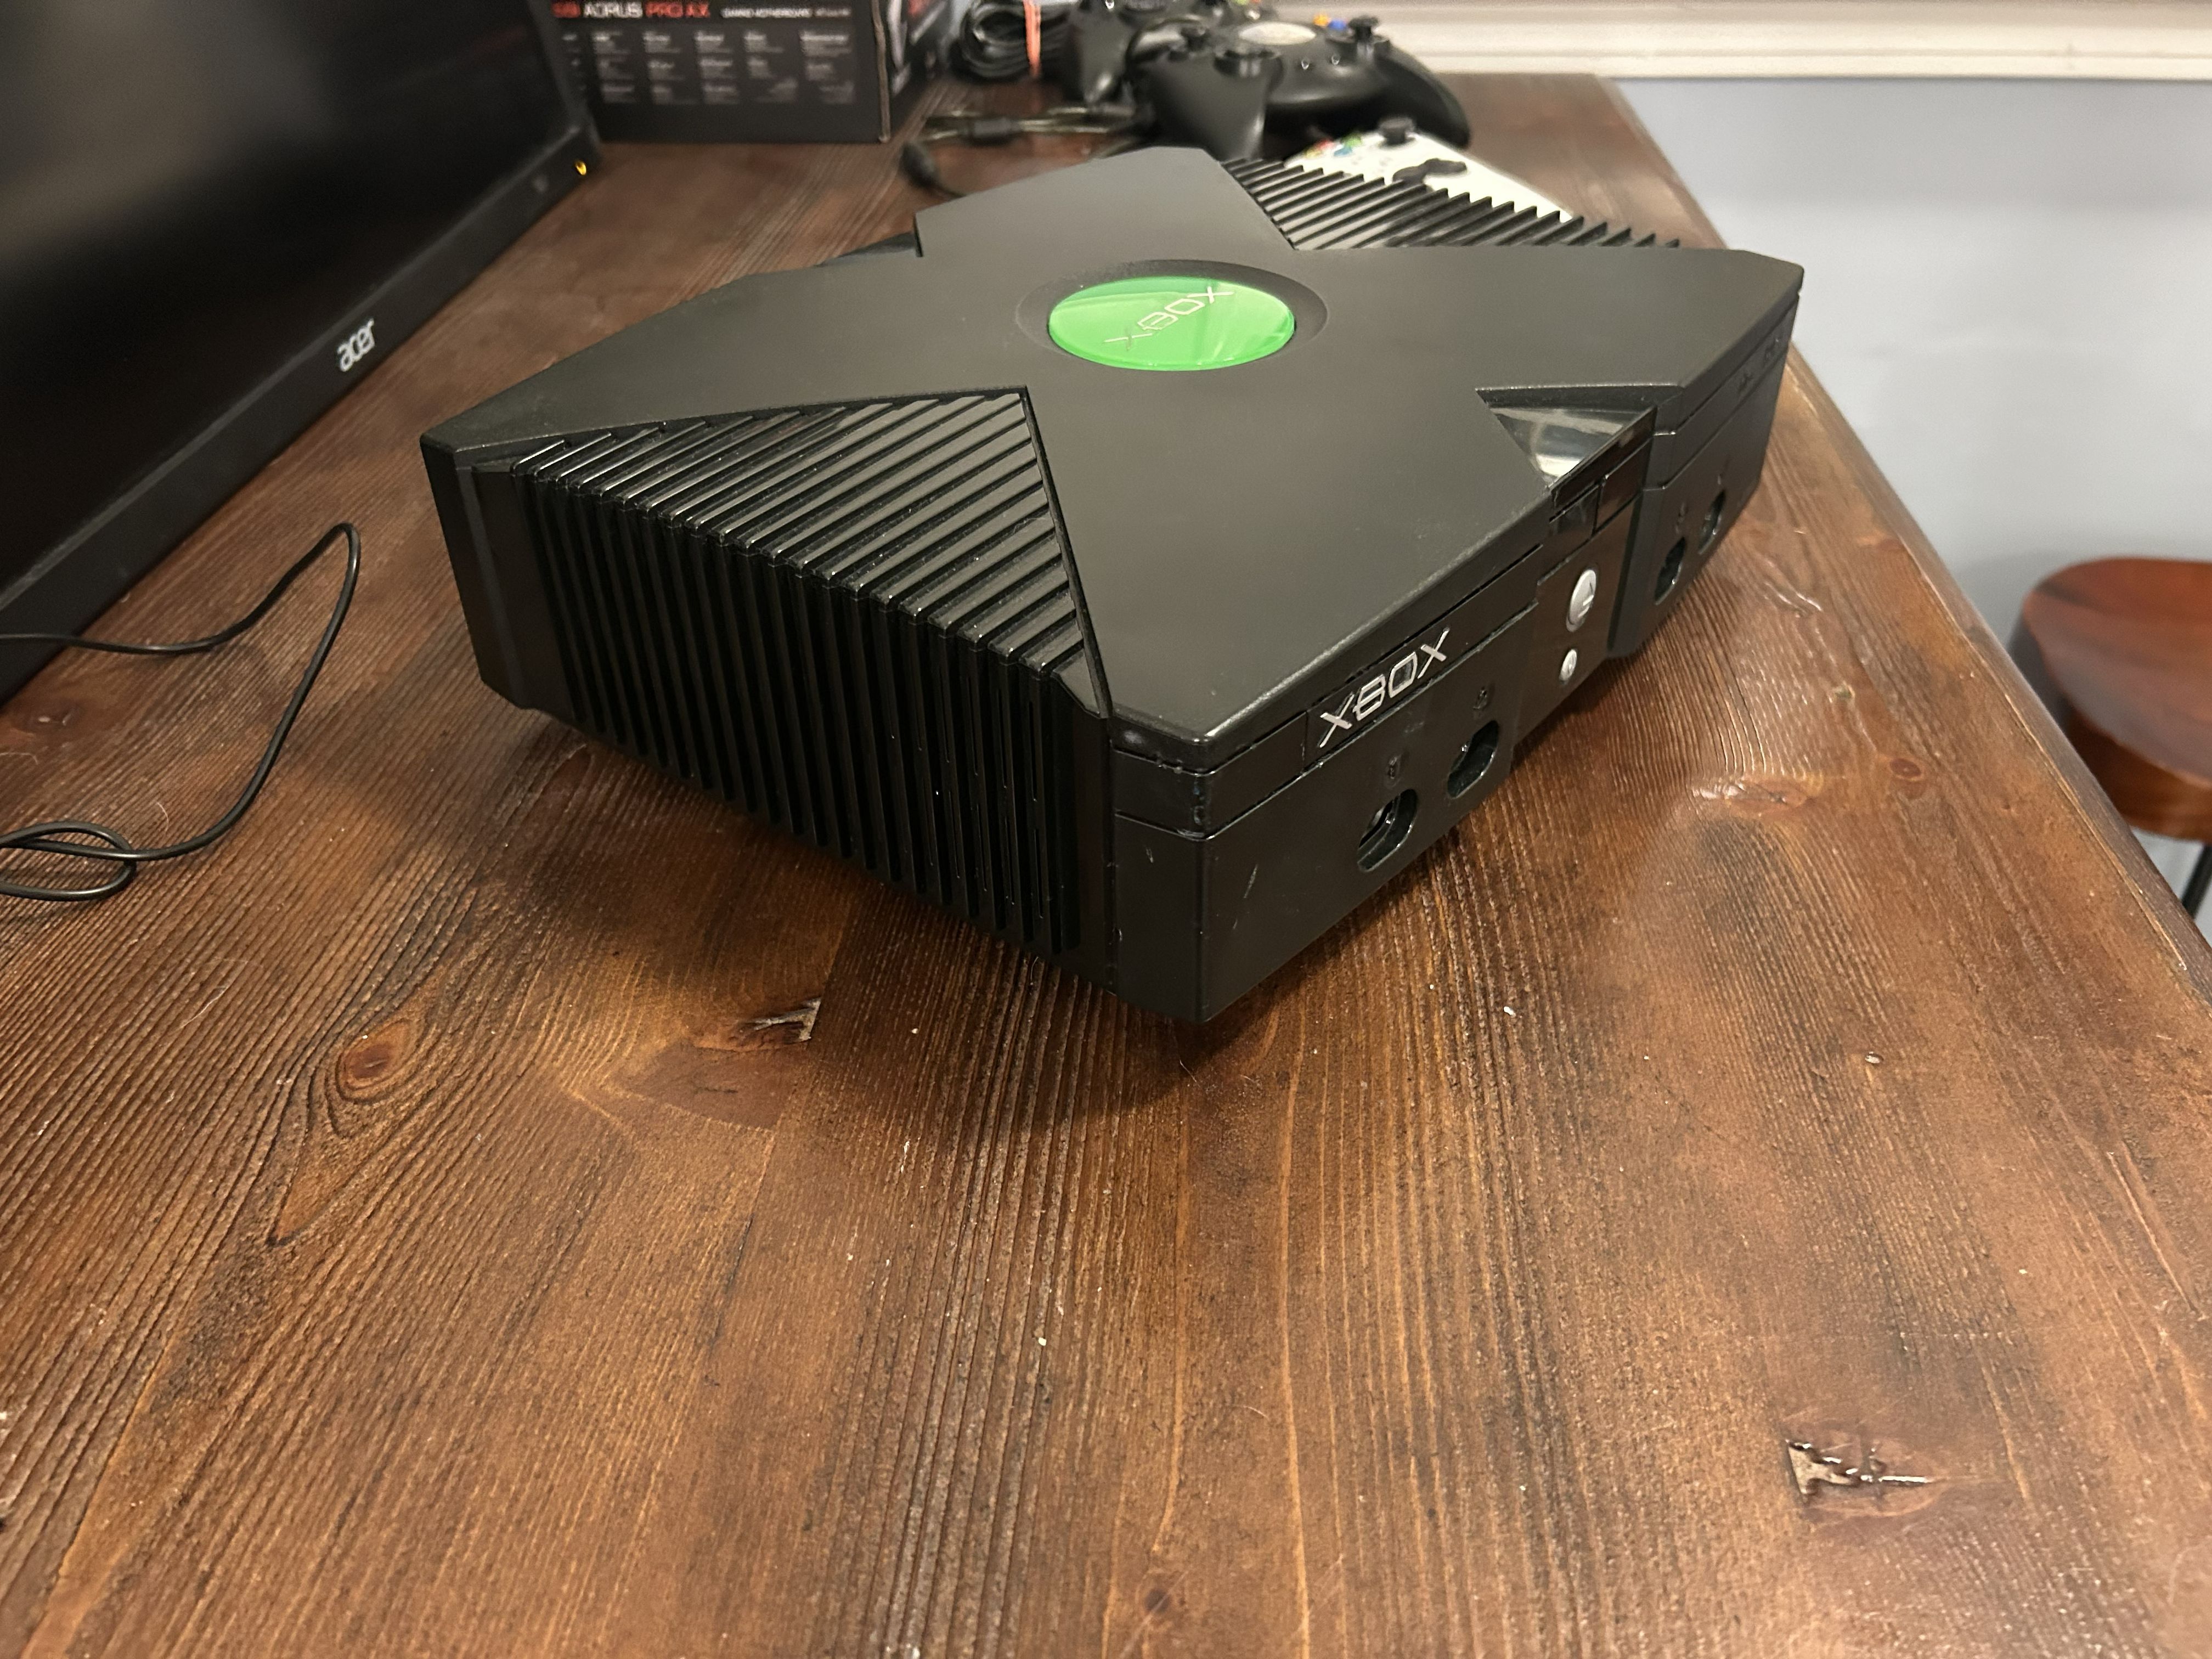
The original Xbox shell I used was a little scuffed and weathered, and I wound up really liking that. The console’s wear makes it seem more unassuming and “real,” allowing it to blend into the space under my TV without drawing much attention.
Demo
Reflections
This project came out great: it’s practical as an HTPC, looks clean, and is a nice conversation starter. In particular, its structural integrity suprised even me! It survived two flights stuffed into my thin travel backpack as my personal item. Overall, this HTPC is something I’m likely to keep upgrading as time goes on, but at the moment it handles most titles at 4K (medium/high settings with FSR) just fine.
Sorry for making this article so green!